Review - 42083 - Bugatti Chiron
Review

REVIEW - 42083 - BUGATTI CHIRON
INTRODUCTION
First of all, my apologies for bringing you this review so late. There were some logistical and communication issues, which caused a delay in the delivery of the set. The set was due to arrive before the LEGO Fan Media Days, but mine arrived after the event. Throw some personal obligations in the mix and you have a belated review. Also, this review won't be as elaborate as the one I did for the Porsche GT3 RS. Sorry about that too. Nevertheless, I hope will enjoy the pics and some of my insights.
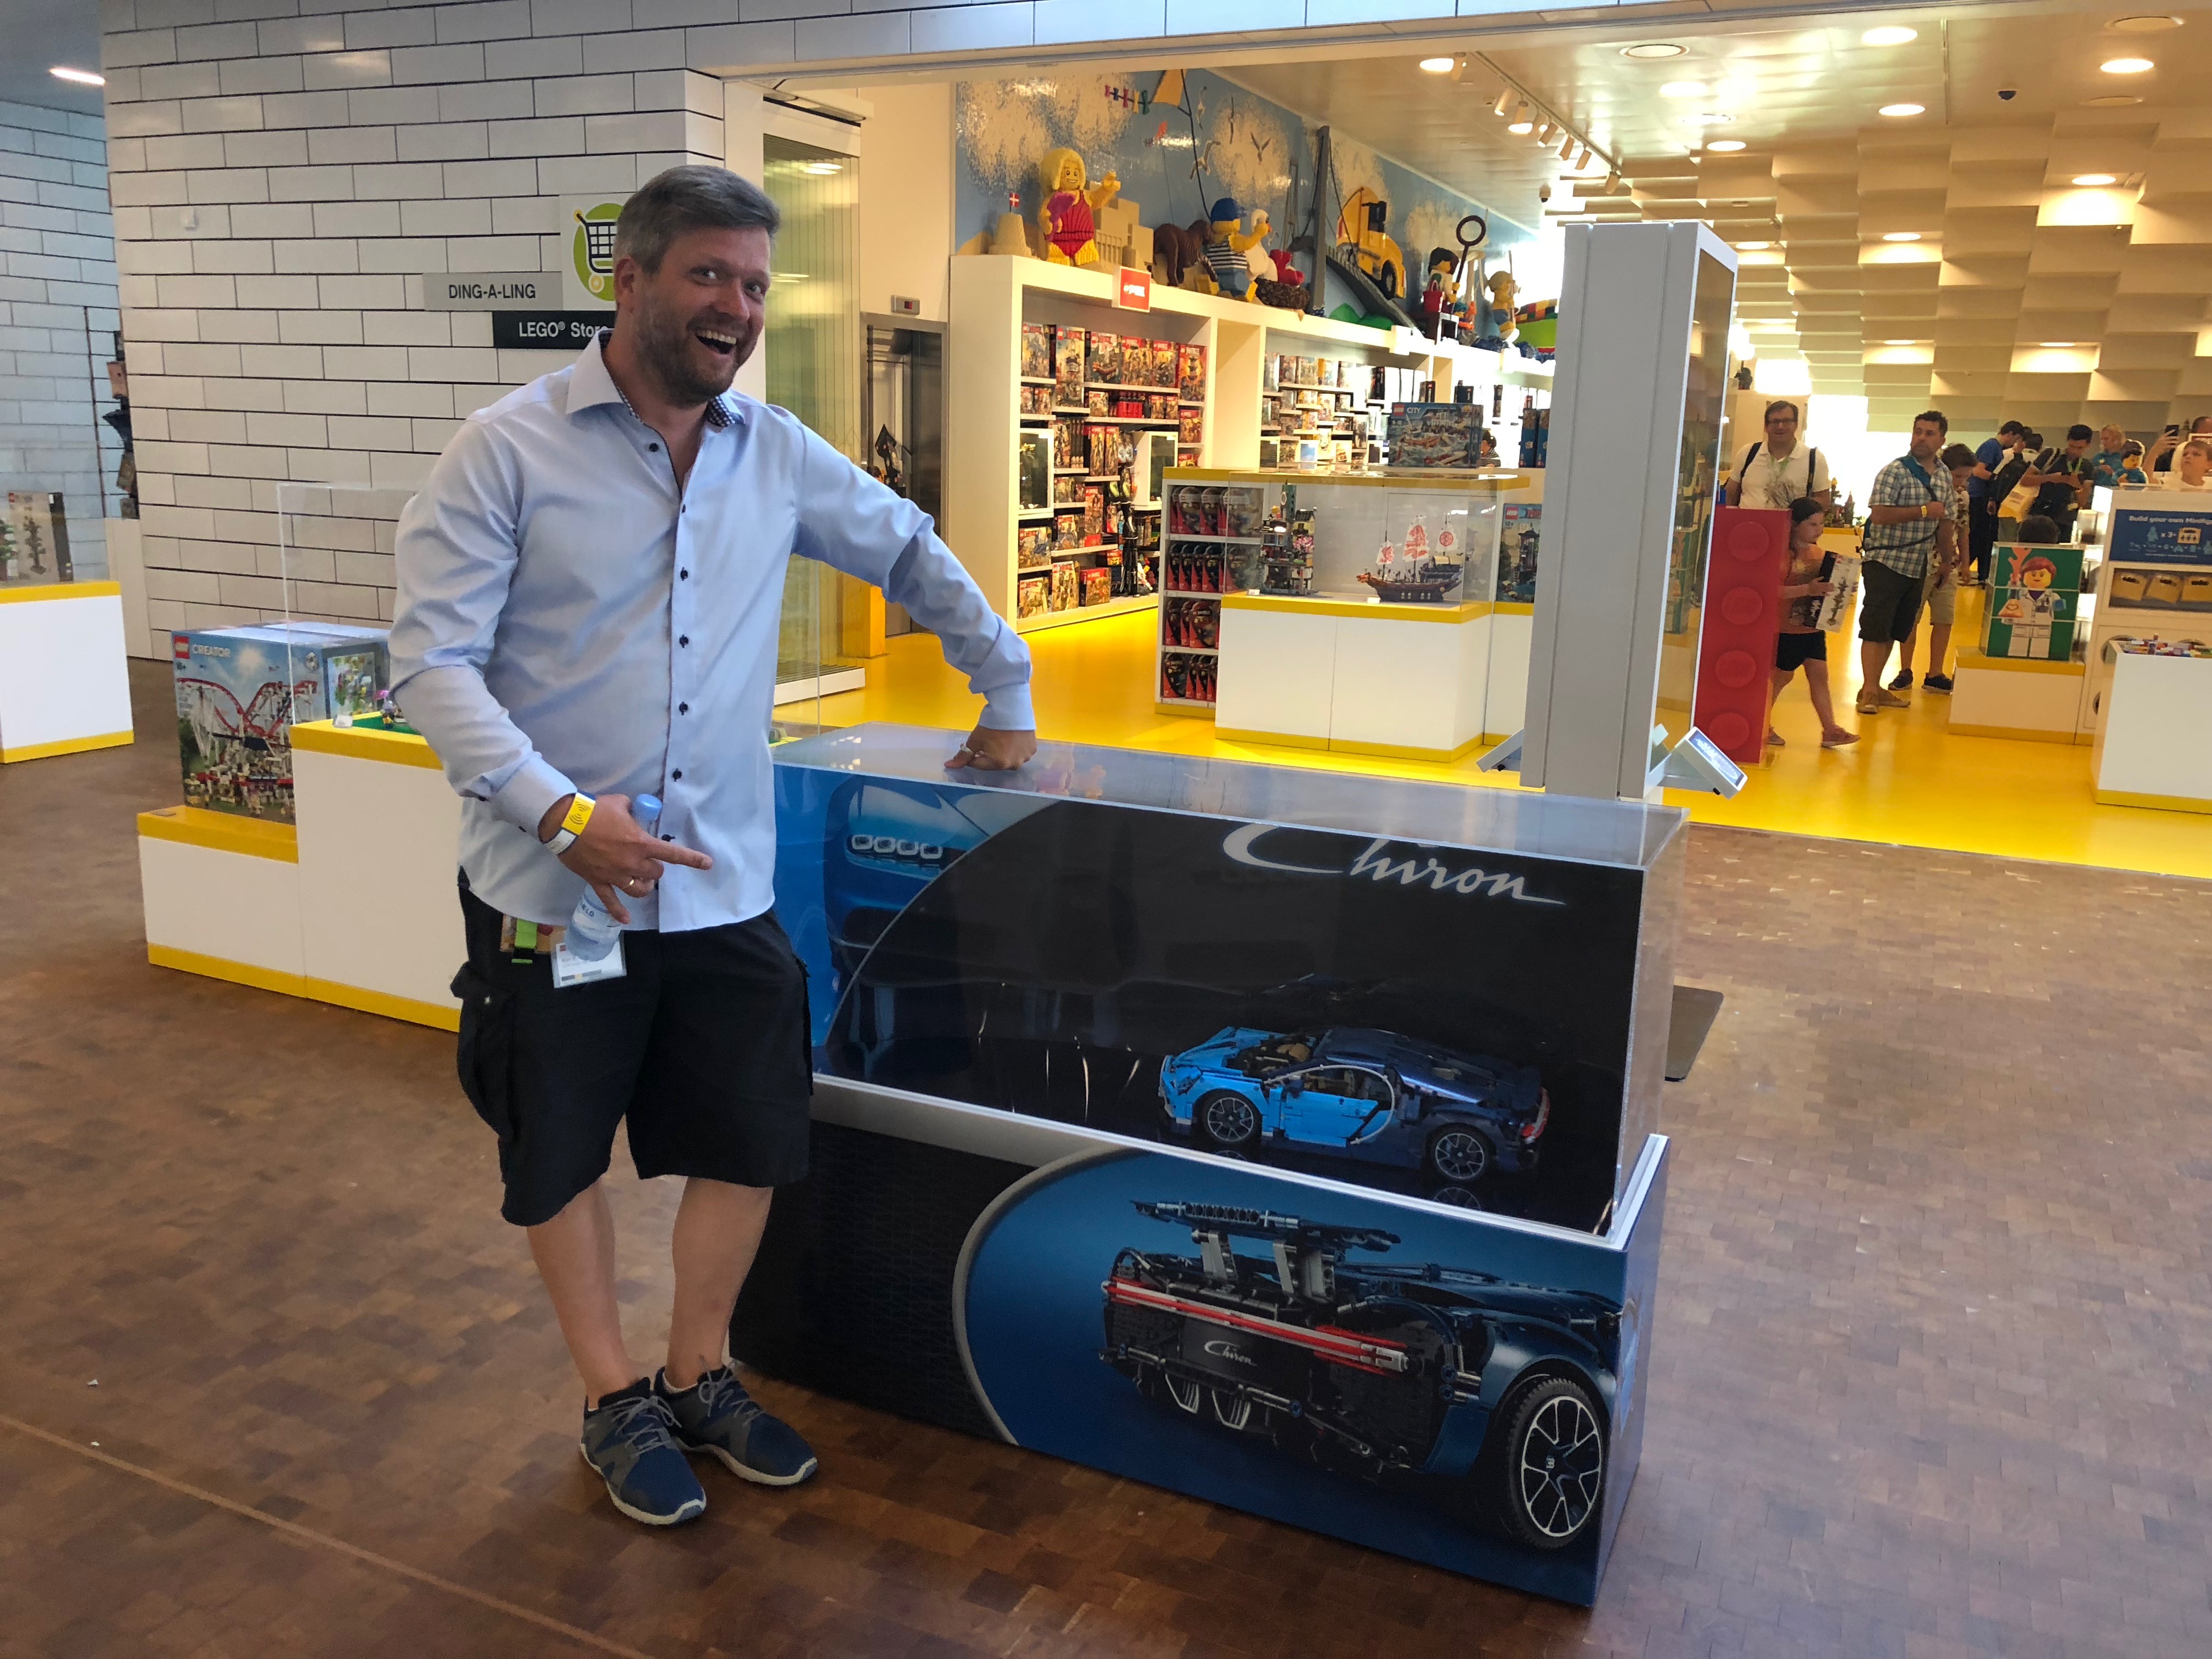
I was fortunate enough to receive an invitation to join the unveiling of the Bugatti Chiron on the 1st of June (2018), which totally rocked.

For those of you who are interested, here's a link to the Bugatti page on the LEGO website and a link to the LEGO page on the Bugatti website.

If you see this icon, you can click the image on the left or right side of the image, to cycle through alternative images.
PICTURES
Pictures can be clicked to view hi-res versions. More pictures can be found in my Flickr album.
DISCLAIMER
This set has been provided by the CEE Team of TLG. It's not my goal to promote this set. It's my goal to give you an honest opinion about it. Therefor, the opinion in this review is my own and is in no way linked to TLG.
SET INFORMATION
Number: 42083
Title: Bugatti Chiron
Theme: Technic
Released: 2018
Part Count: 3.599
Box Weight: 5,9 kg (approx)
Box Dimensions: 57 cm x 37,5 cm x 15 cm
Set Price (MSRP): £ 329.99 / $ 349.99 / € 369,99
Price per Part: £ 0.92 / $ 0.97 / € 0,103
Links: Brickset, Bricklink
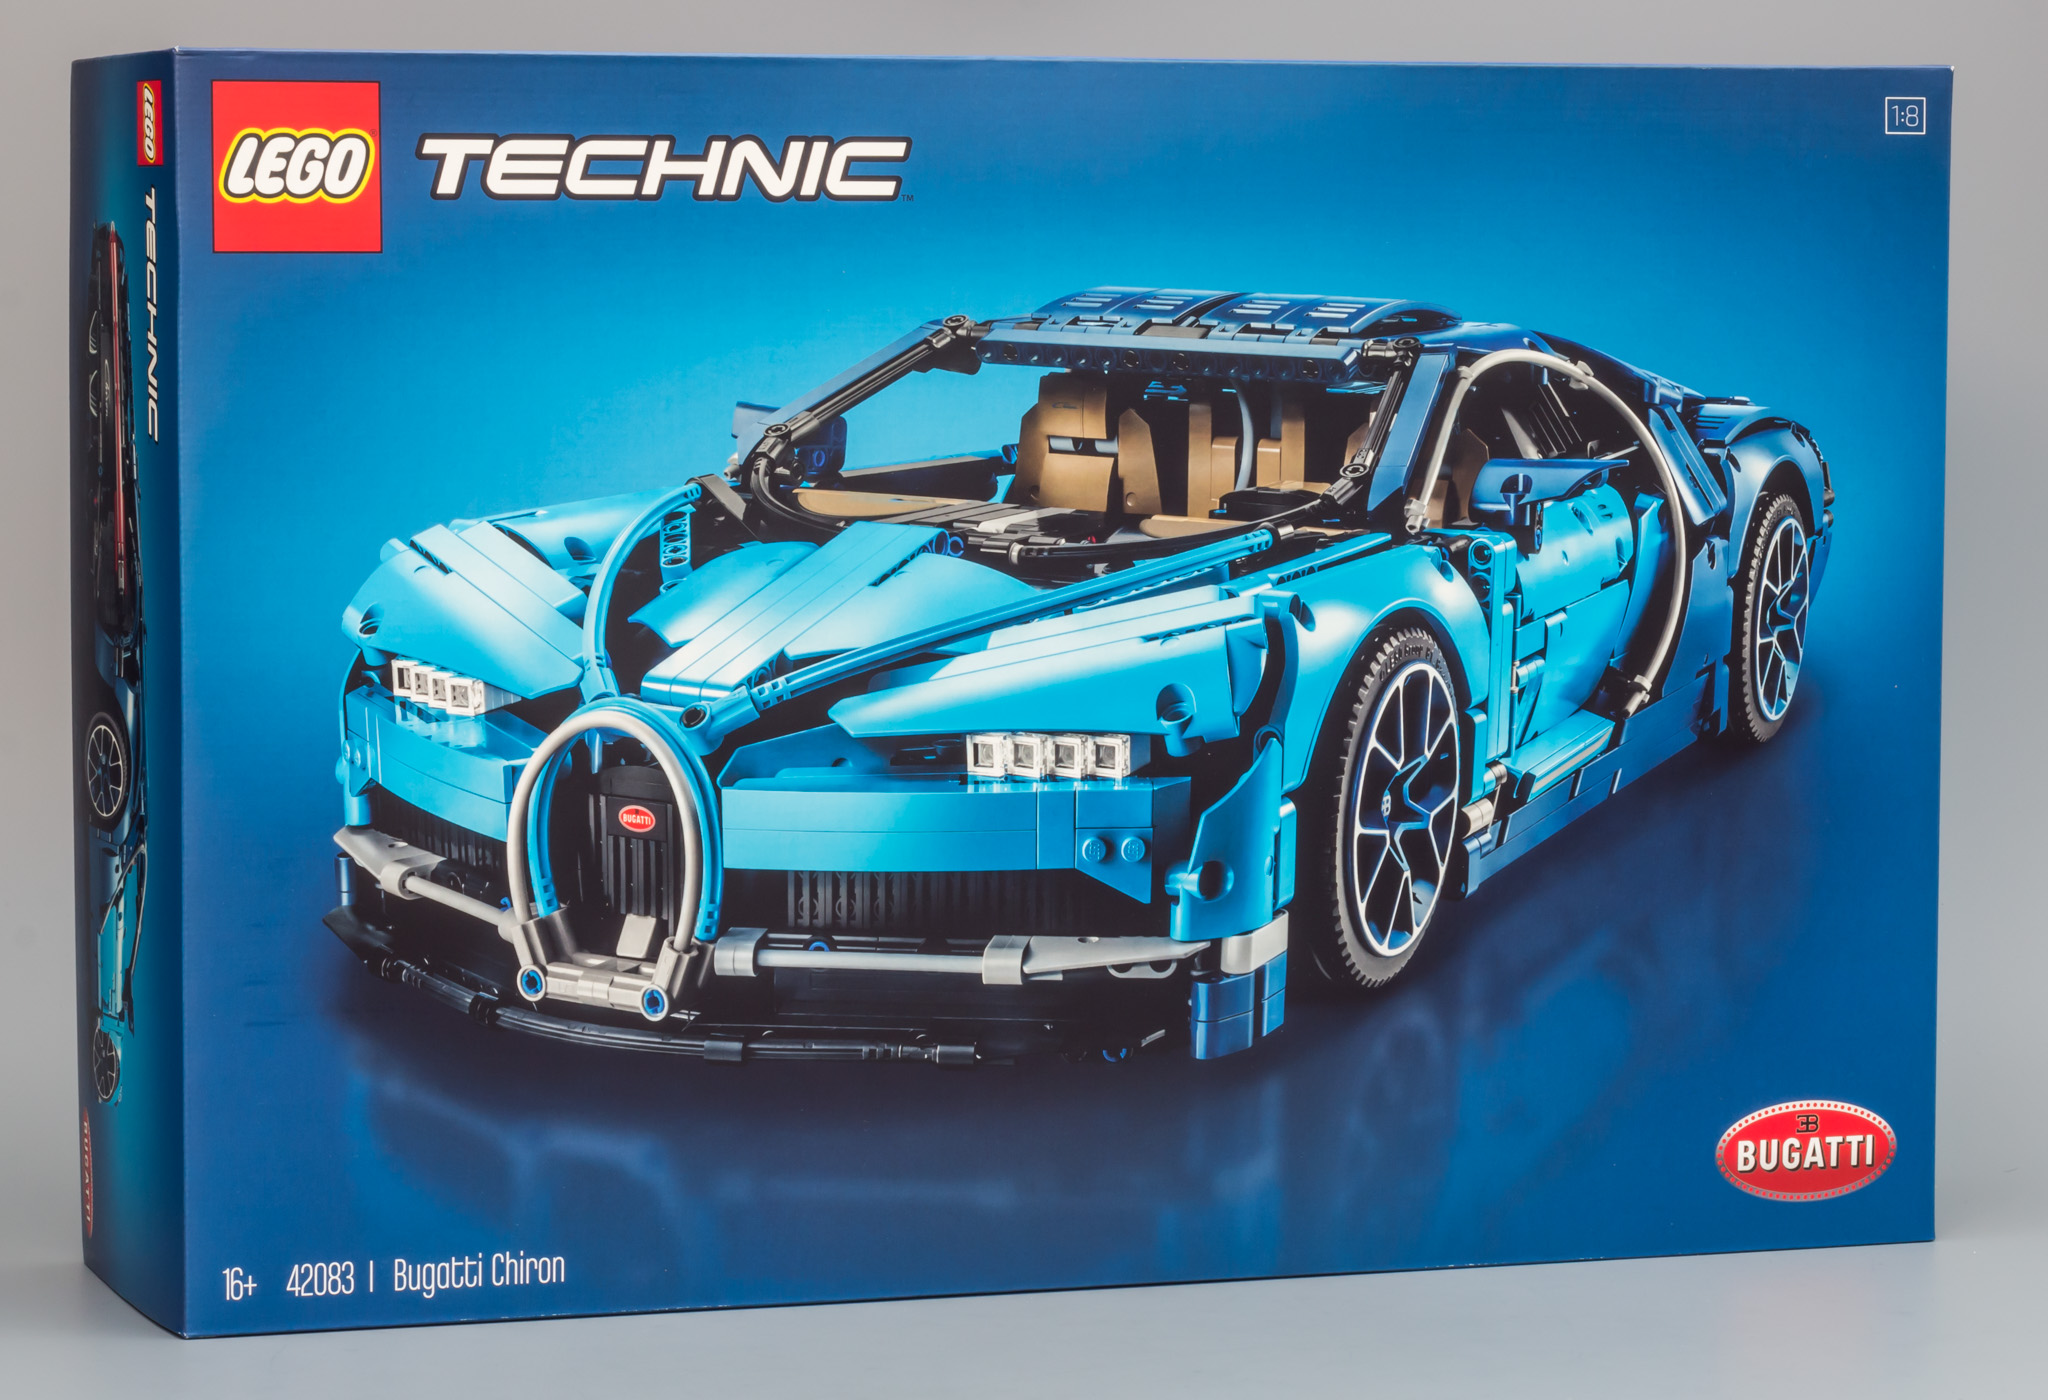
THE BOX
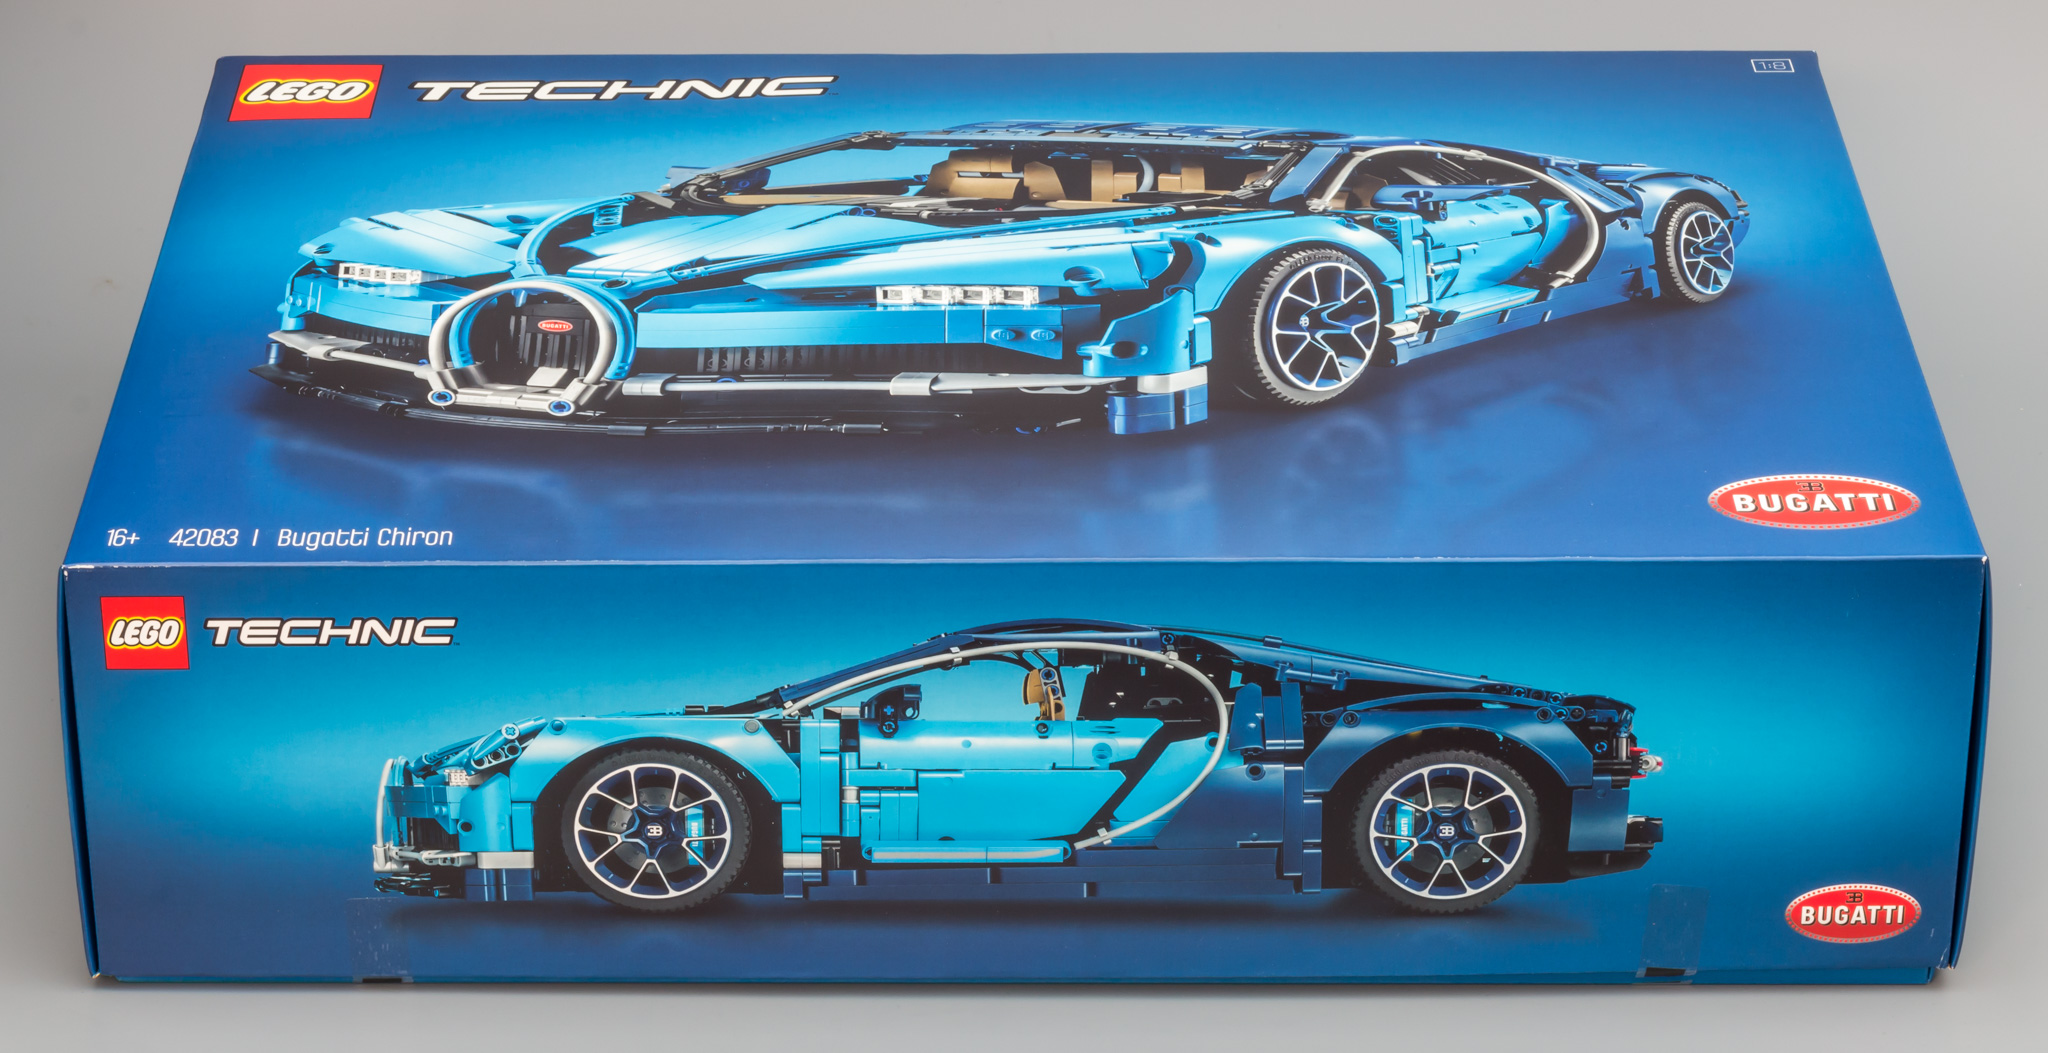
As you have come to expect, the box is more luxurious than the regular LEGO Technic sets. The blue on blue effect of the vehicle and background is working for me. And I like the reflection underneath the car. The upper right corner of the box shows that this set is also built in a 1:8 scale, like the Porsche.
Some people state that the box is a waste of money and they prefer a regular box. Since this will probably only slice a couple of euros of the price, I prefer having a luxurious box for the "UCS" models. Since you are paying top dollar already, you might as well get a nice box with your model. I throw away every other Technic box, but I wouldn't think of throwing this one away.
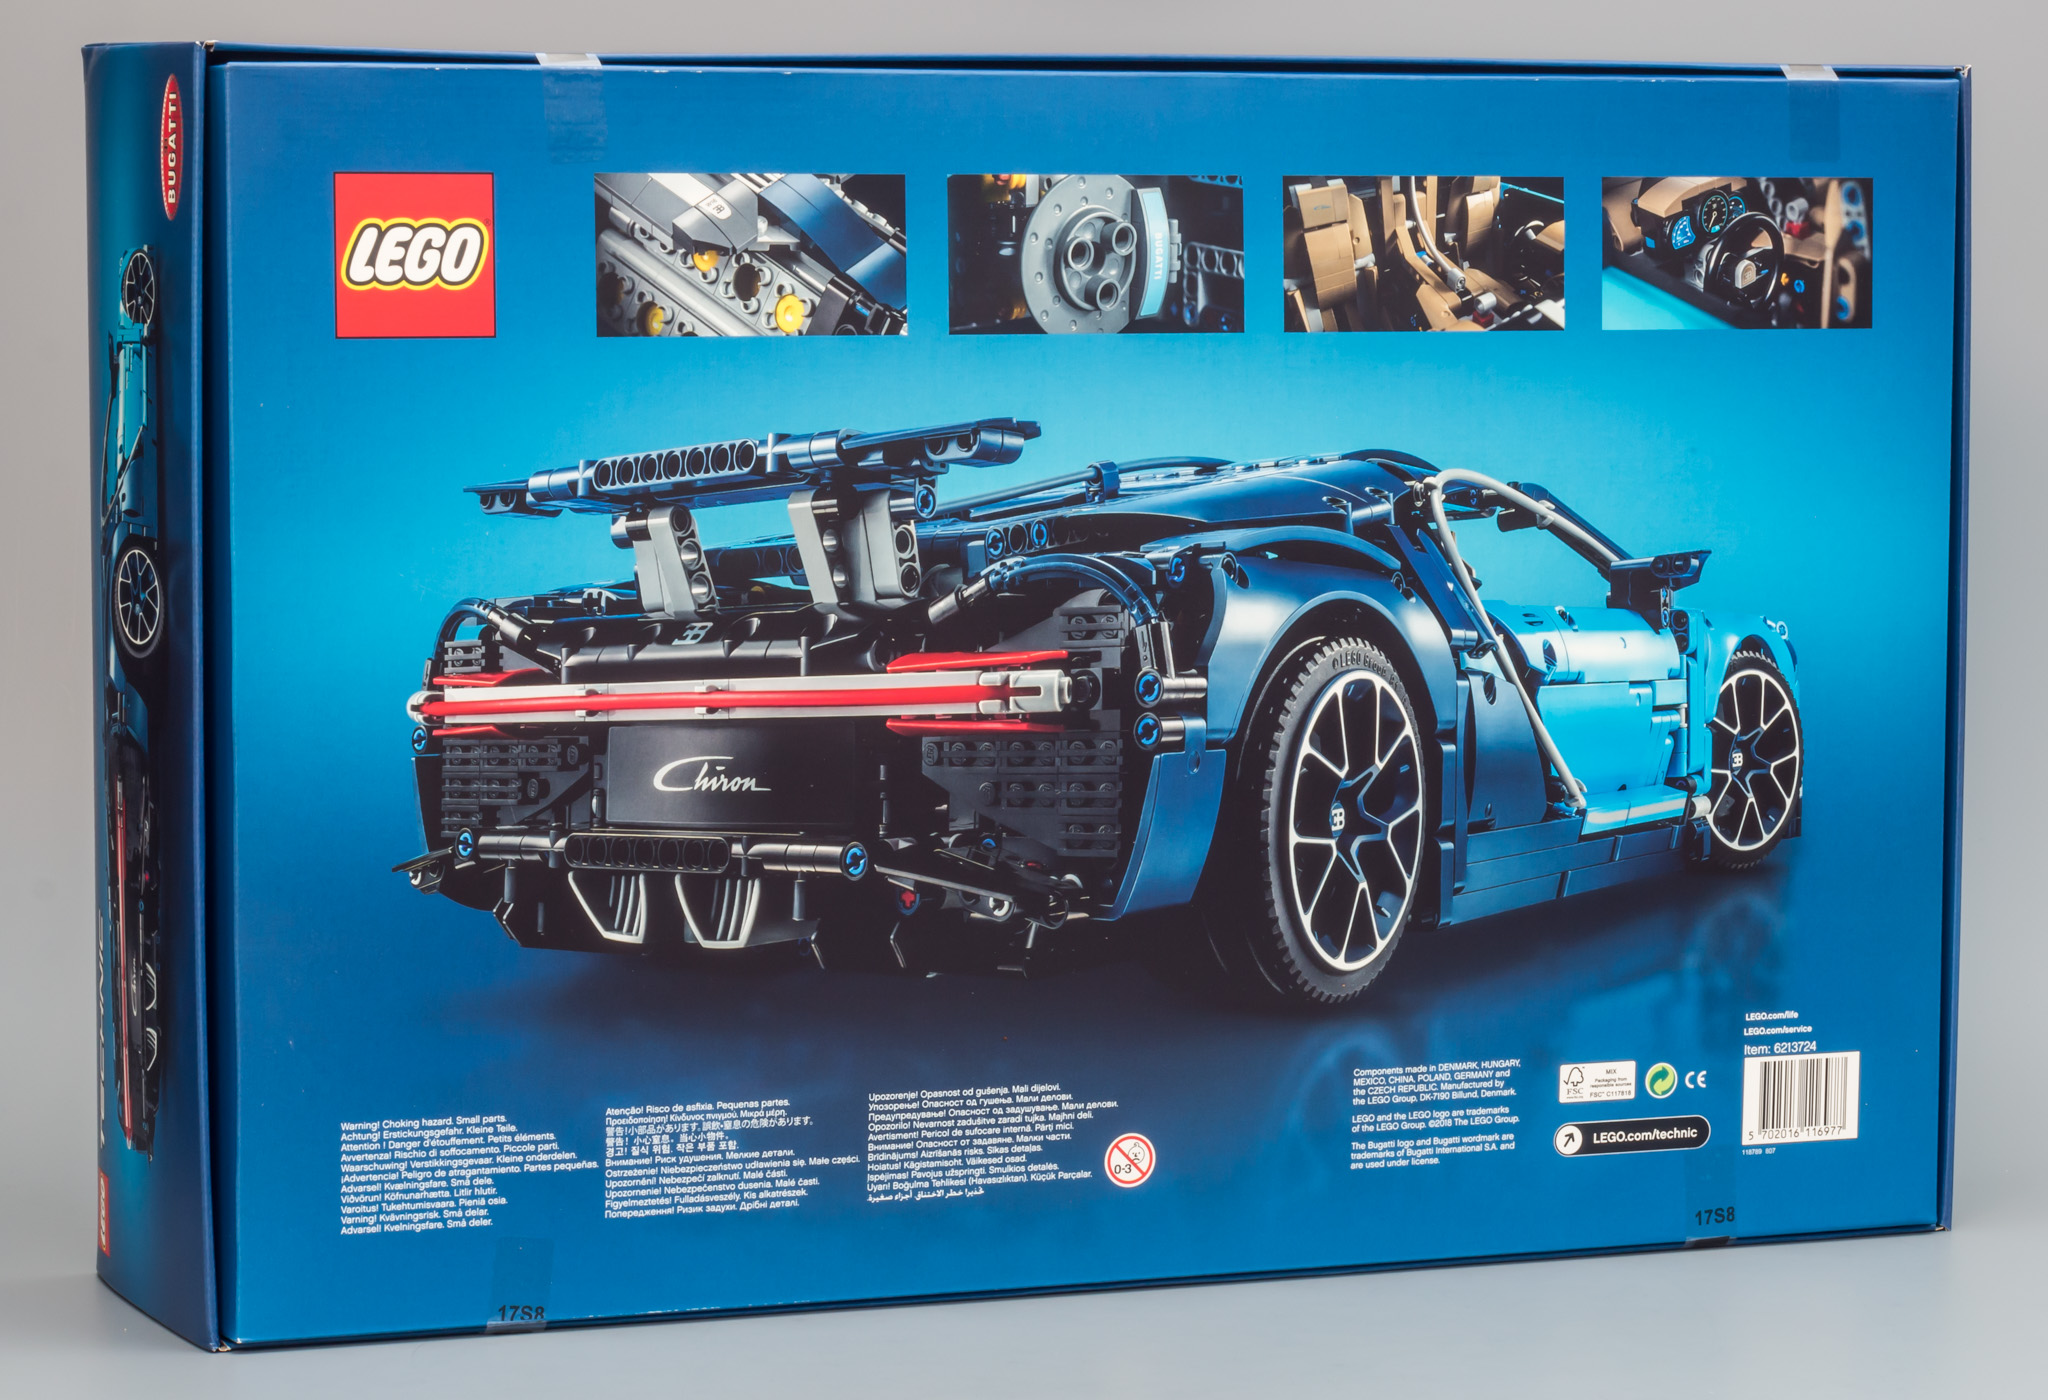
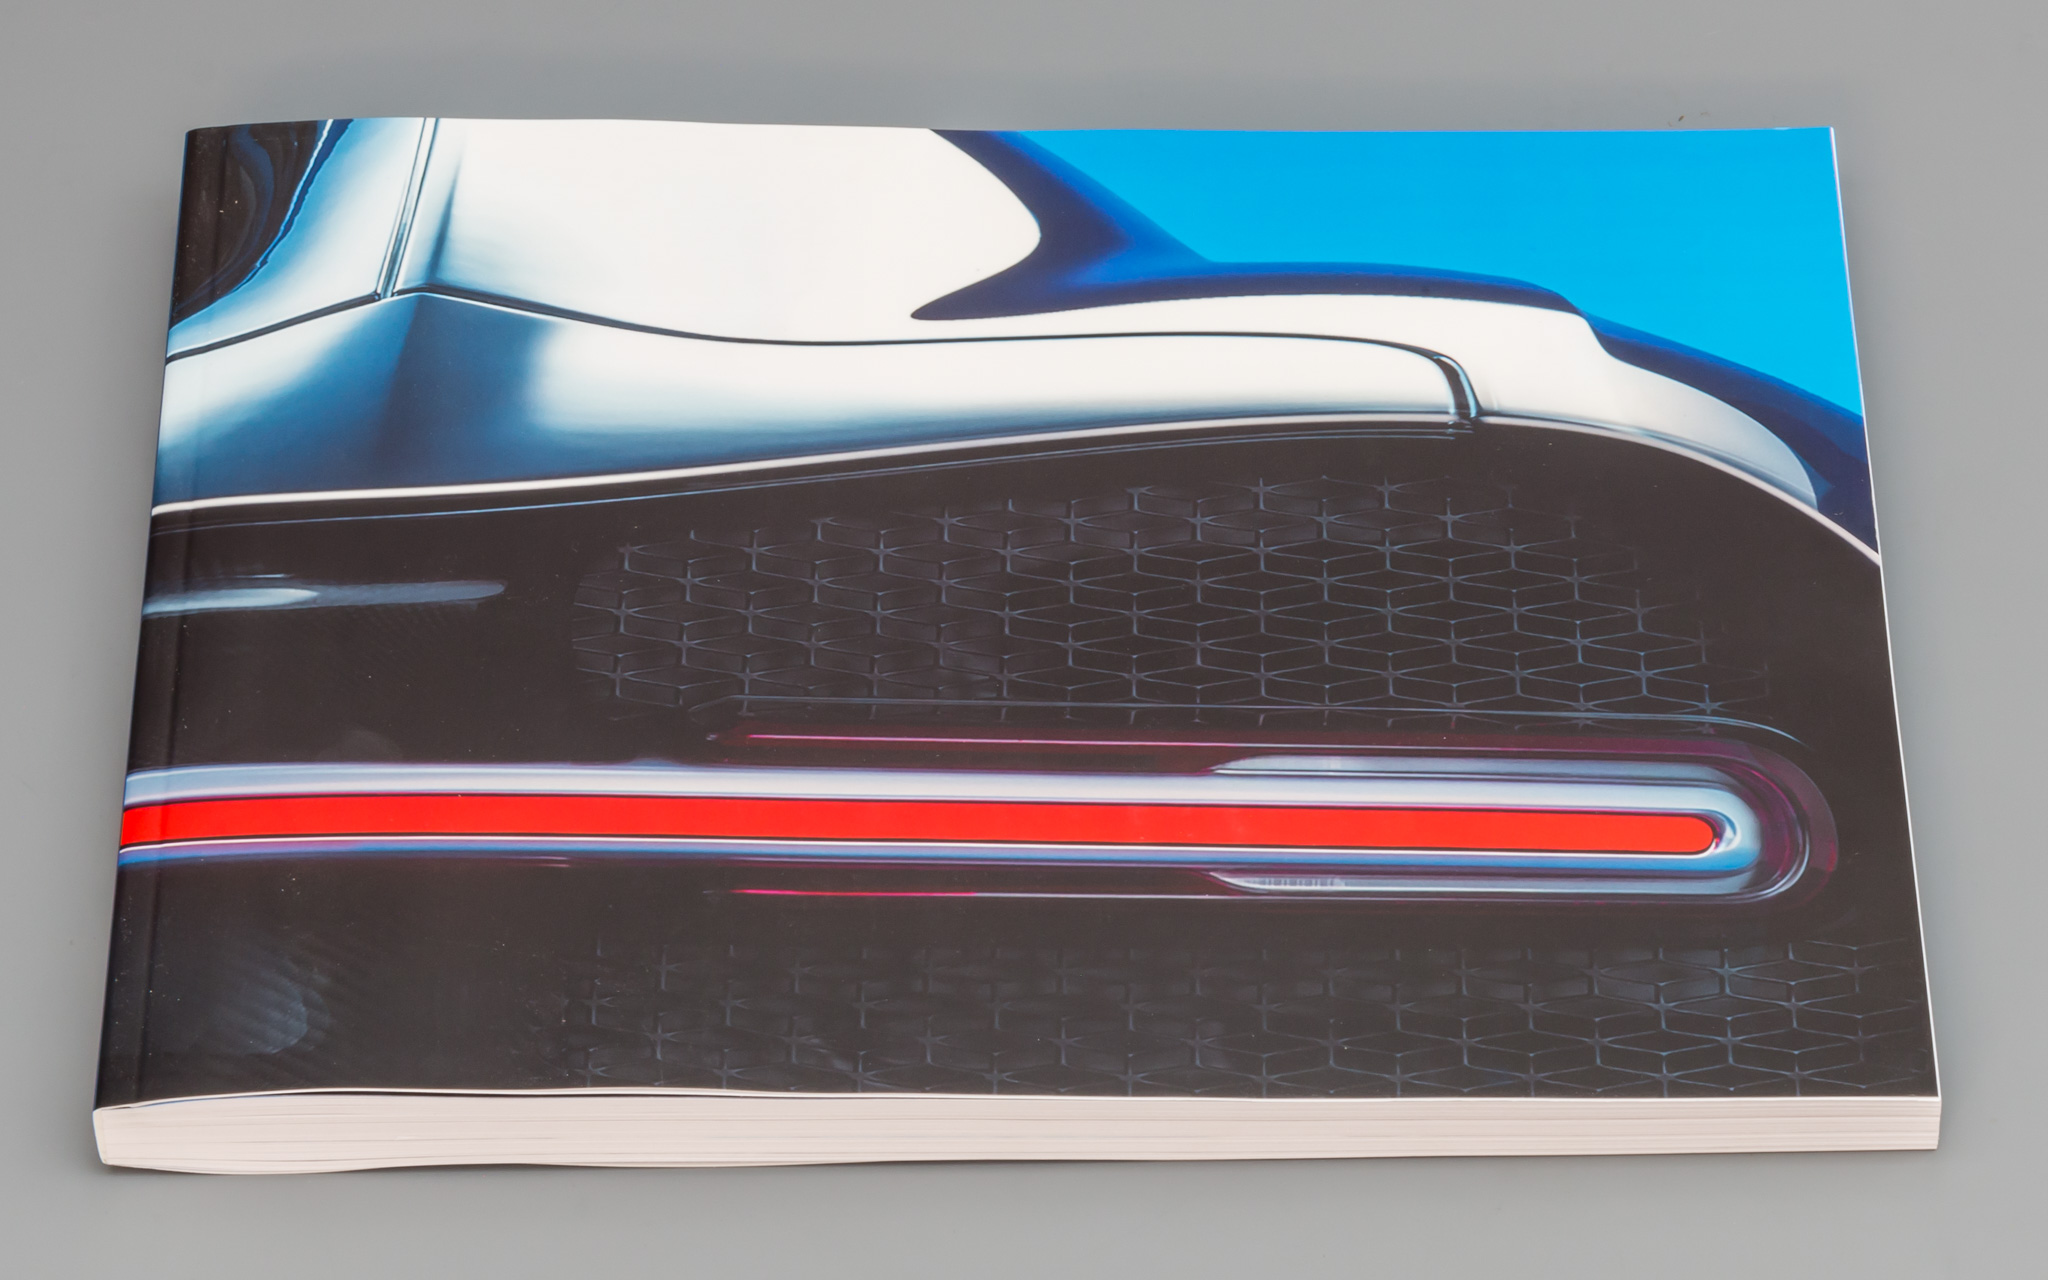
The back of the box shows some key elements of the car. And it shows the sexy behind of the car. More praise for that later.
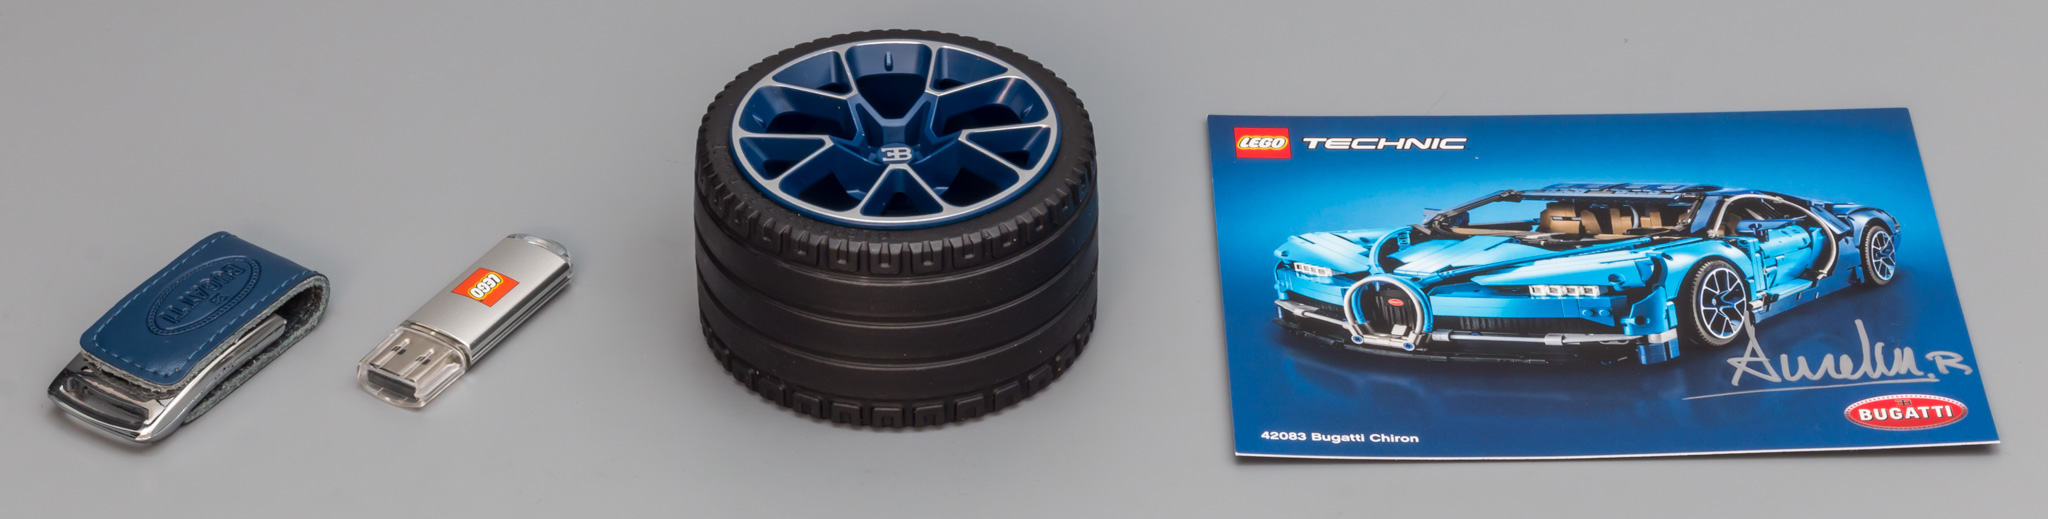
Nope, these are not my left-over parts from the build. This the content of a bag I received at the unveiling event. The USB sticks contain media kit for both Bugatti and LEGO (click here to download the LEGO Media Kit and Bugatti Media Kit). And when I run a flat, I can at least change it :wink:
CONTENTS OF THE BOX
The side of the box shows the profile view of the car. Click on the images to show the inside of the box. There are six boxes, one for each step of the build.
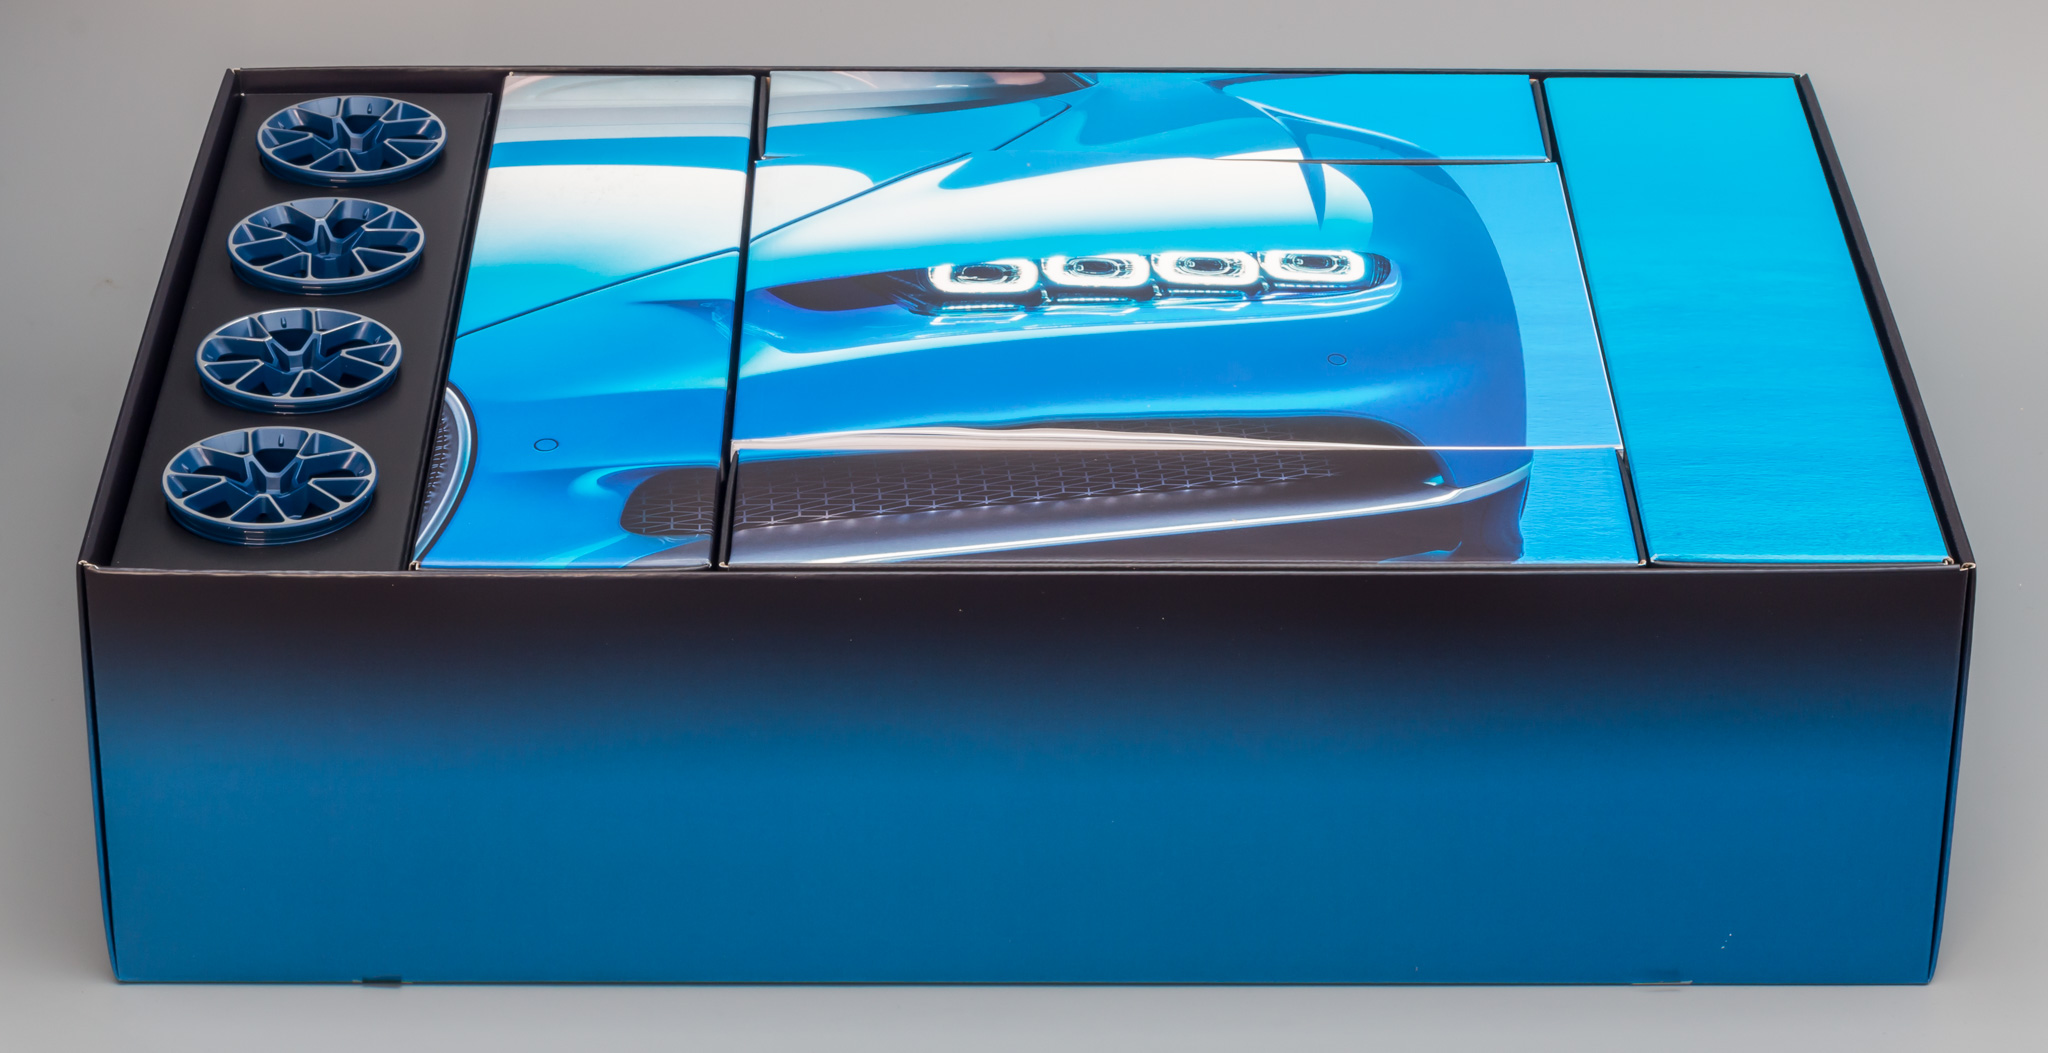

The box contains two books, instead of one. And since the Bugatti is built in two parts (before the marriage) this allows you to start the build together with someone else.
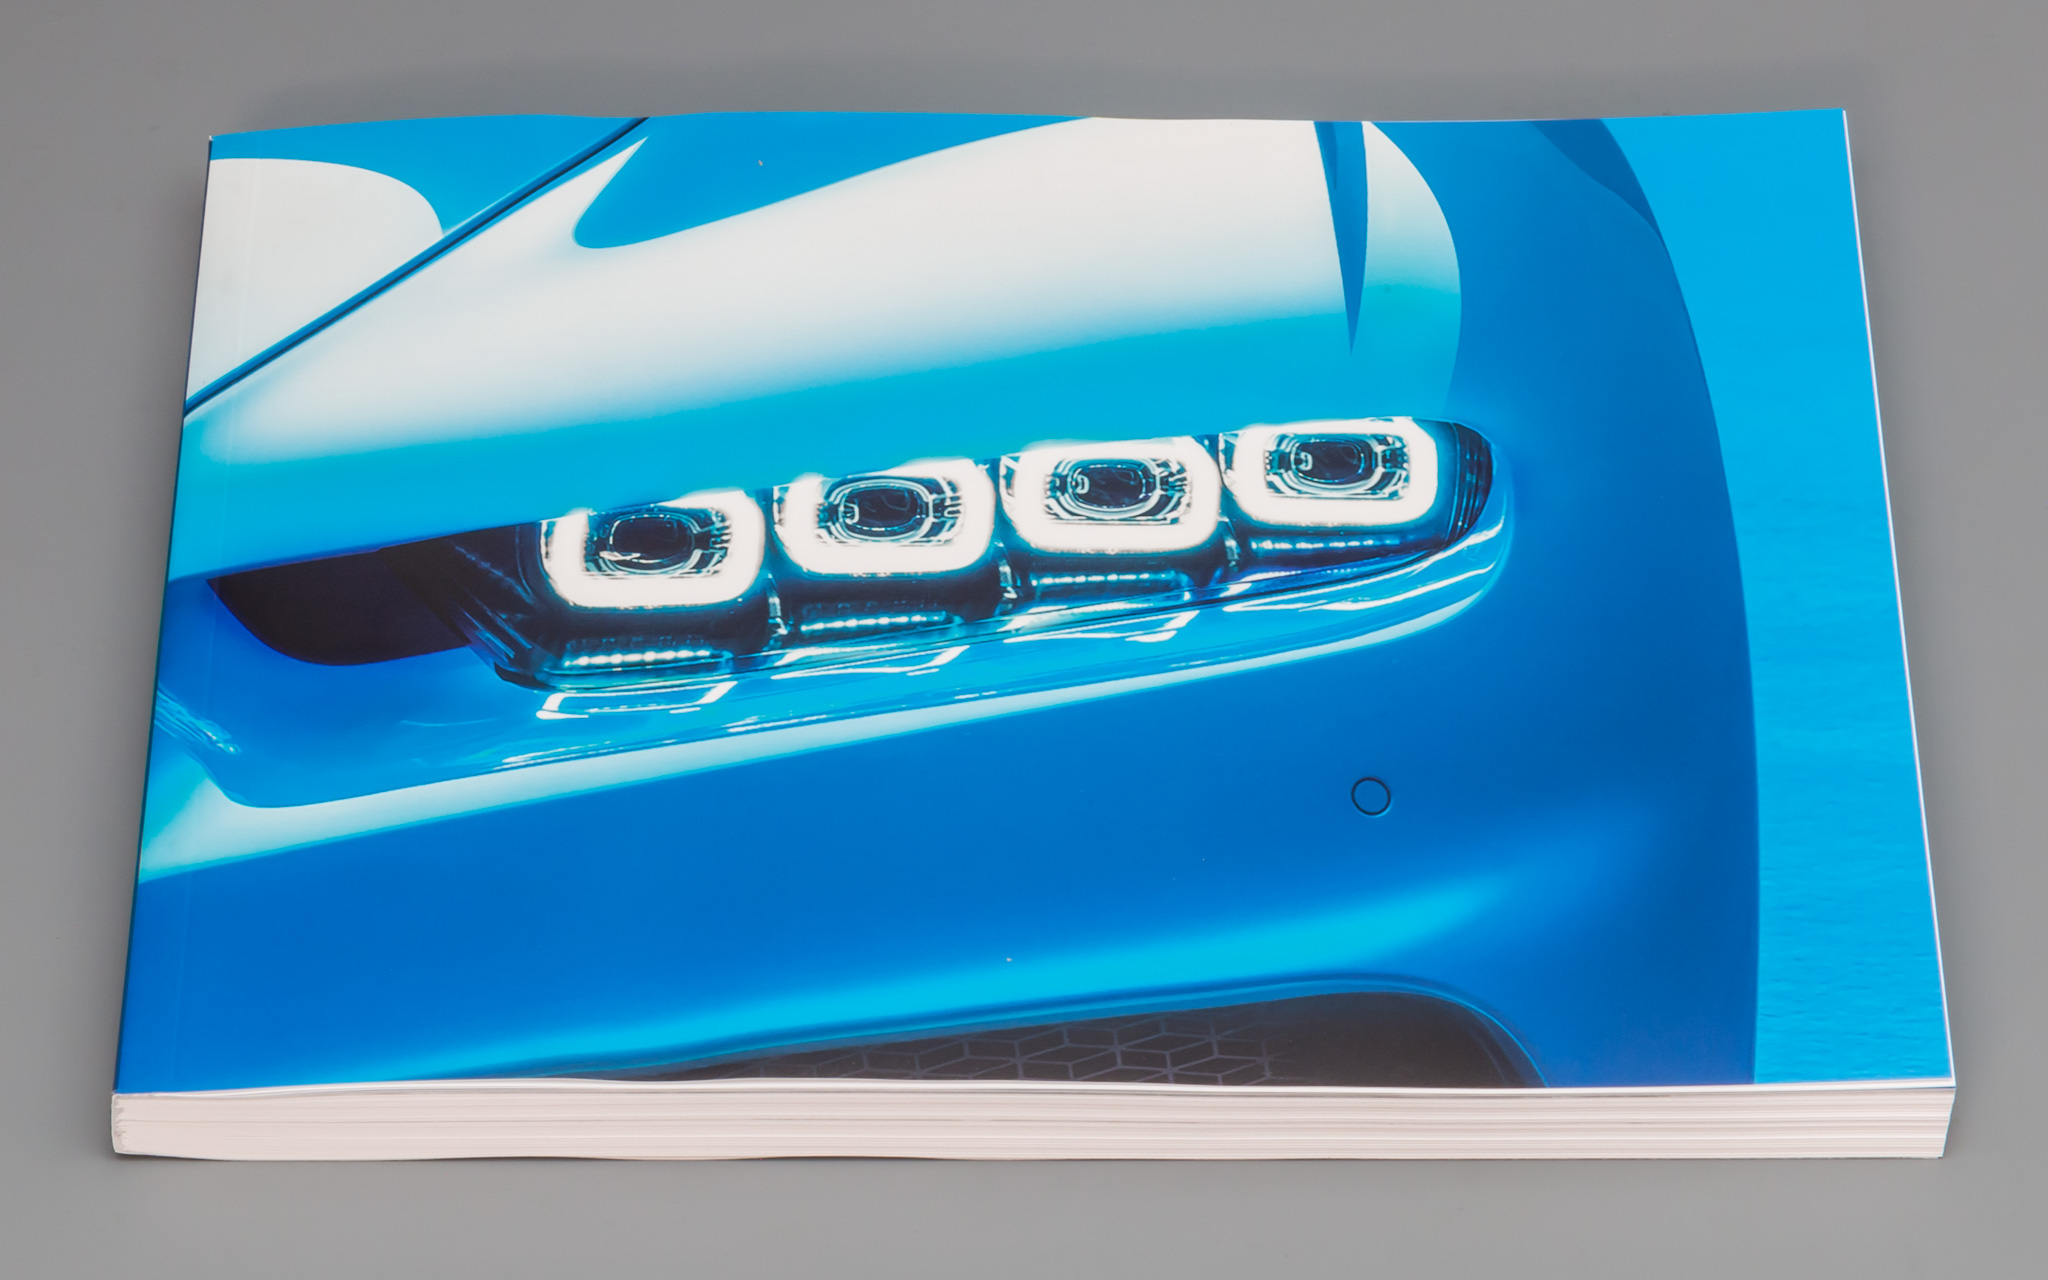
The second book.
And the sticker sheet. I would be nice to get a second sticker sheet with a set like this.

My Flickr album has pictures of the numbered bags, used in the different stages.
HIGHLIGHTED PARTS
I skipped this section in my Porsche review, but I agree it's worth having the Highlighted Parts section.
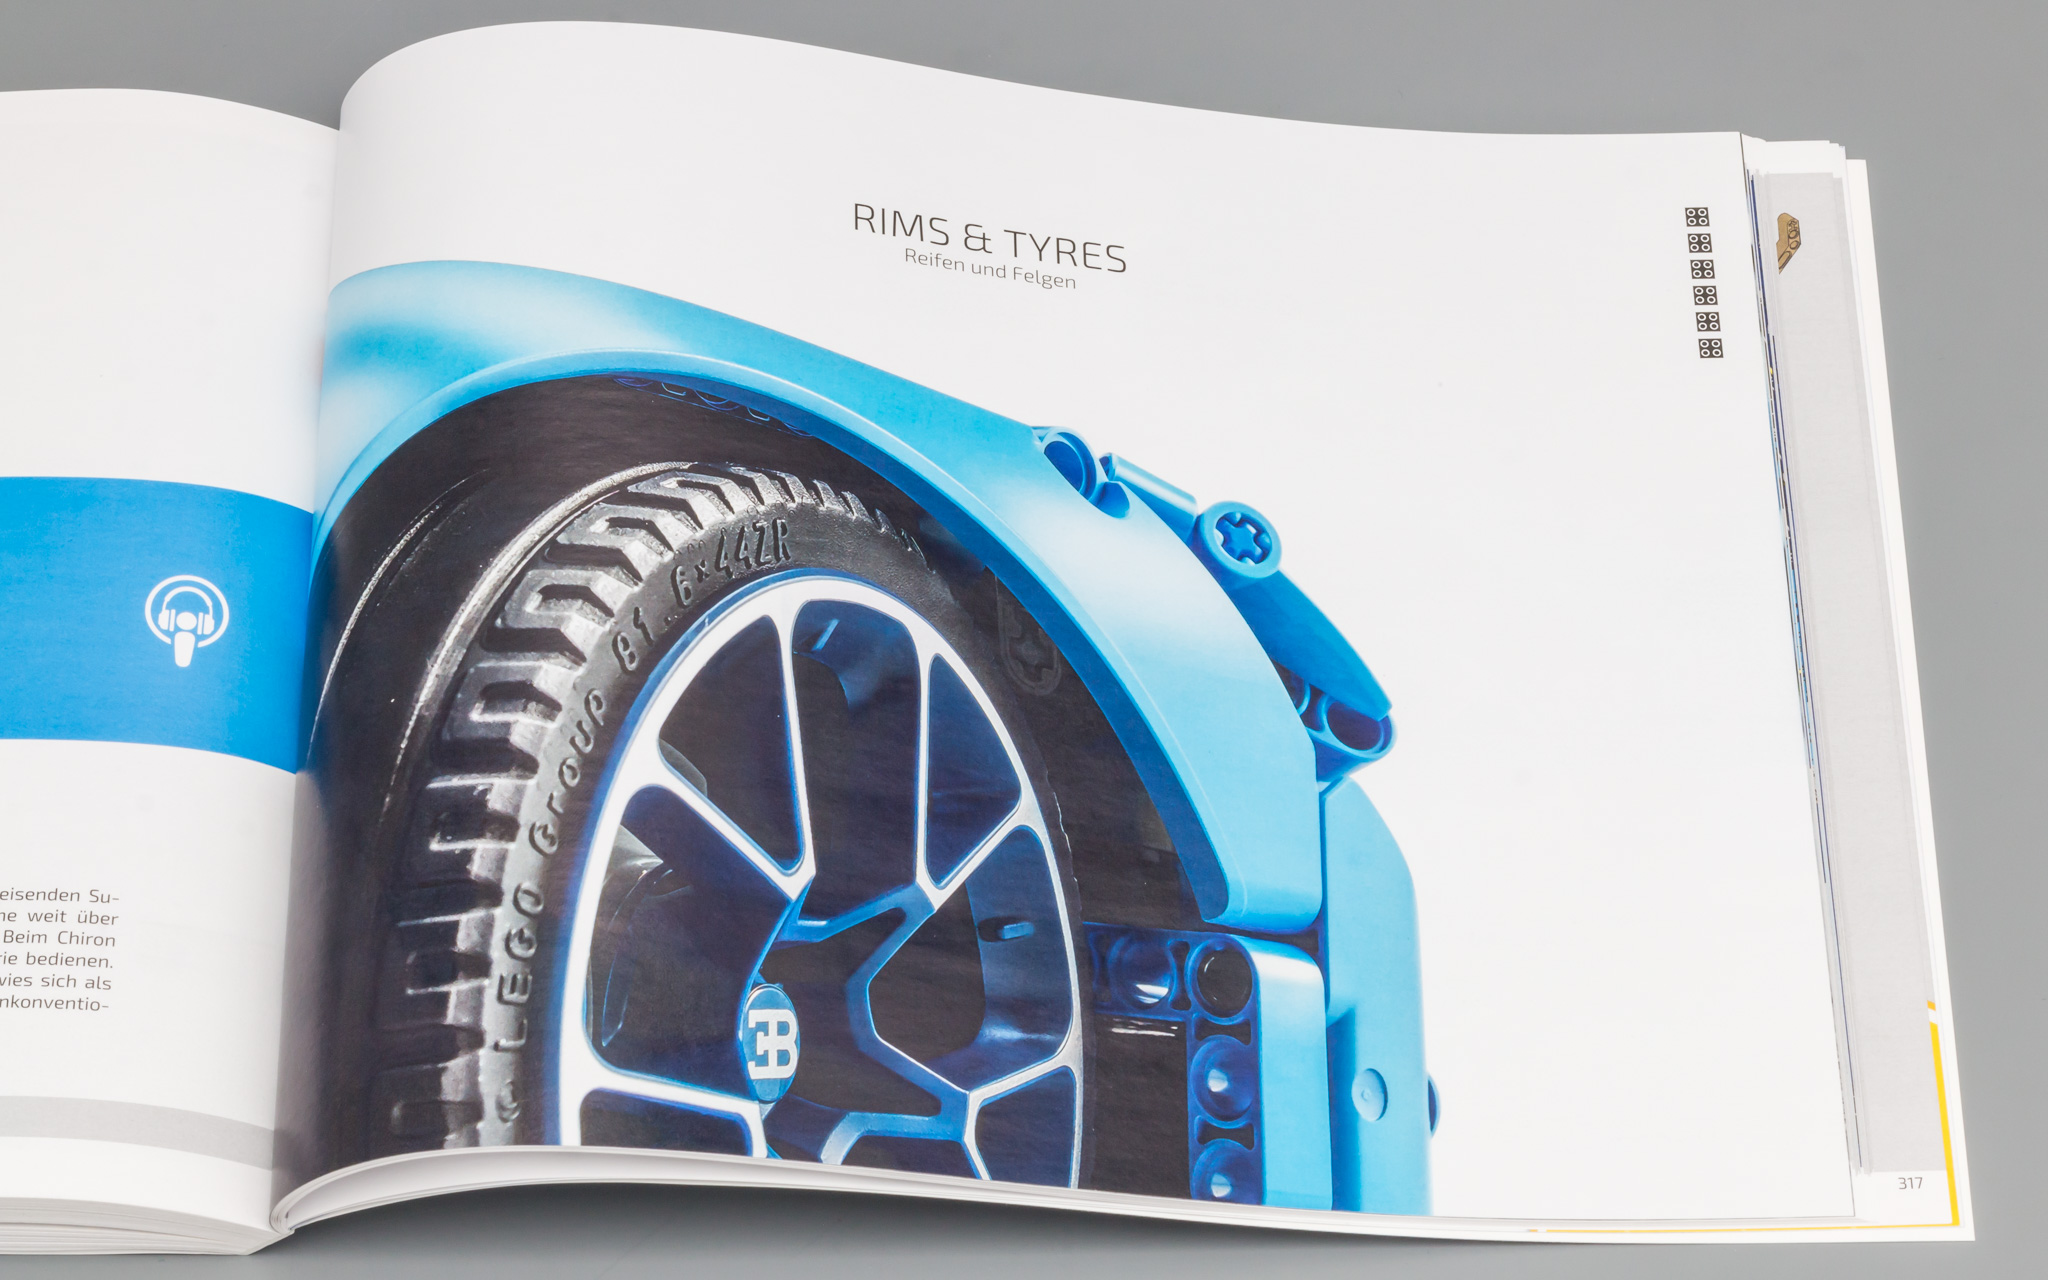
RIMS
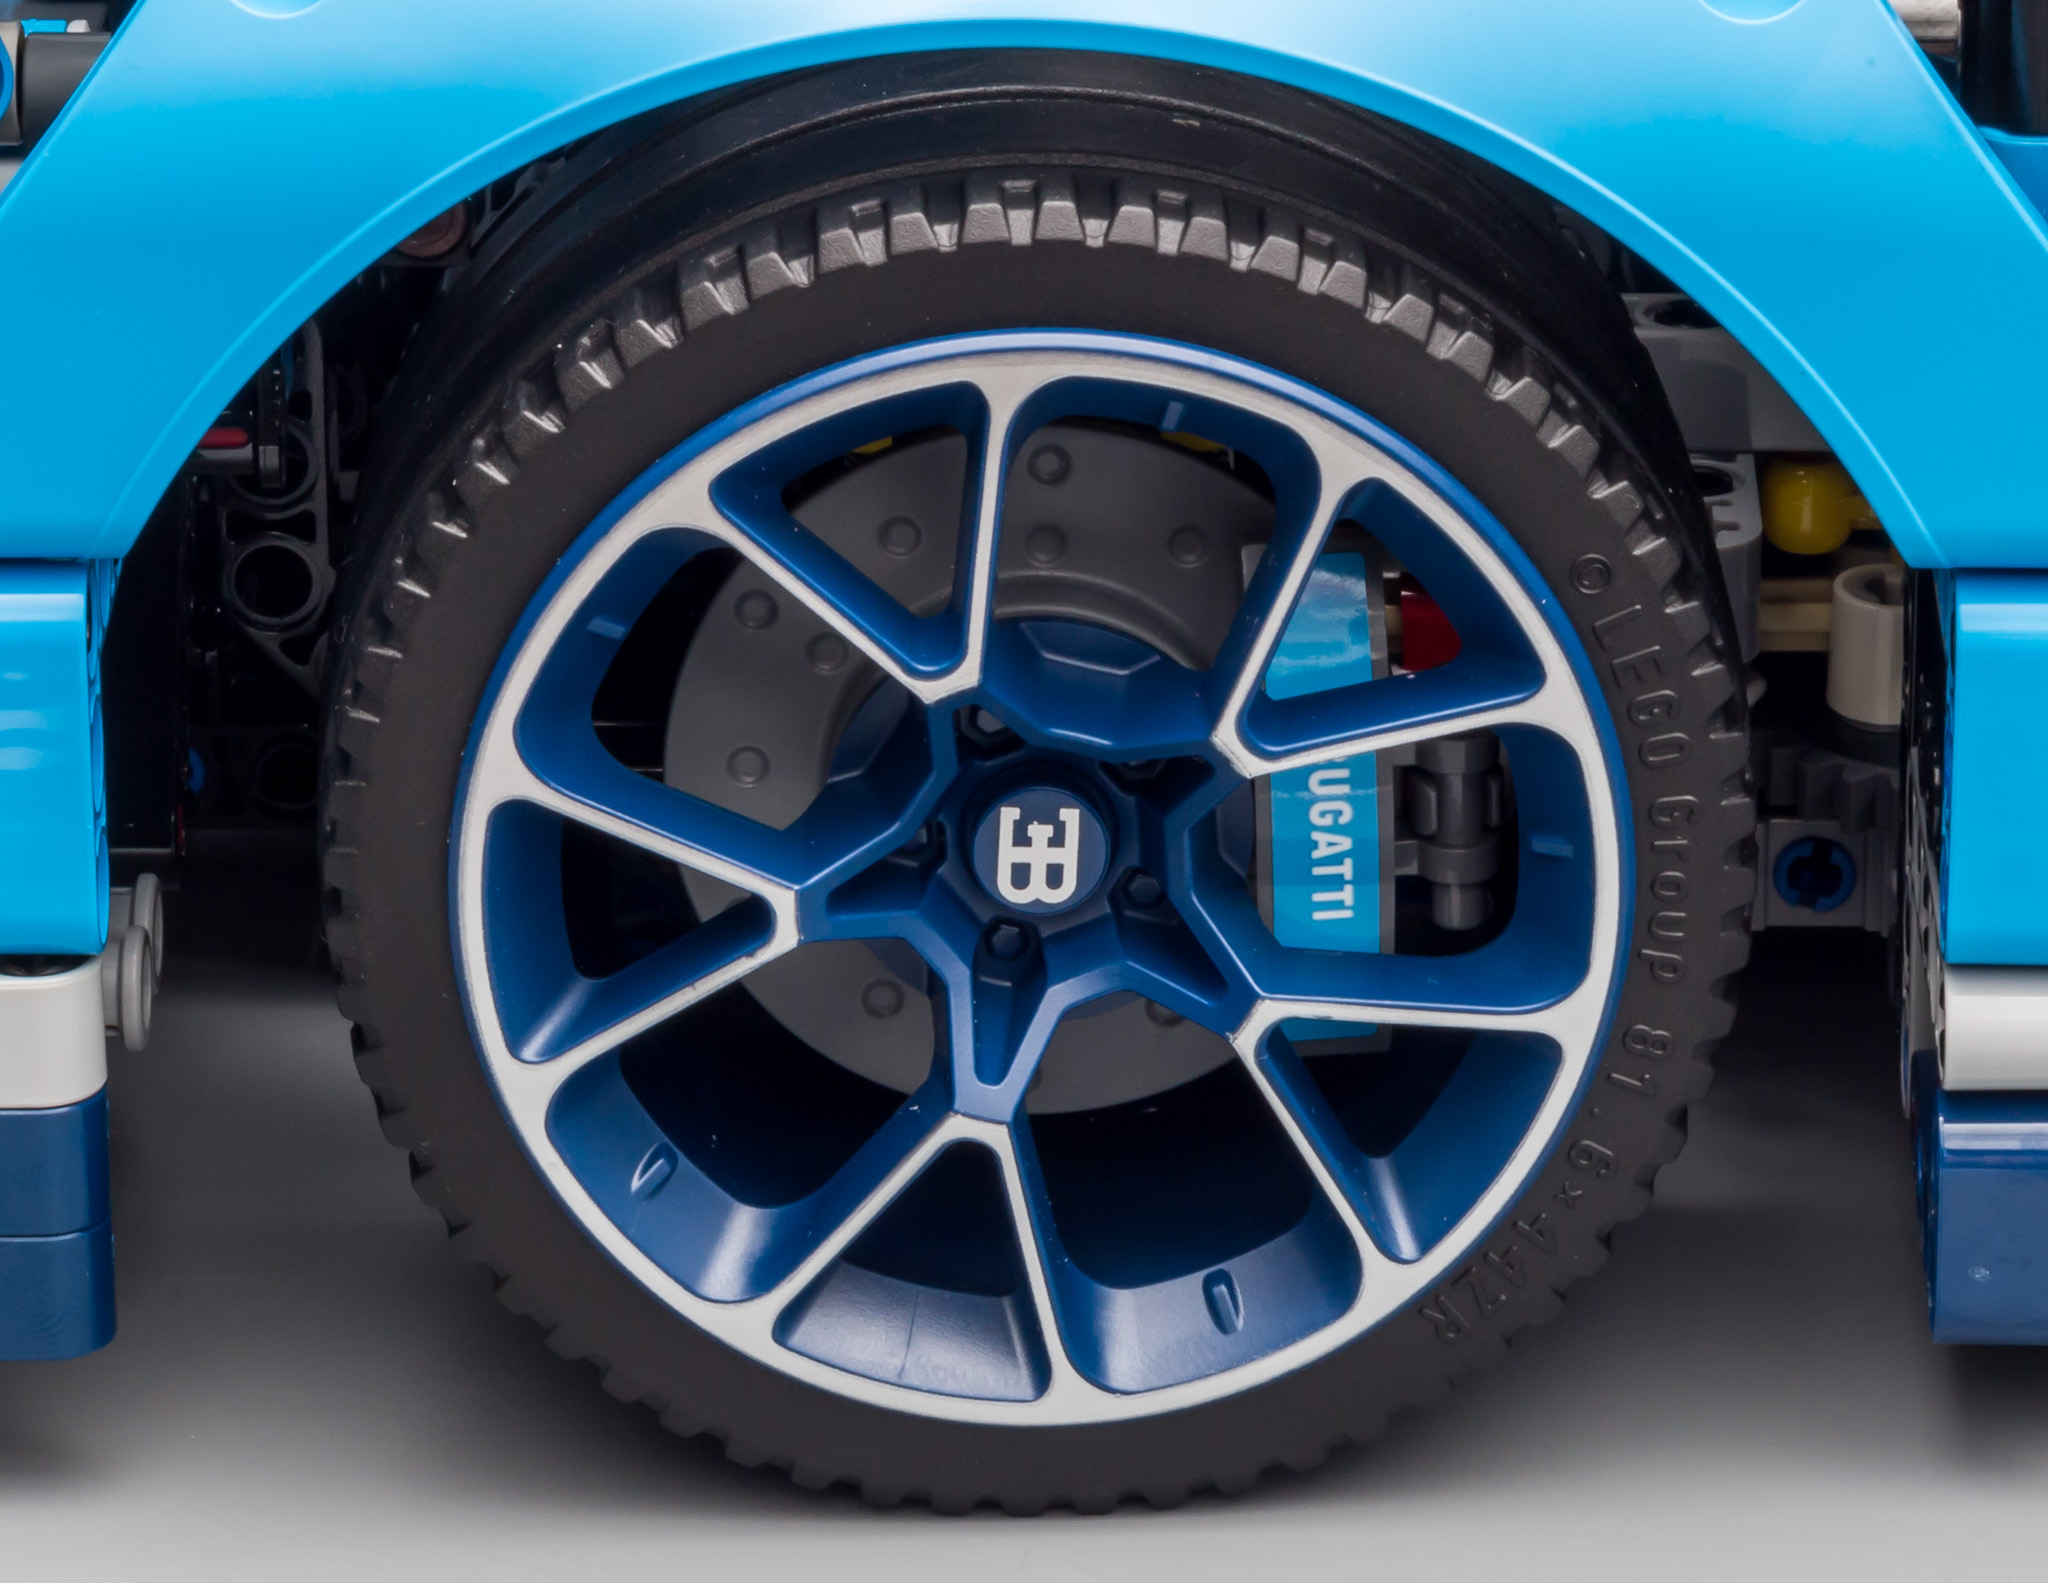
Let's start with the most unique and prominent part of them all...the rims. Specially designed for the Chiron. And man, this design is magnificent. Absolutely spot on. Since they are dark blue it might be difficult to use them in MOCs, but given the number of dark blue panels in this set, we will most likely see more dark blue MOCs in the future.
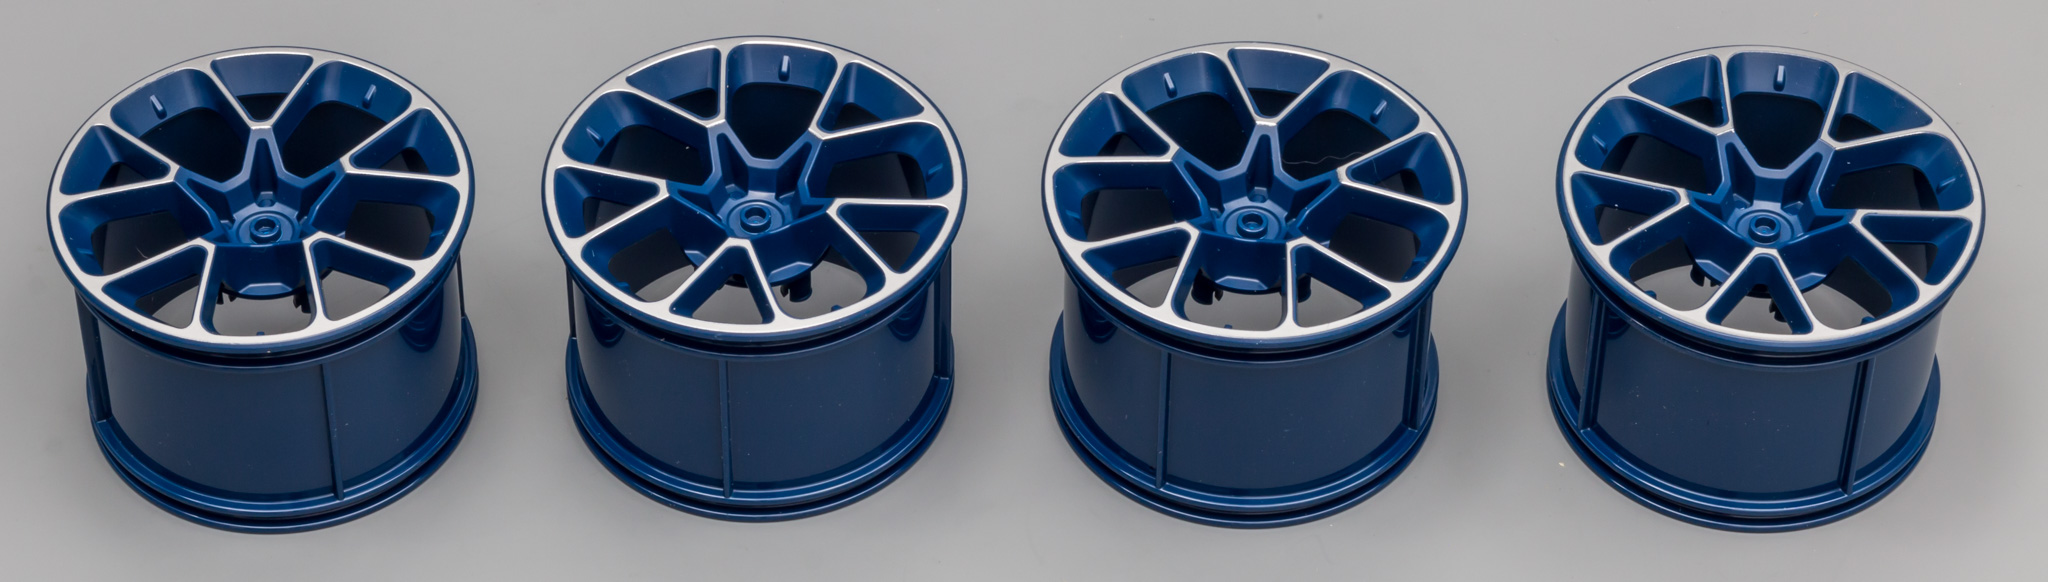
A thing worth noting is that the pins are attached to the rims. Unlike other rims, which have holes (female), these rims have pins (male). This makes them harder to use with some of the previously used setups. On the other hand, this set comes with very cool brake discs and calipers, which can be used in MOCs as well.

As you can see in the image below, all of the common rims come with holes, instead of pins.

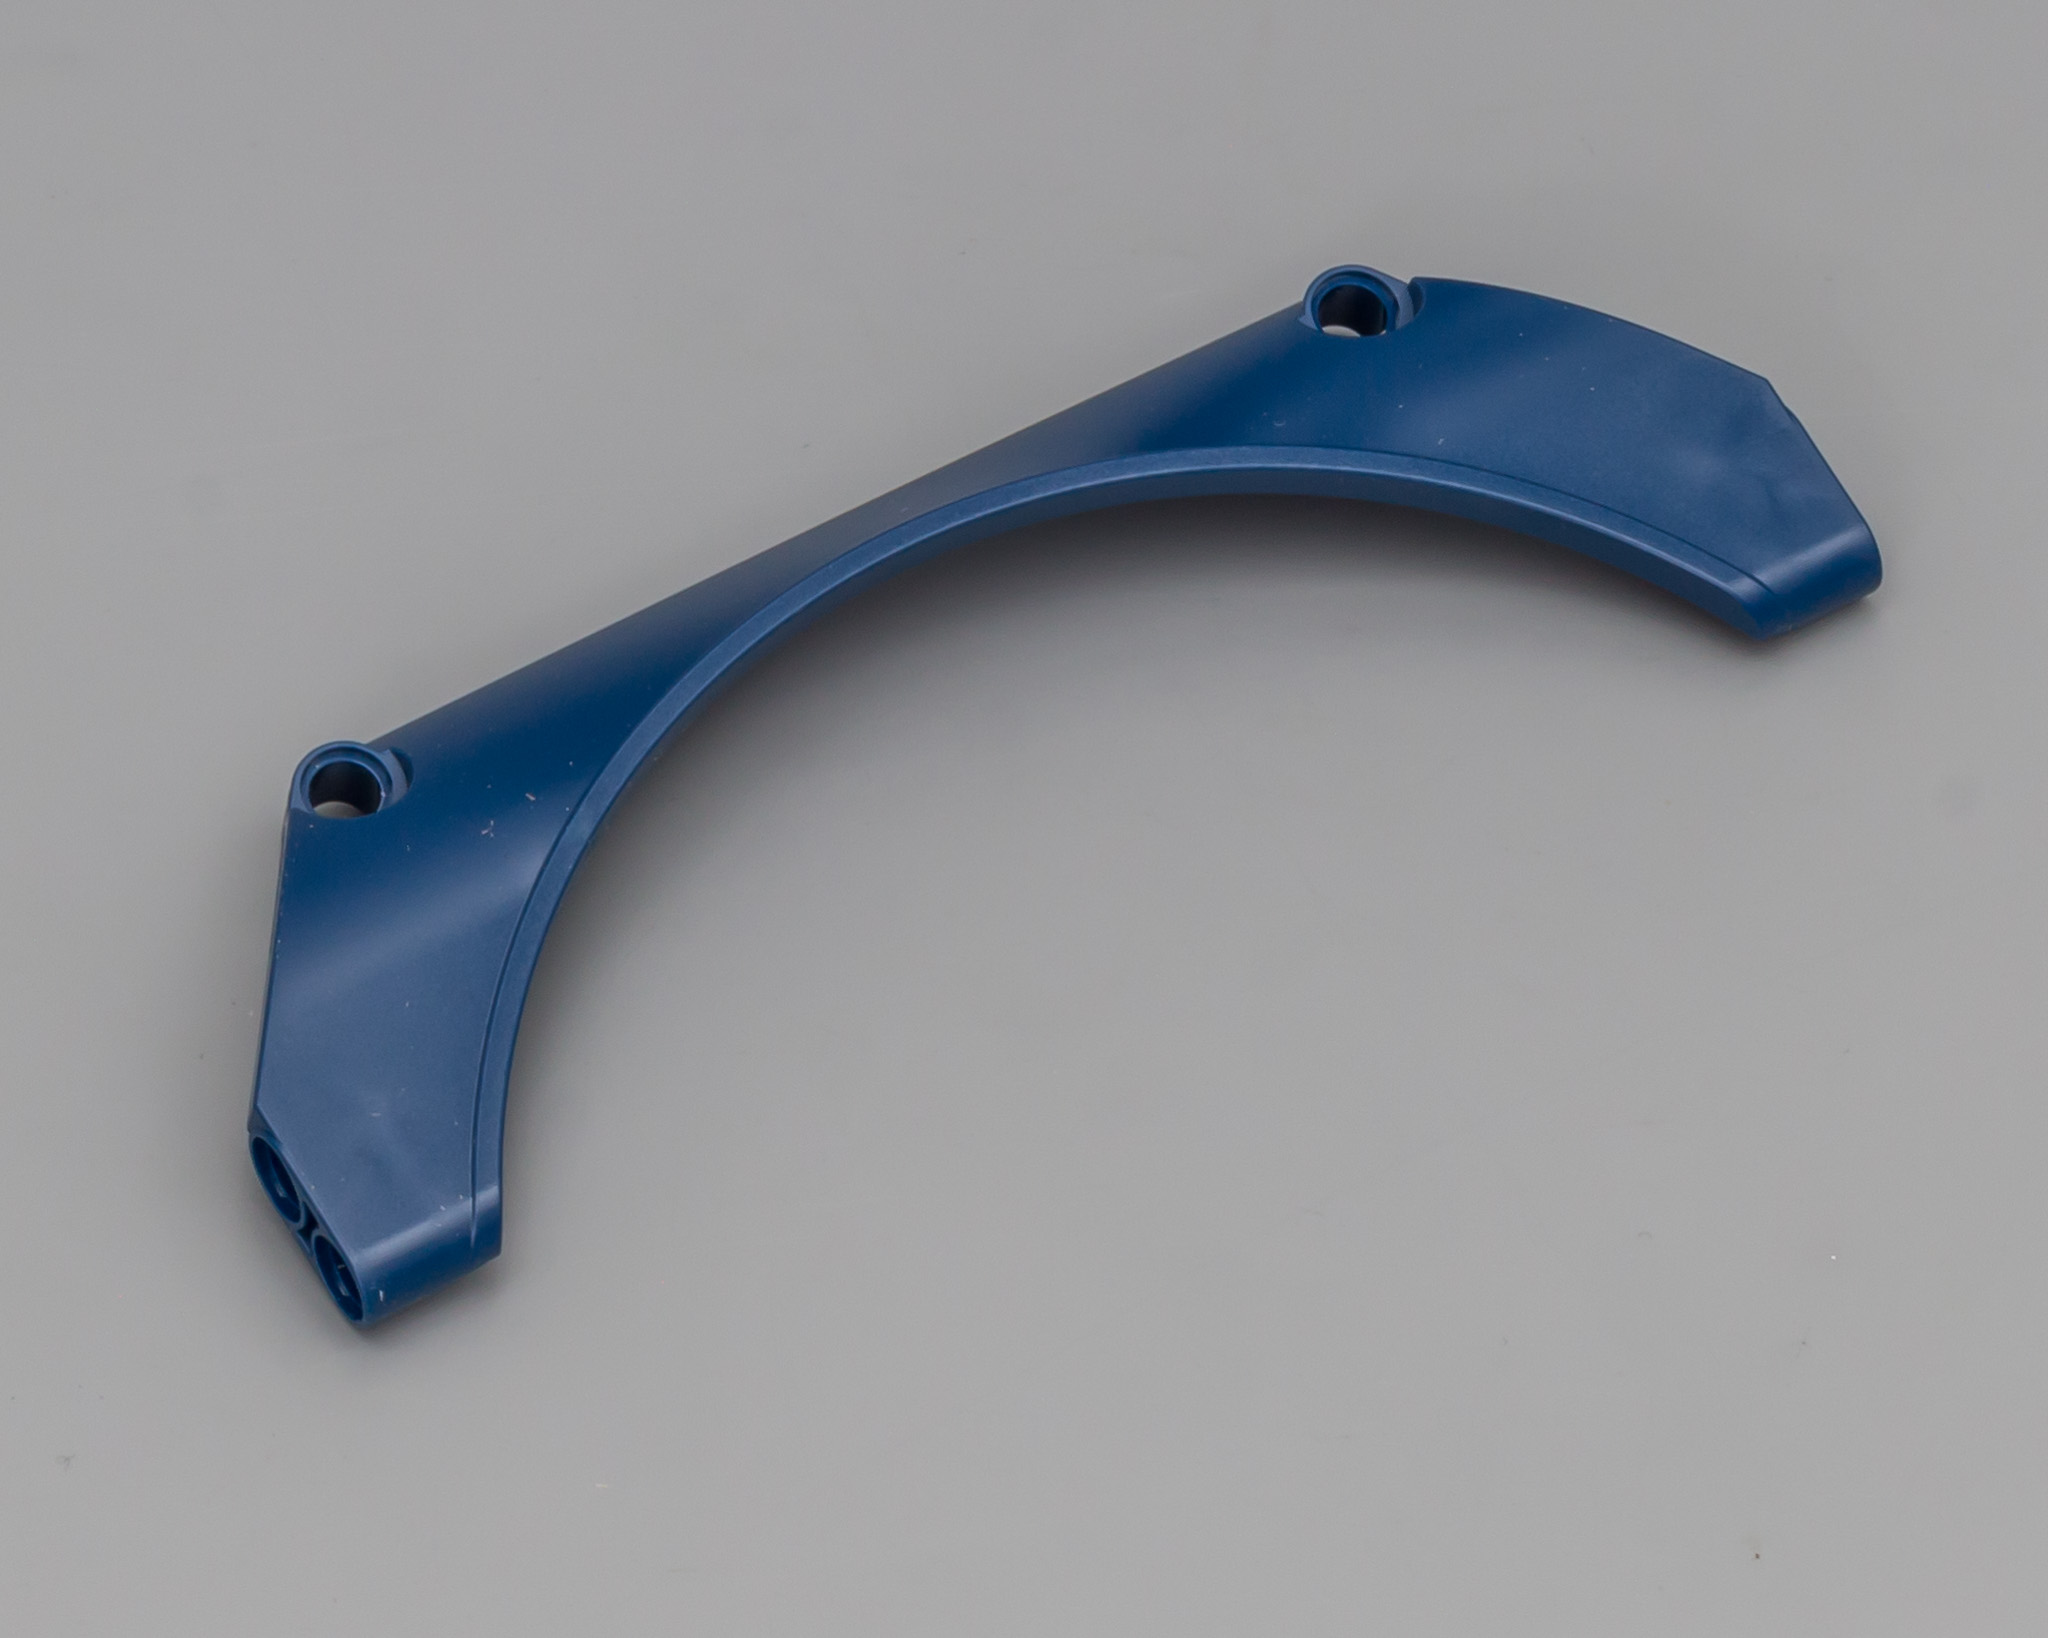
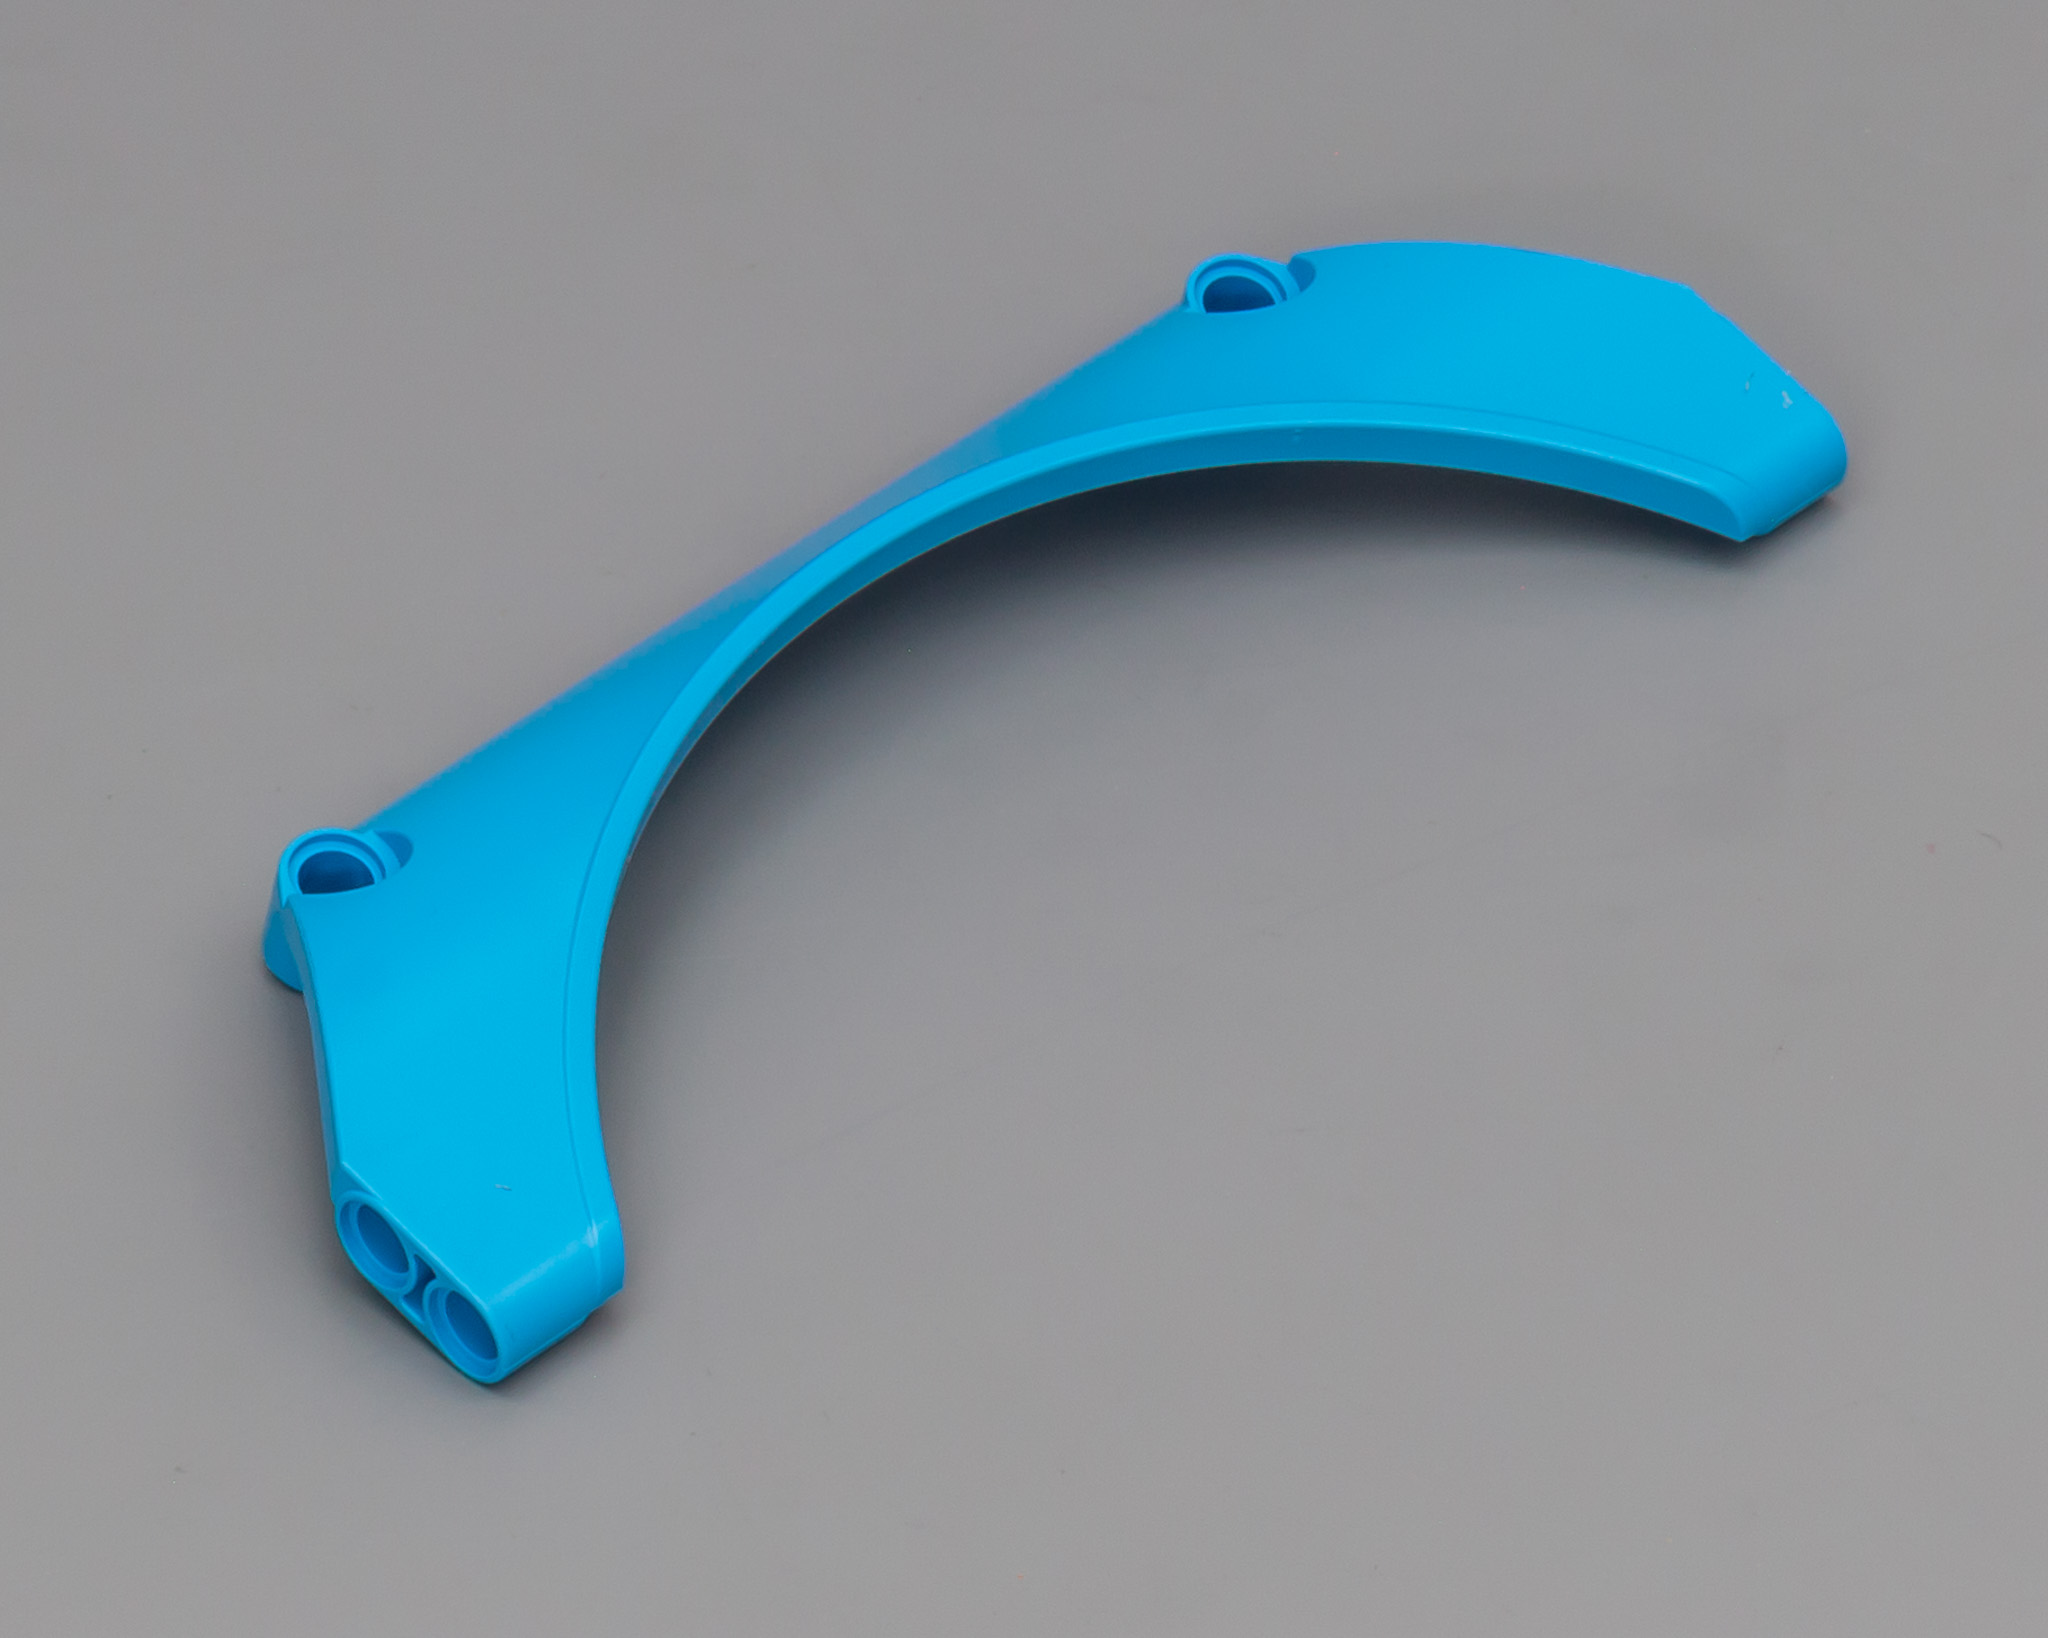
BLUE PANELS
At first, I wasn't happy with the idea of this set being blue on blue, but then I found out TLG used my two favorite shades of blue. It's a public secret I am a big fan of dark azure and that's no different for dark blue, used in the 41999 - 4x4 Crawler Exclusive Edition and later in the 42064 - Ocean Explorer.
I have compiled a list of modern panels in dark azure and dark blue. I think this list is complete, but feel free to check for accuracy :wink:
DARK AZURE
2 x Panel Car Mudguard Arched 15 x 2 x 5
2 x Panel Curved 11 x 3 with 2 Pin Holes through Panel Surface (new in Bugatti)
0 x Panel Curved 11 x 3 with 10 Pin Holes through Panel Surface
0 x Panel Curved 3 x 6 x 3 (non-existent)
0 x Panel Curved 3 x 13
2 x Panel Fairing # 1 Small Smooth Short, Side A
2 x Panel Fairing # 2 Small Smooth Short, Side B
0 x Panel Fairing # 3 Small Smooth Long, Side A
0 x Panel Fairing # 4 Small Smooth Long, Side B
2 x Panel Fairing # 5 Long Smooth, Side A
2 x Panel Fairing # 6 Long Smooth, Side B
2 x Panel Fairing #13 Large Short Smooth, Side A
2 x Panel Fairing #14 Large Short Smooth, Side B
1 x Panel Fairing #17 Large Smooth, Side A (new in Bugatti)
1 x Panel Fairing #18 Large Smooth, Side B (new in Bugatti)
1 x Panel Fairing #21 Very Small Smooth, Side B (new in Bugatti)
1 x Panel Fairing #22 Very Small Smooth, Side A (new in Bugatti)
0 x Panel Plate 3 x 11 x 1
0 x Panel Plate 5 x 11 x 1
DARK BLUE
2 x Panel Car Mudguard Arched 15 x 2 x 5 (new in Bugatti)
0 x Panel Curved 11 x 3 with 2 Pin Holes through Panel Surface (non-existent)
0 x Panel Curved 11 x 3 with 10 Pin Holes through Panel Surface
2 x Panel Curved 3 x 6 x 3
6 x Panel Curved 3 x 13
1 x Panel Fairing # 1 Small Smooth Short, Side A
1 x Panel Fairing # 2 Small Smooth Short, Side B
0 x Panel Fairing # 3 Small Smooth Long, Side A (non-existent)
0 x Panel Fairing # 4 Small Smooth Long, Side B (non-existent)
2 x Panel Fairing # 5 Long Smooth, Side A
2 x Panel Fairing # 6 Long Smooth, Side B
2 x Panel Fairing #13 Large Short Smooth, Side A (new in Bugatti)
2 x Panel Fairing #14 Large Short Smooth, Side B (new in Bugatti)
1 x Panel Fairing #17 Large Smooth, Side A (new in Bugatti)
1 x Panel Fairing #18 Large Smooth, Side B (new in Bugatti)
6 x Panel Fairing #21 Very Small Smooth, Side B
6 x Panel Fairing #22 Very Small Smooth, Side A
4 x Panel Plate 3 x 11 x 1
0 x Panel Plate 5 x 11 x 1 (still unique to 41999)
There are lots of new dark azure and dark blue parts in this sets, like liftarms and soft hoses. For a full list, I recommend checking the Bricklink Inventory or looking at the inventory pics in the next section.
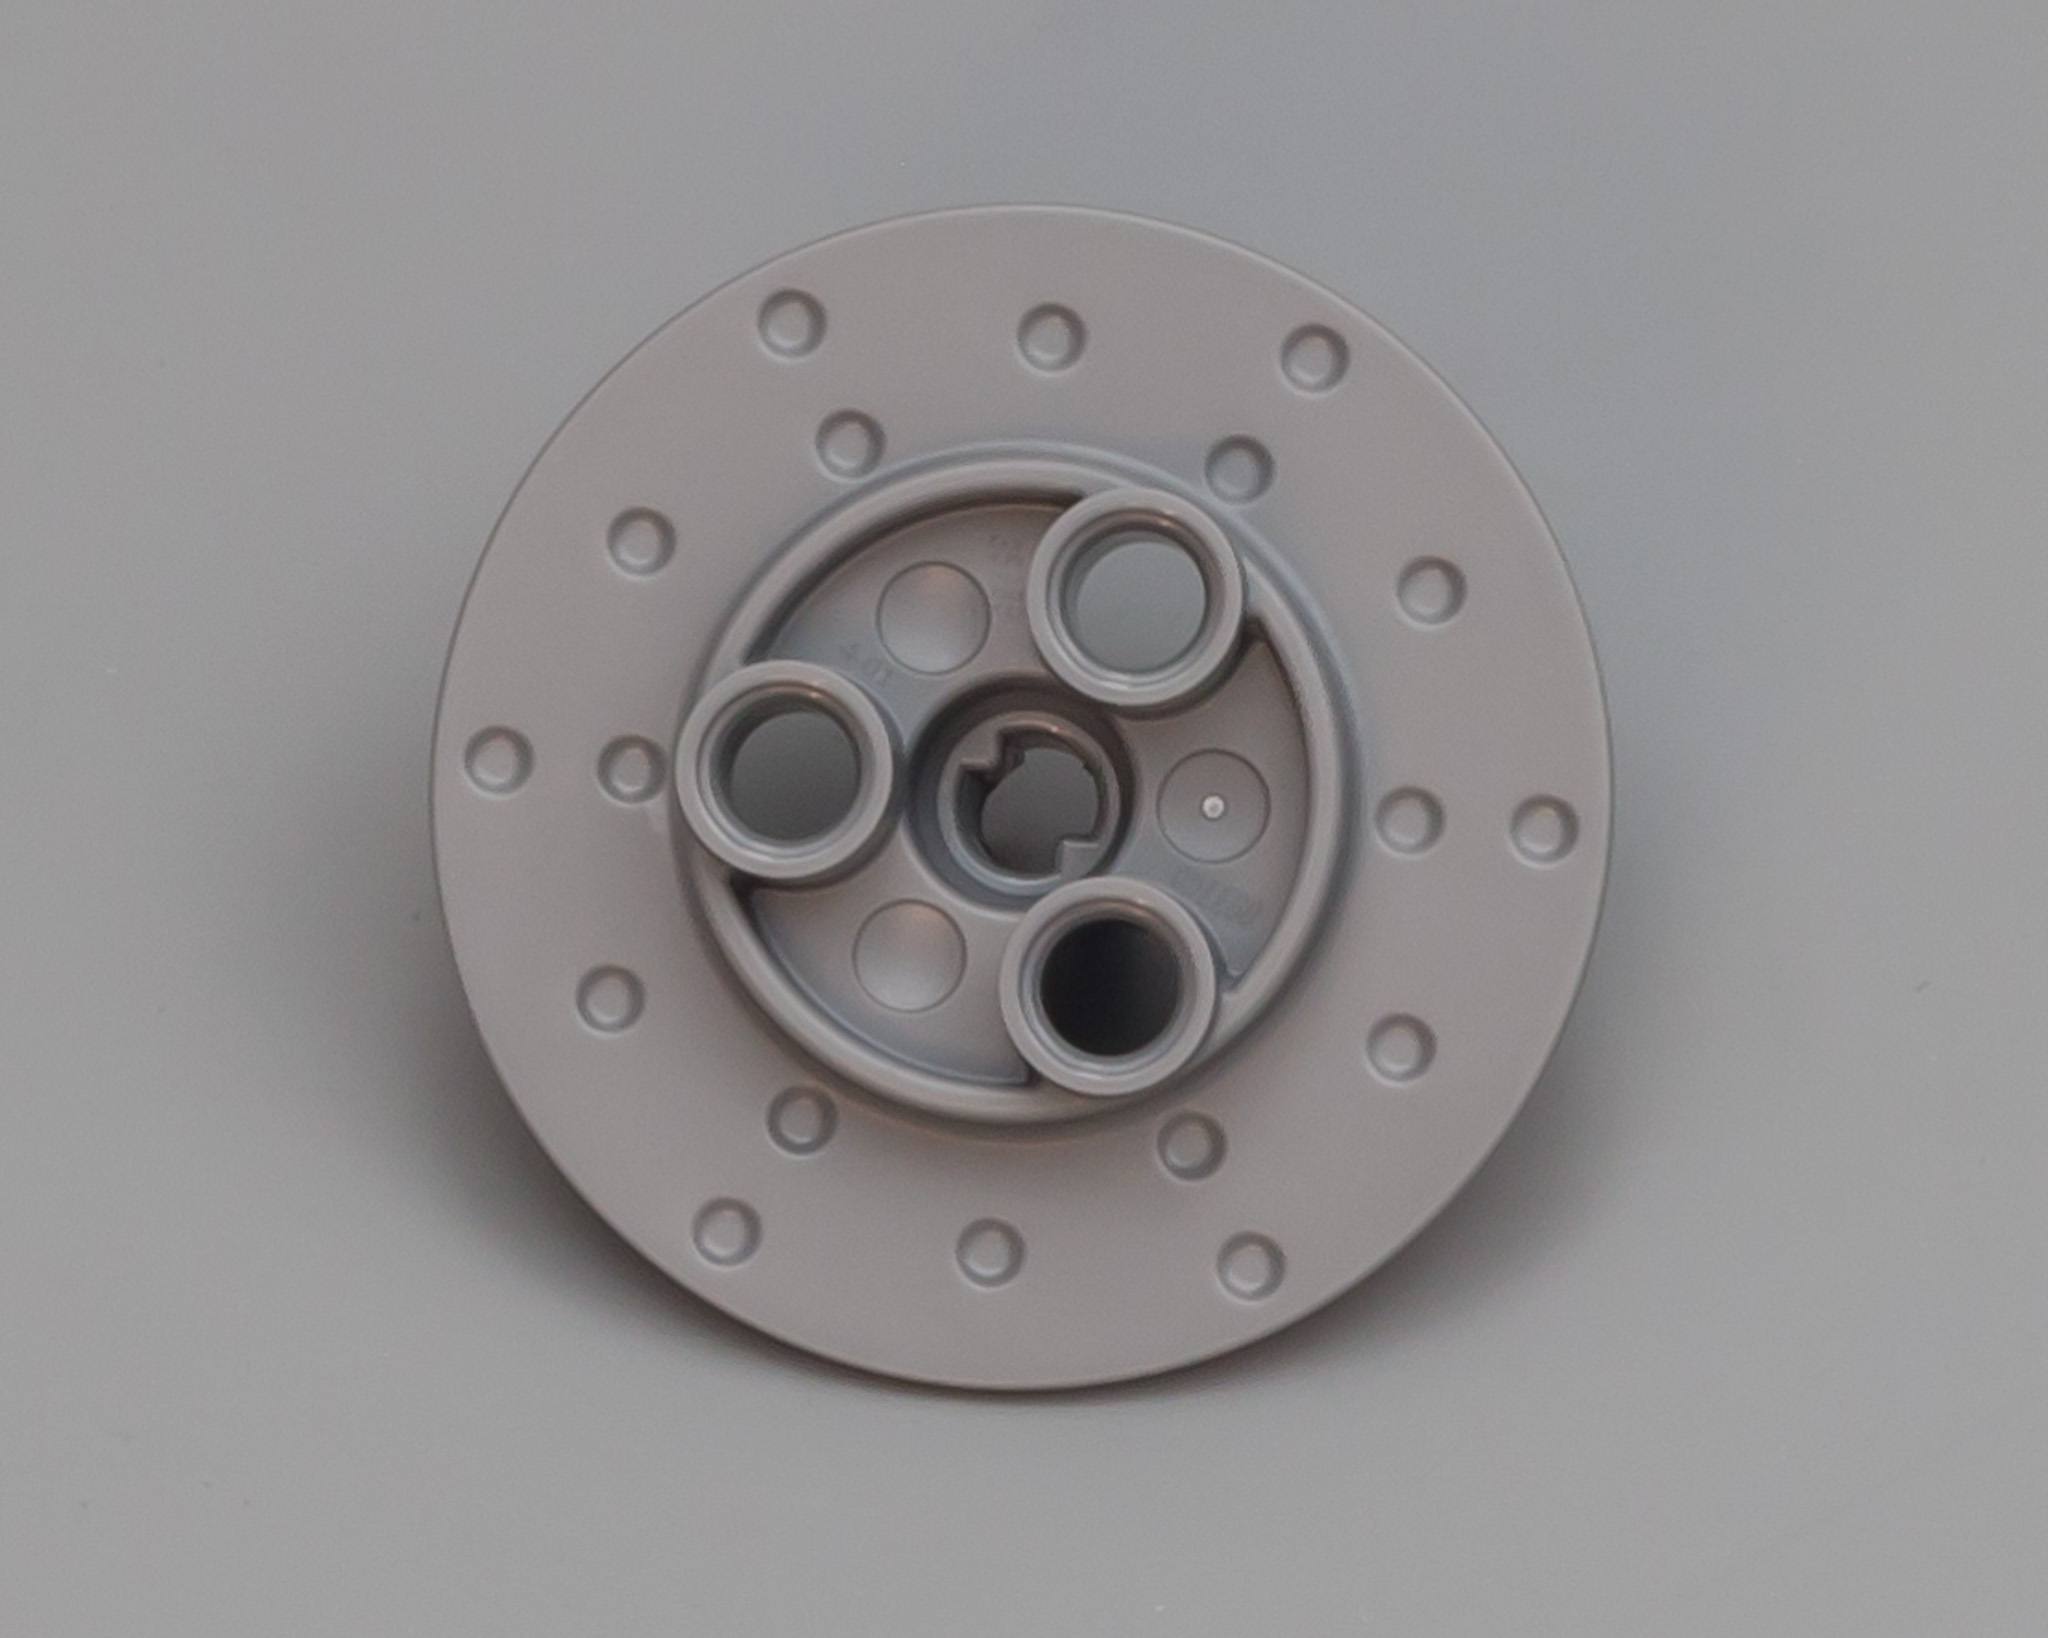
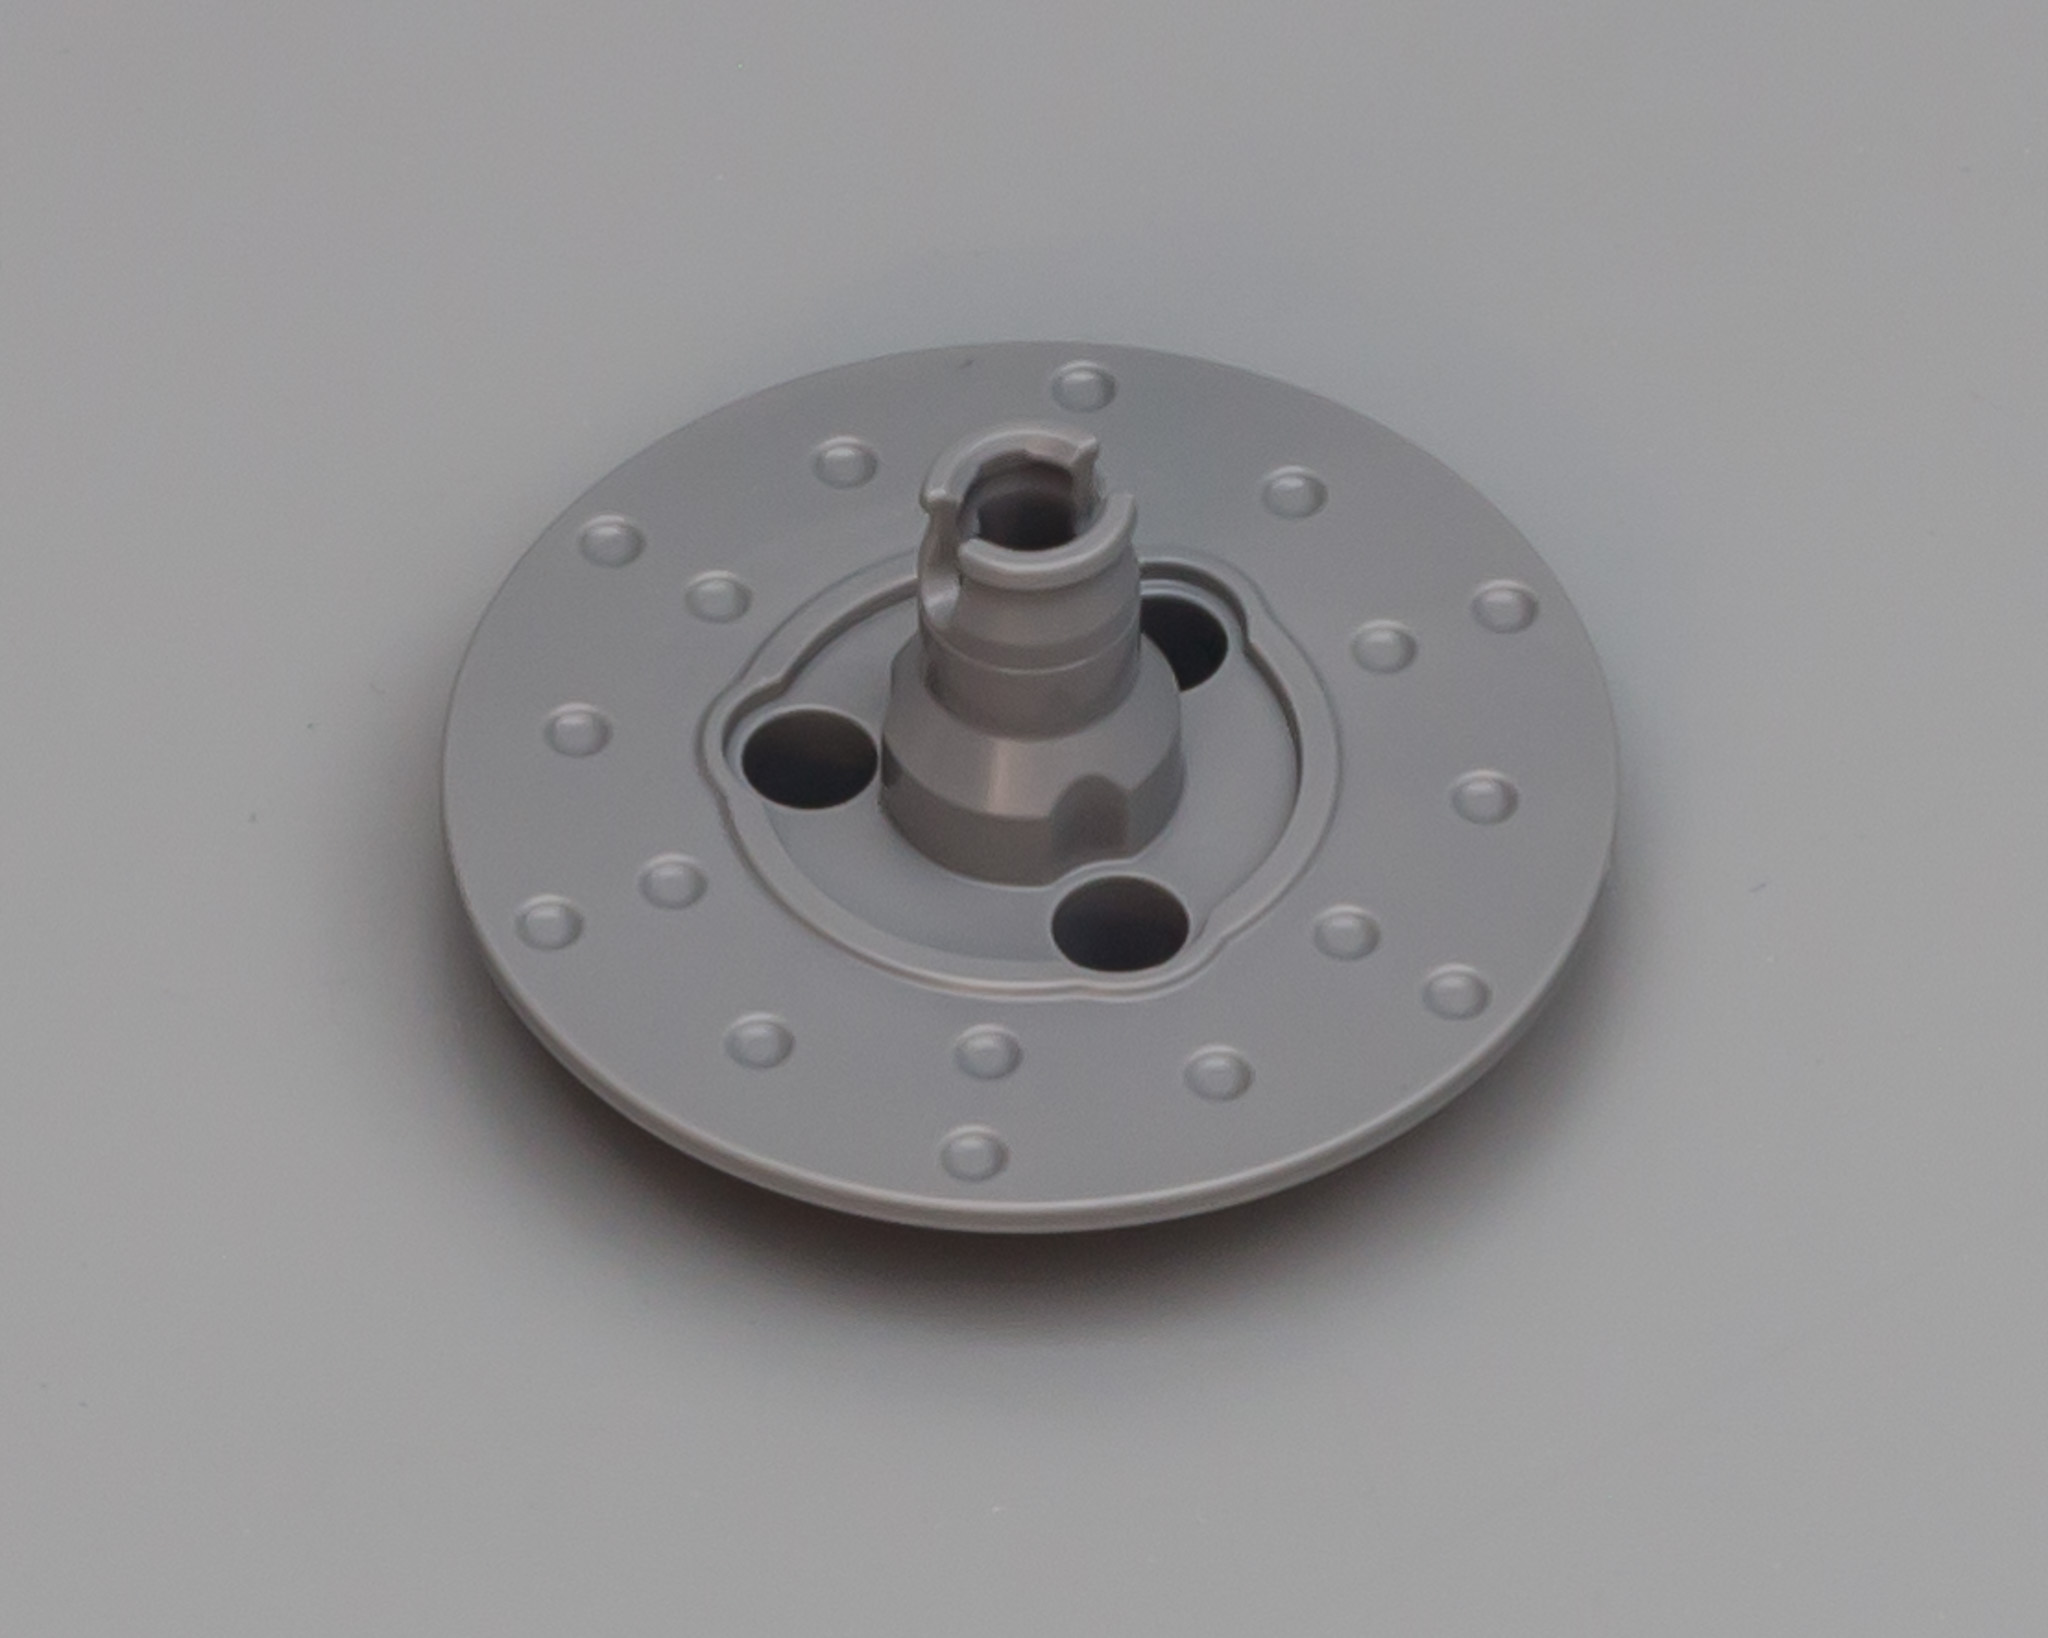
DISC BRAKES
On Bricklink these are called called Steering Wheel Hubs 3 Pin Holes Round, but I will simply call them disc brakes. I love how these turned out.
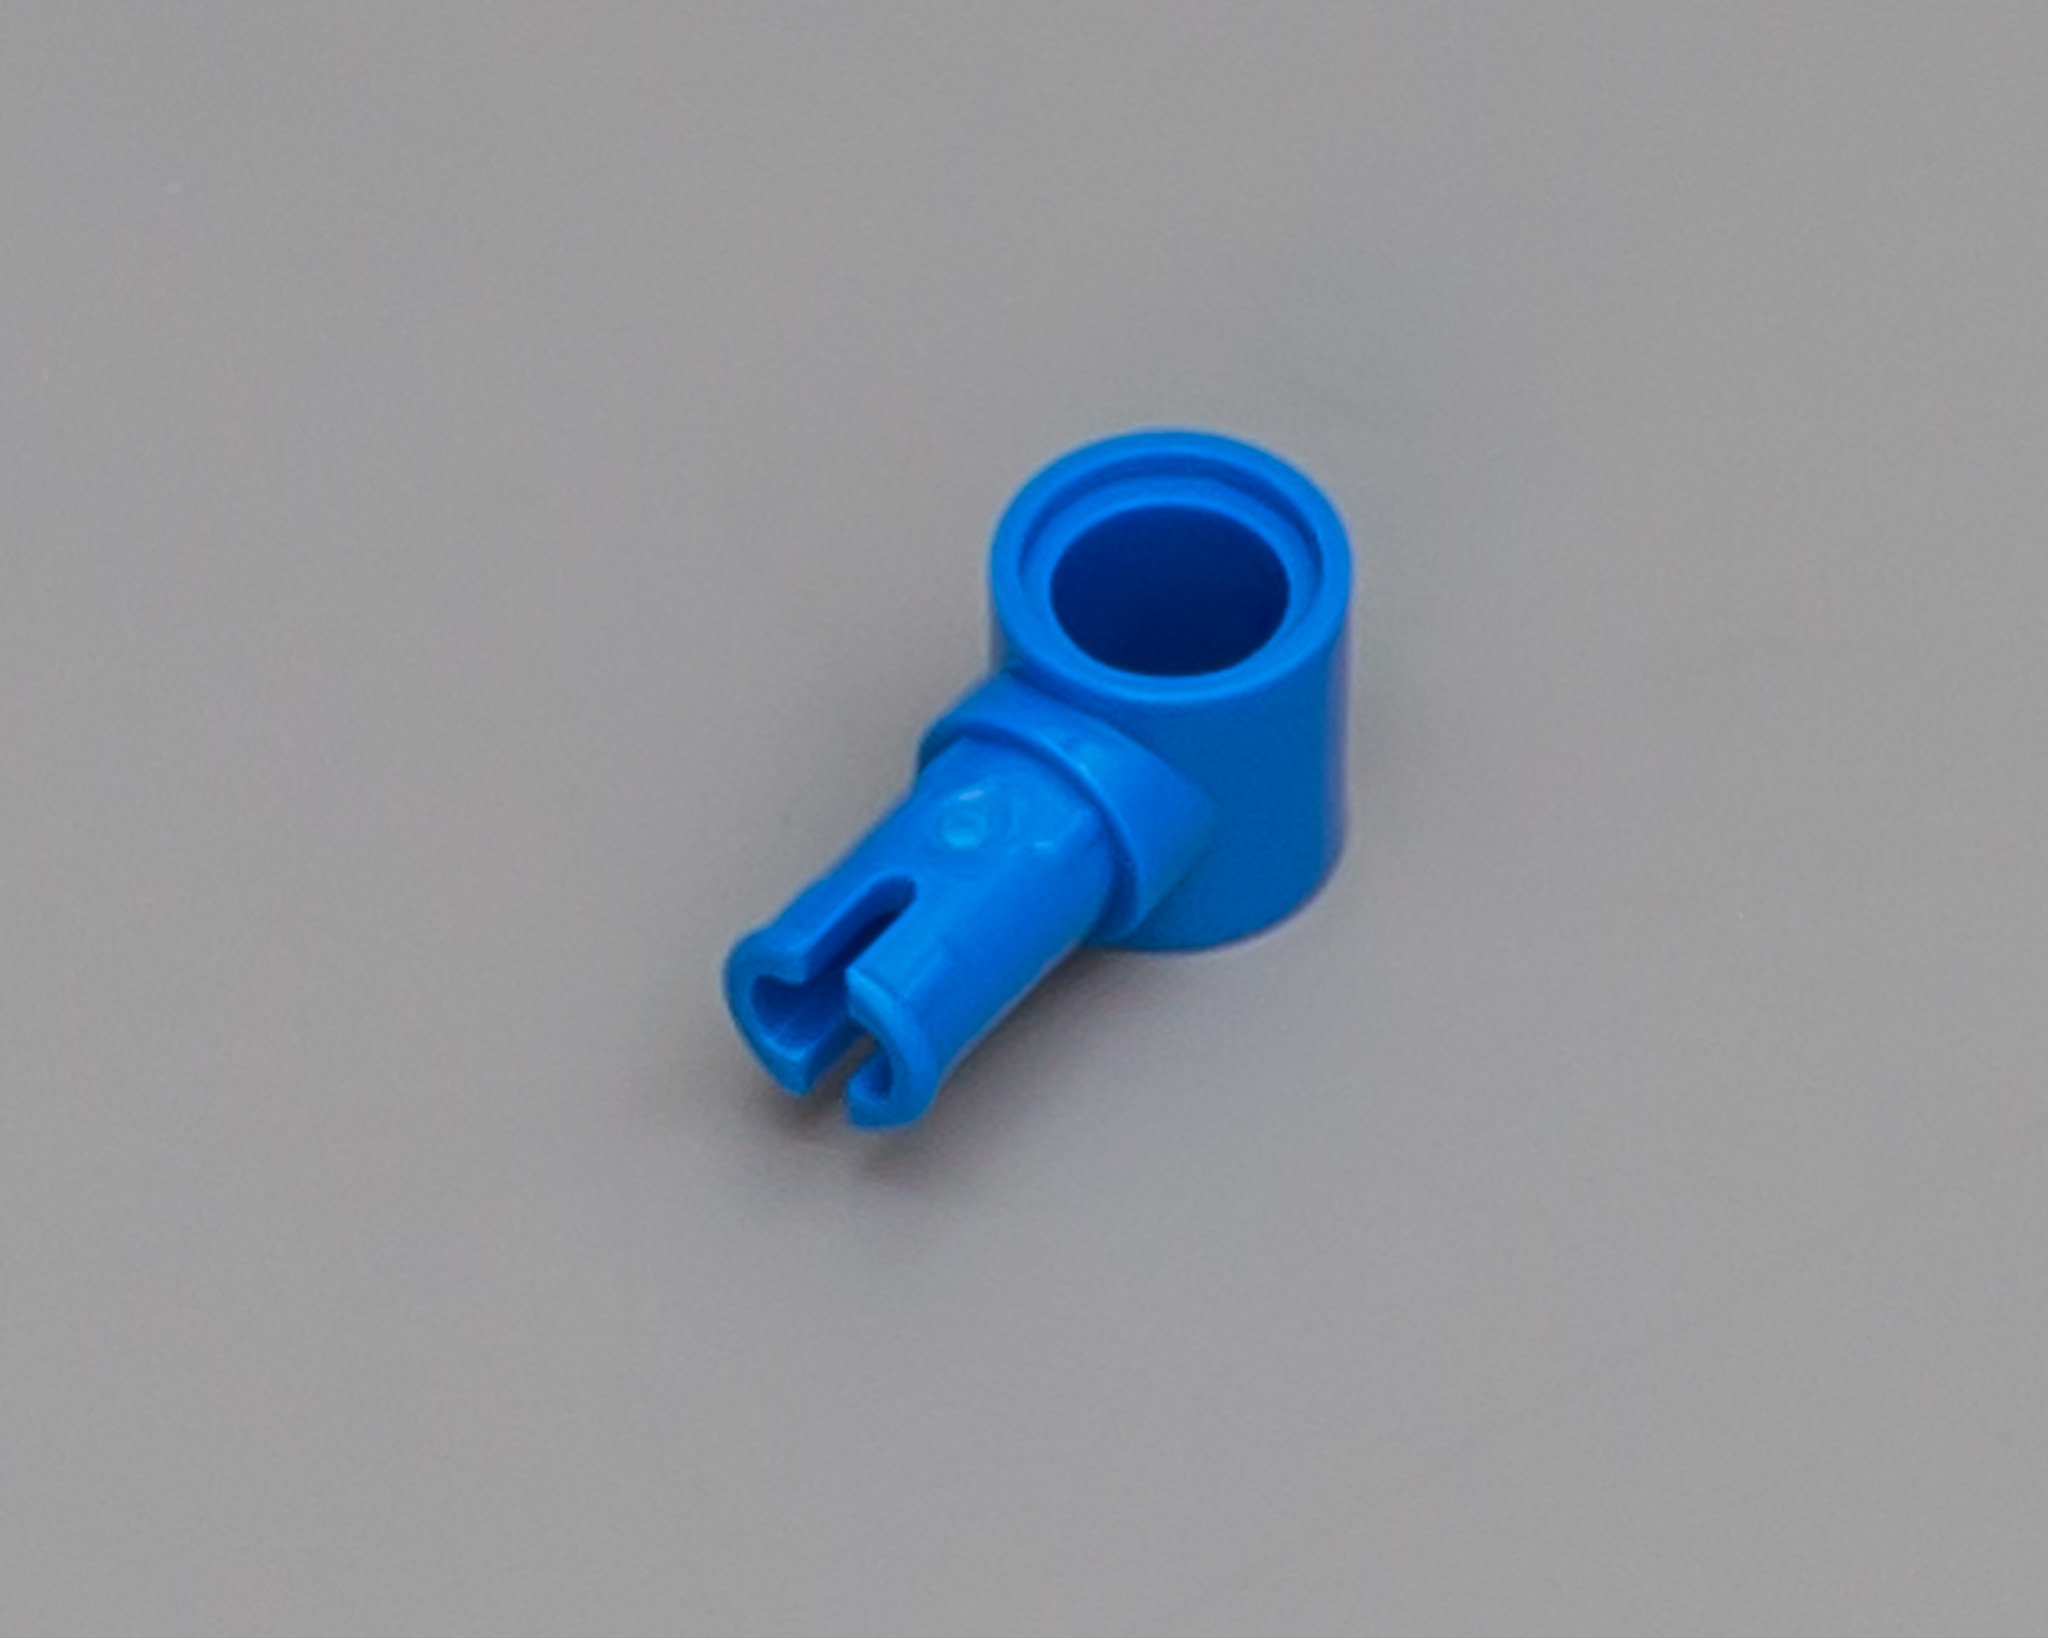
1L PIN CONNECTOR
Both were already available in these colors in 2017, but it's worth noting that this part is getting more and more common in different colors. I do like this part a lot.


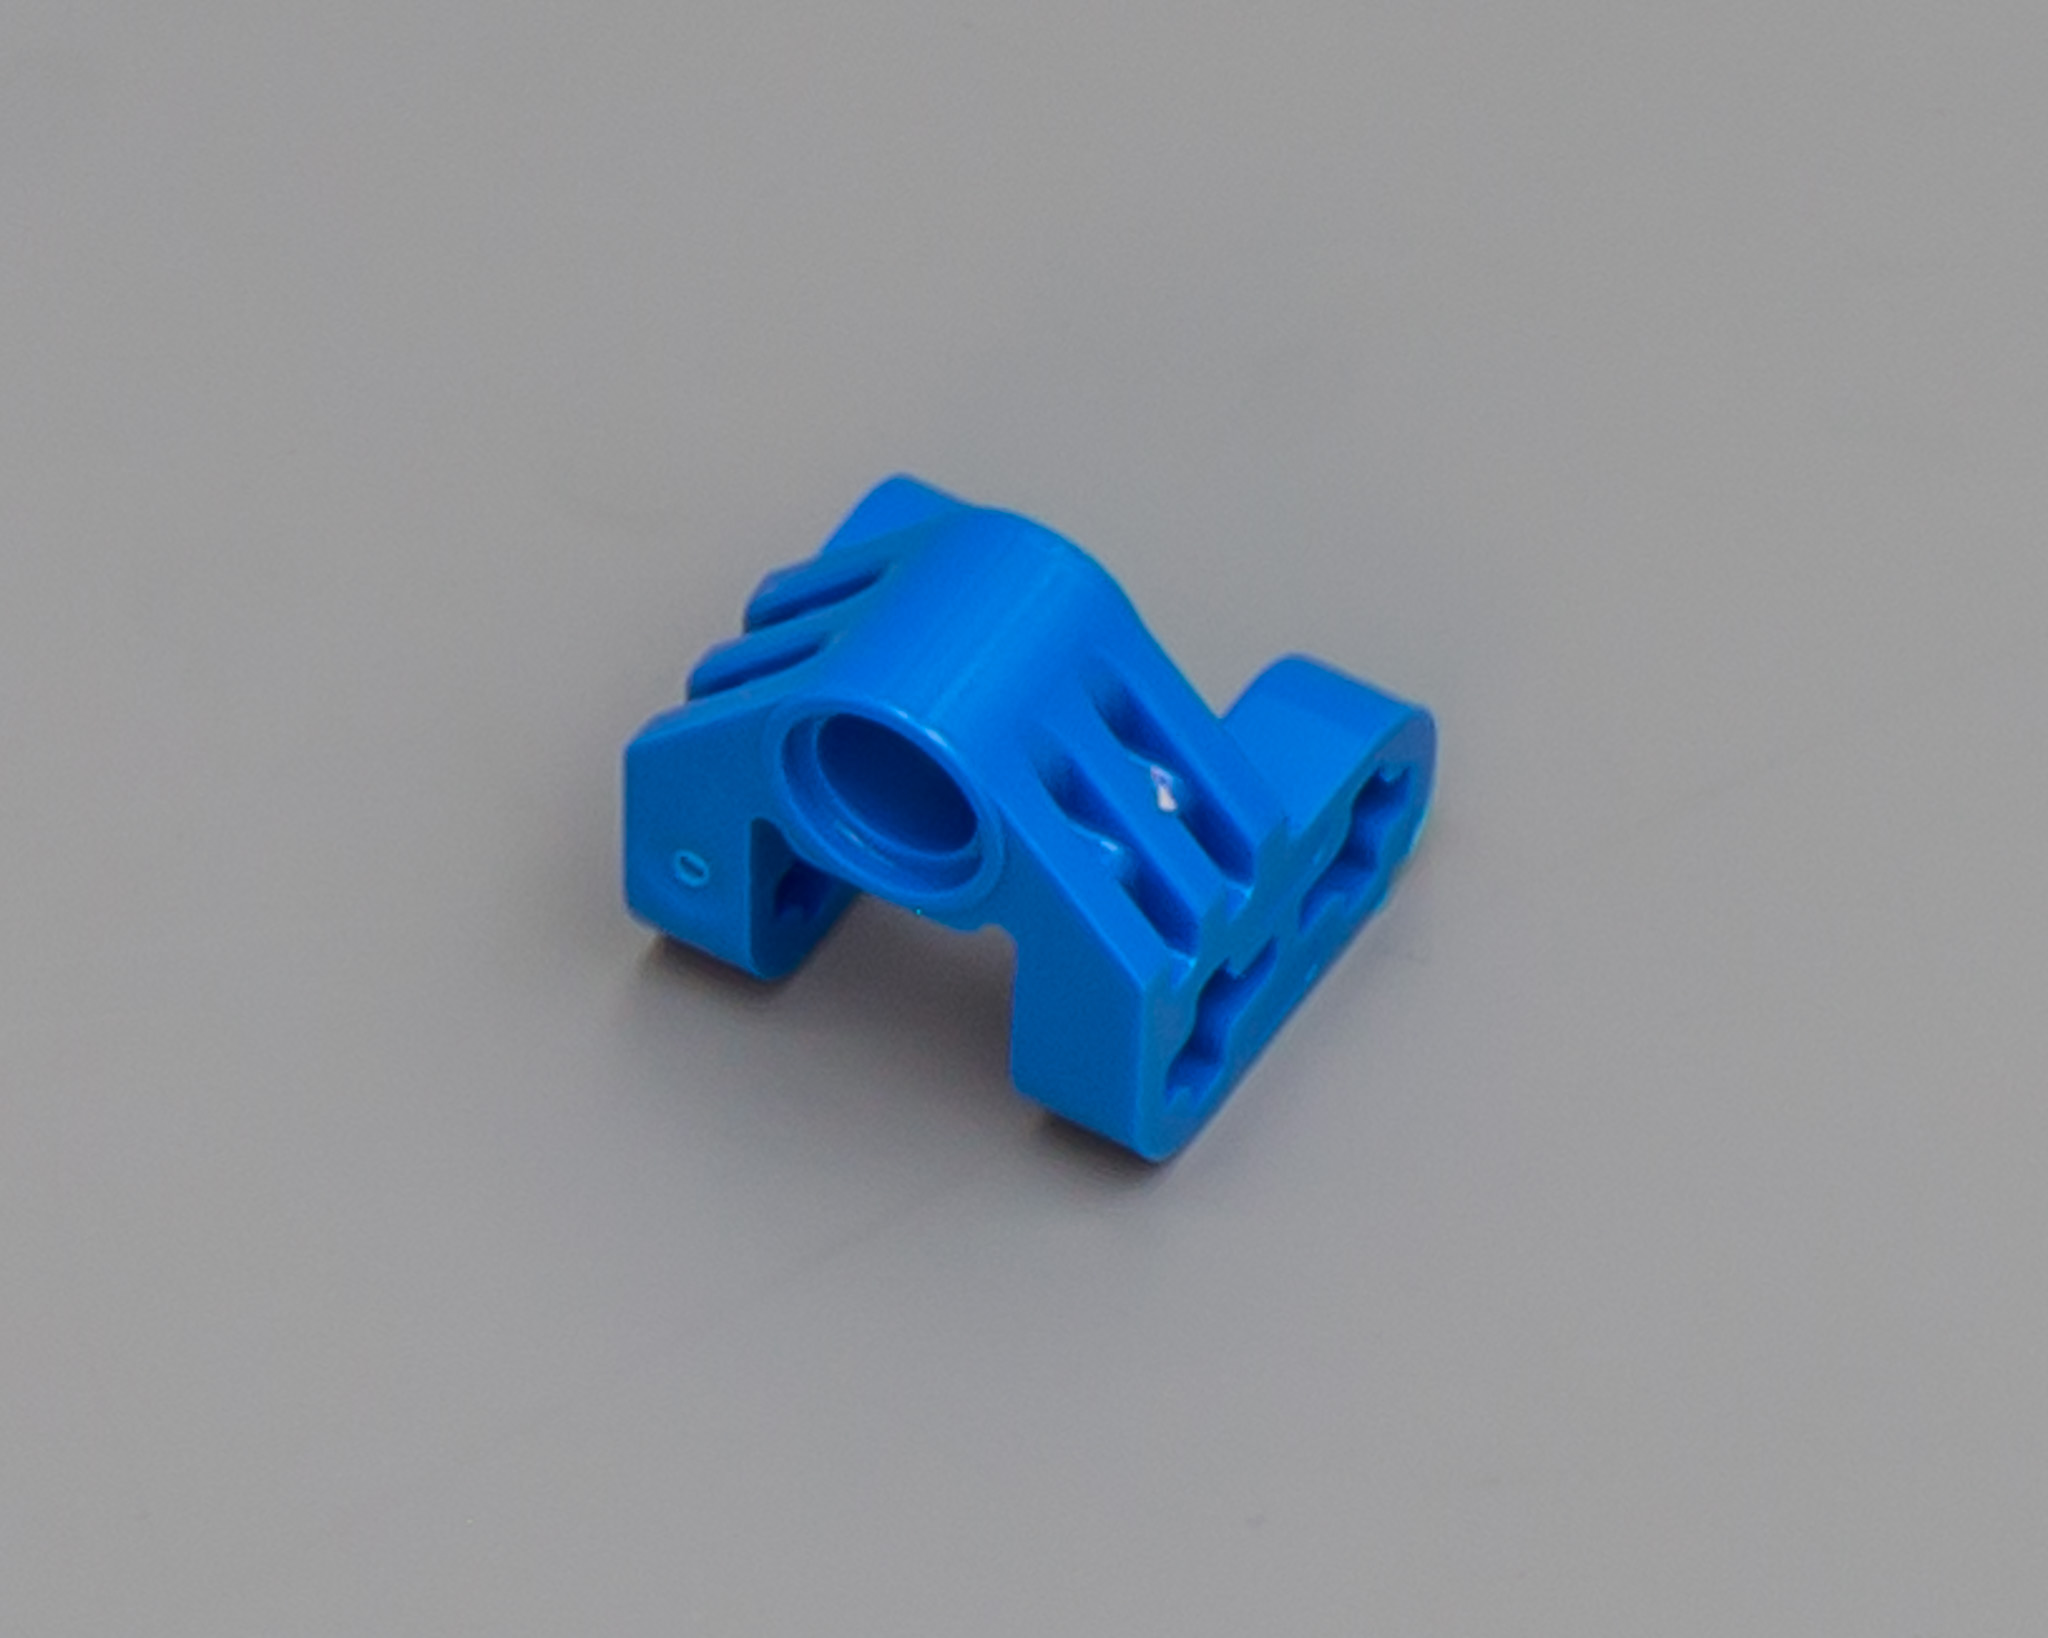
CONNECTORS
New in the regular blue color. Makes you wonder why TLG introduced the connector with hole in blue, since neither of the three sets which have them in blue are depending on this color. TLG tends to use new colors in multiple sets, but we might see the real reason for producing it in one of the future sets. The same goes for the perpendicular split connector btw.
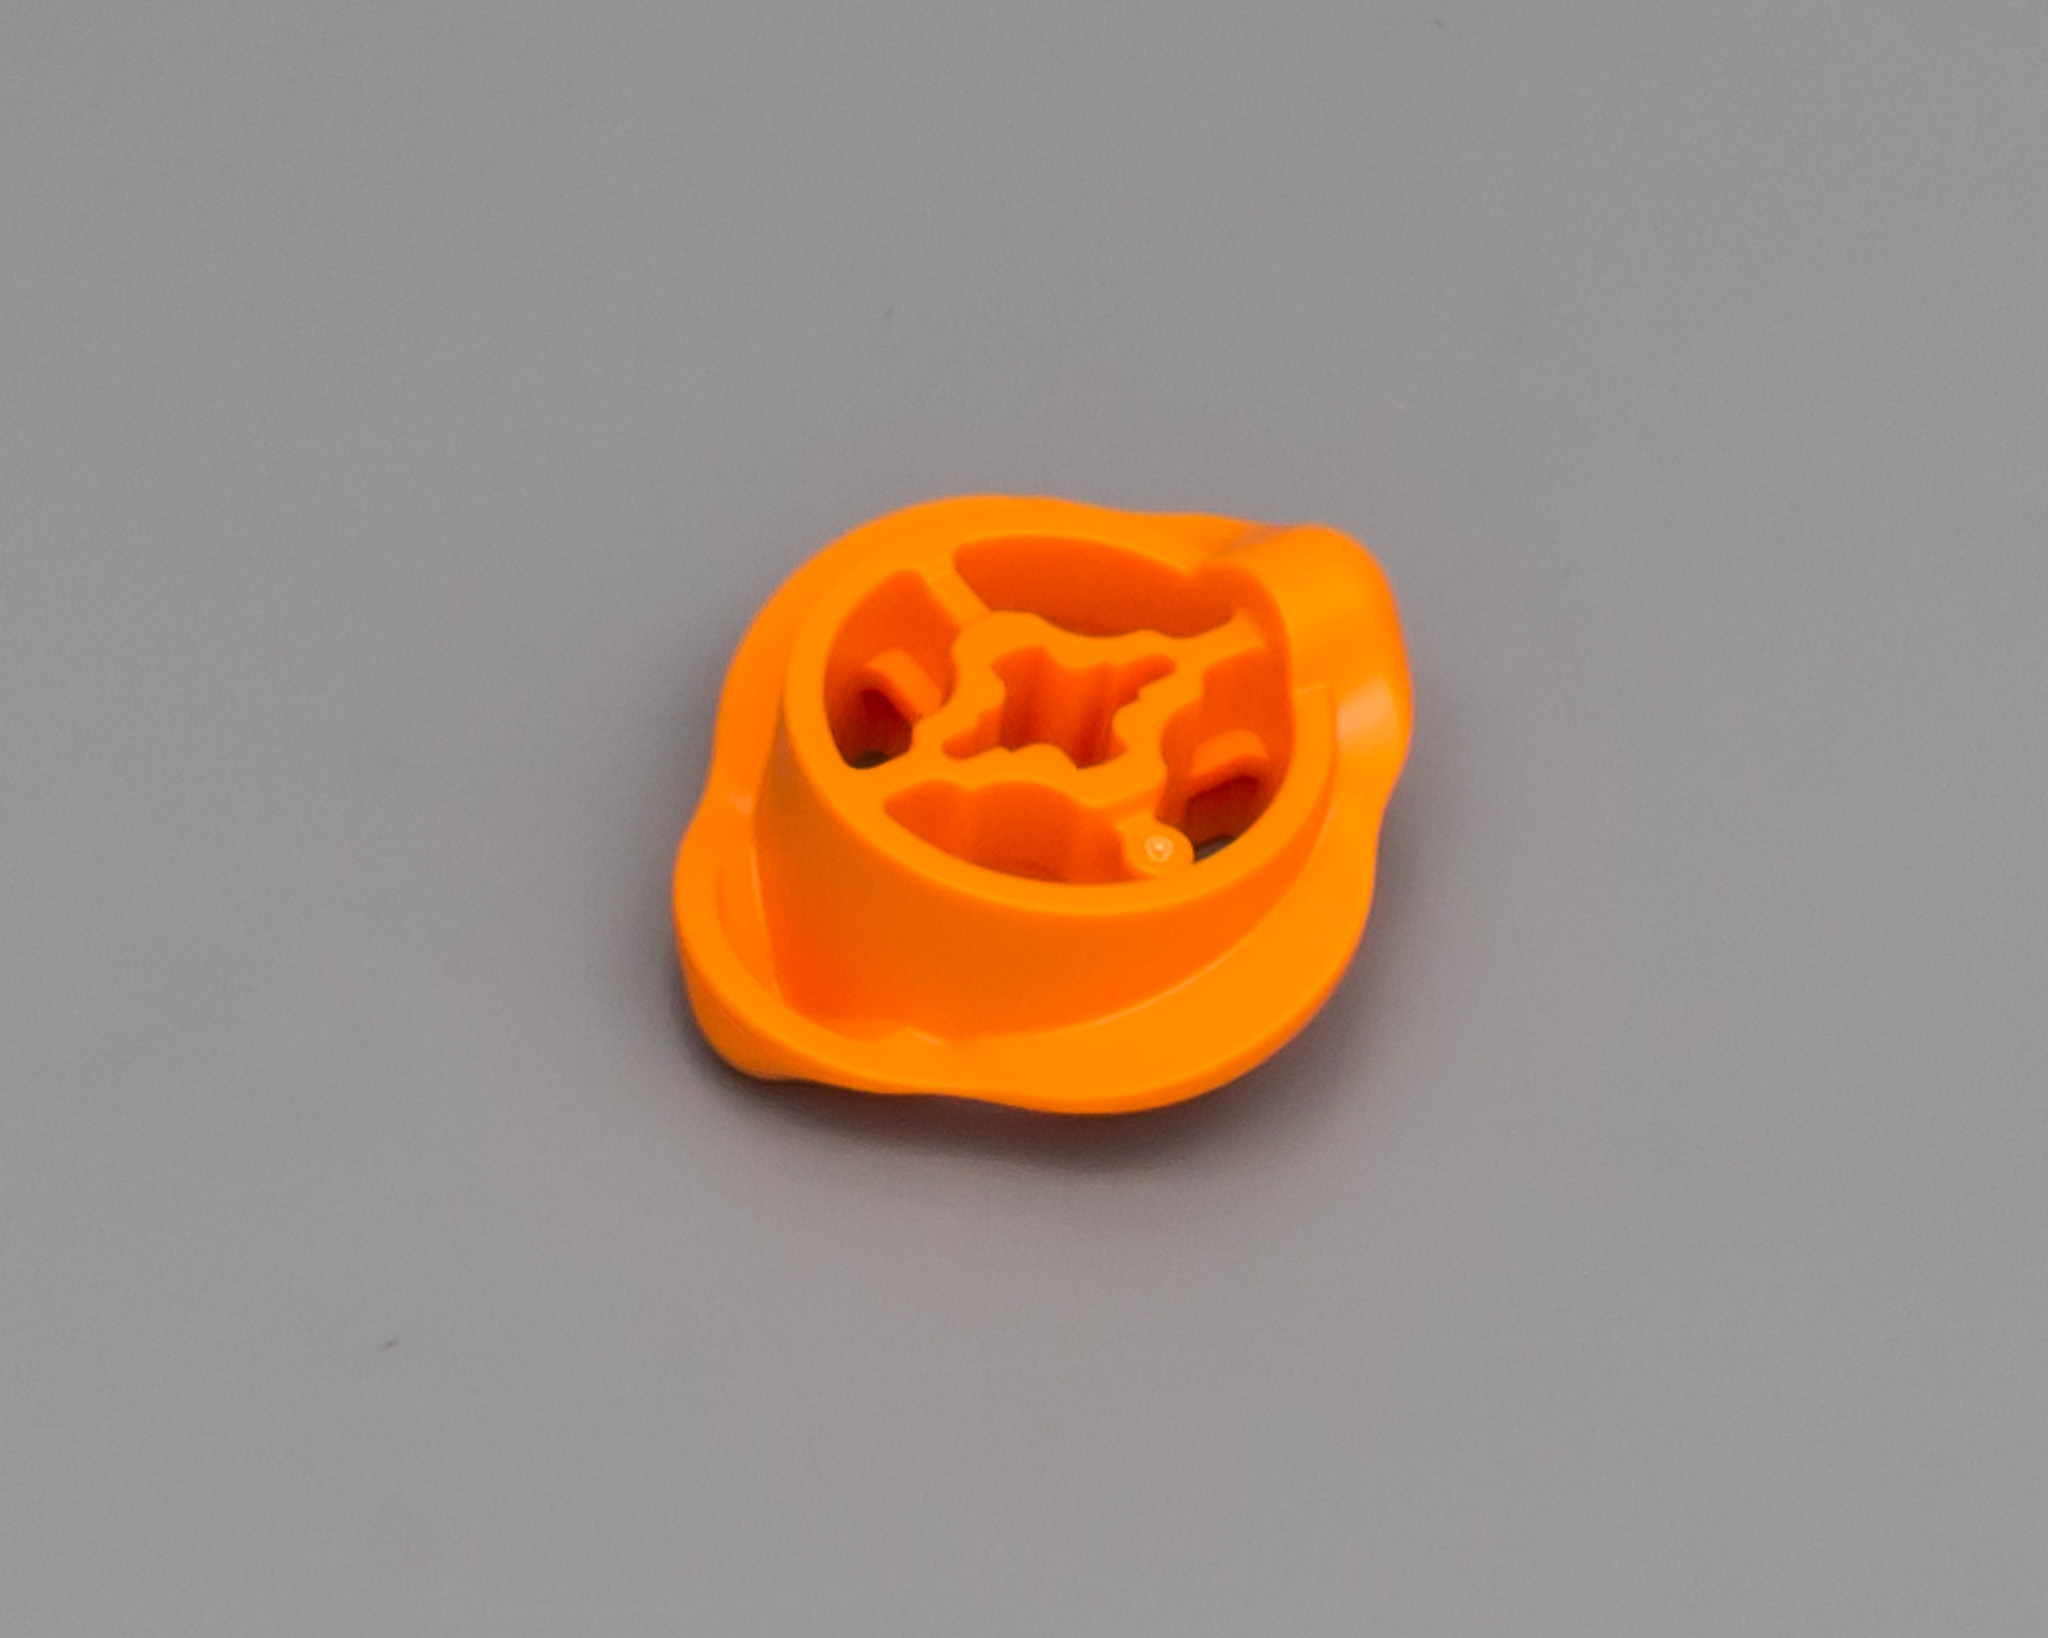
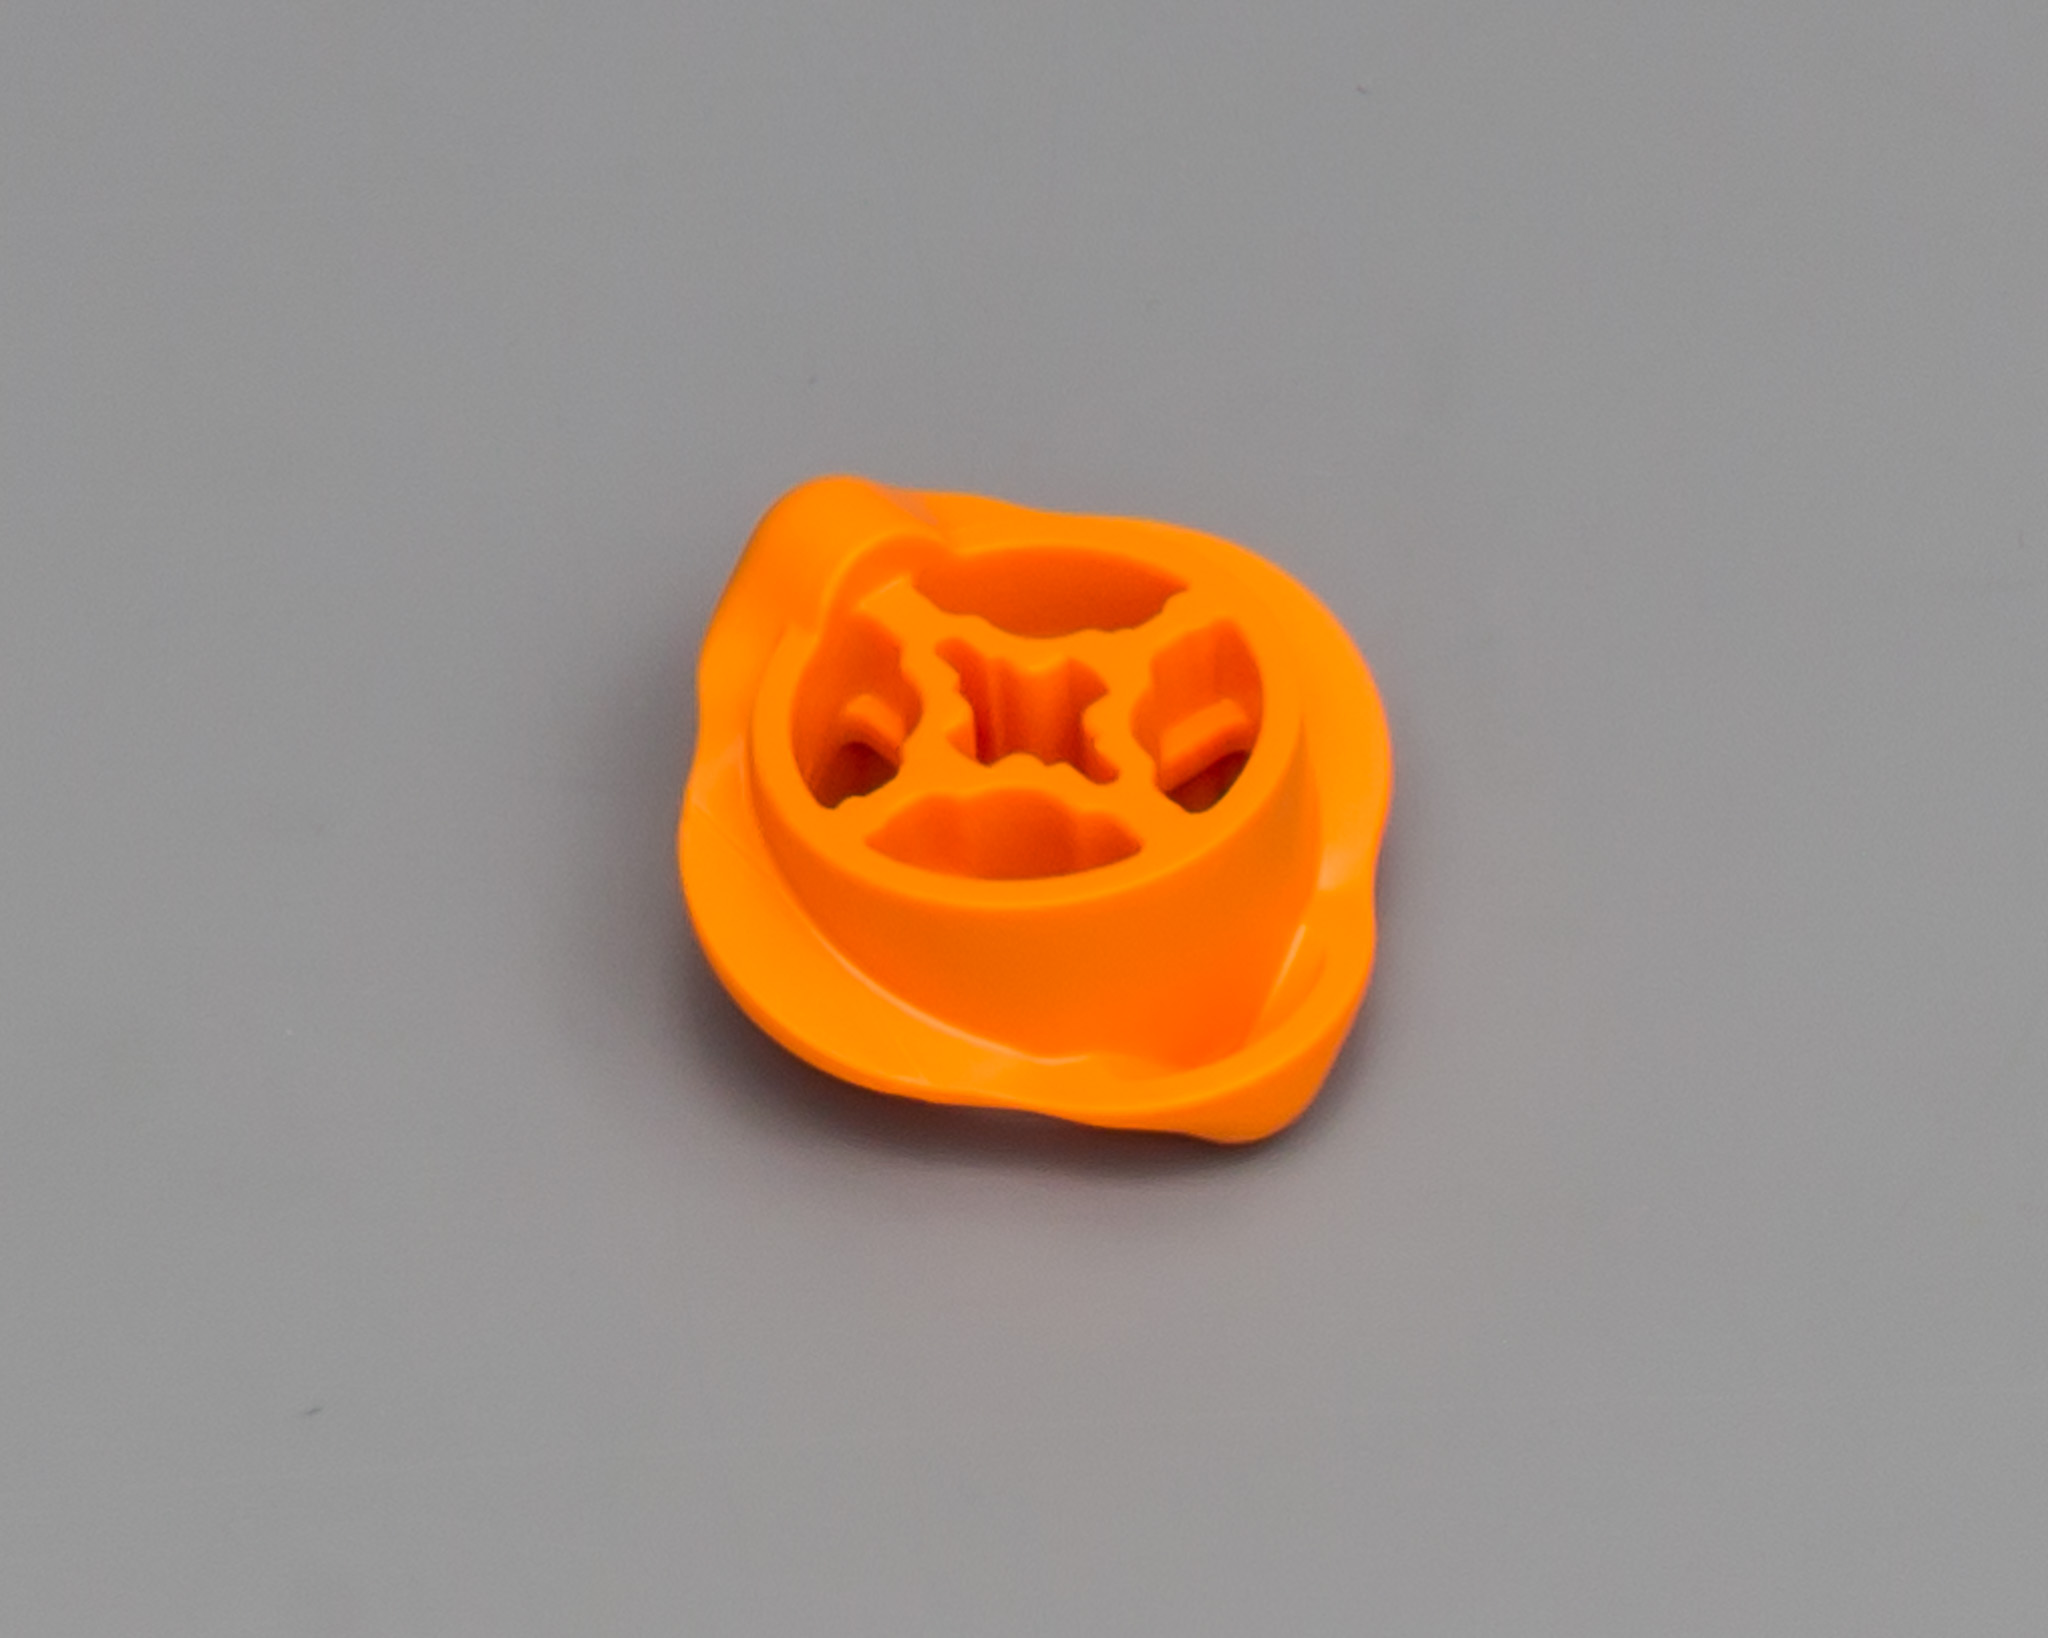
ROTARY CHANGEOVER CATCH
This cool new part is specifically designed for the gearbox on the Chiron. It can engage gears by using a rotary movement, instead of sideways/lateral motion. I'm sure we will see cool new applications for this part in future sets. I heard something about it being used in one of the 2H sets already.
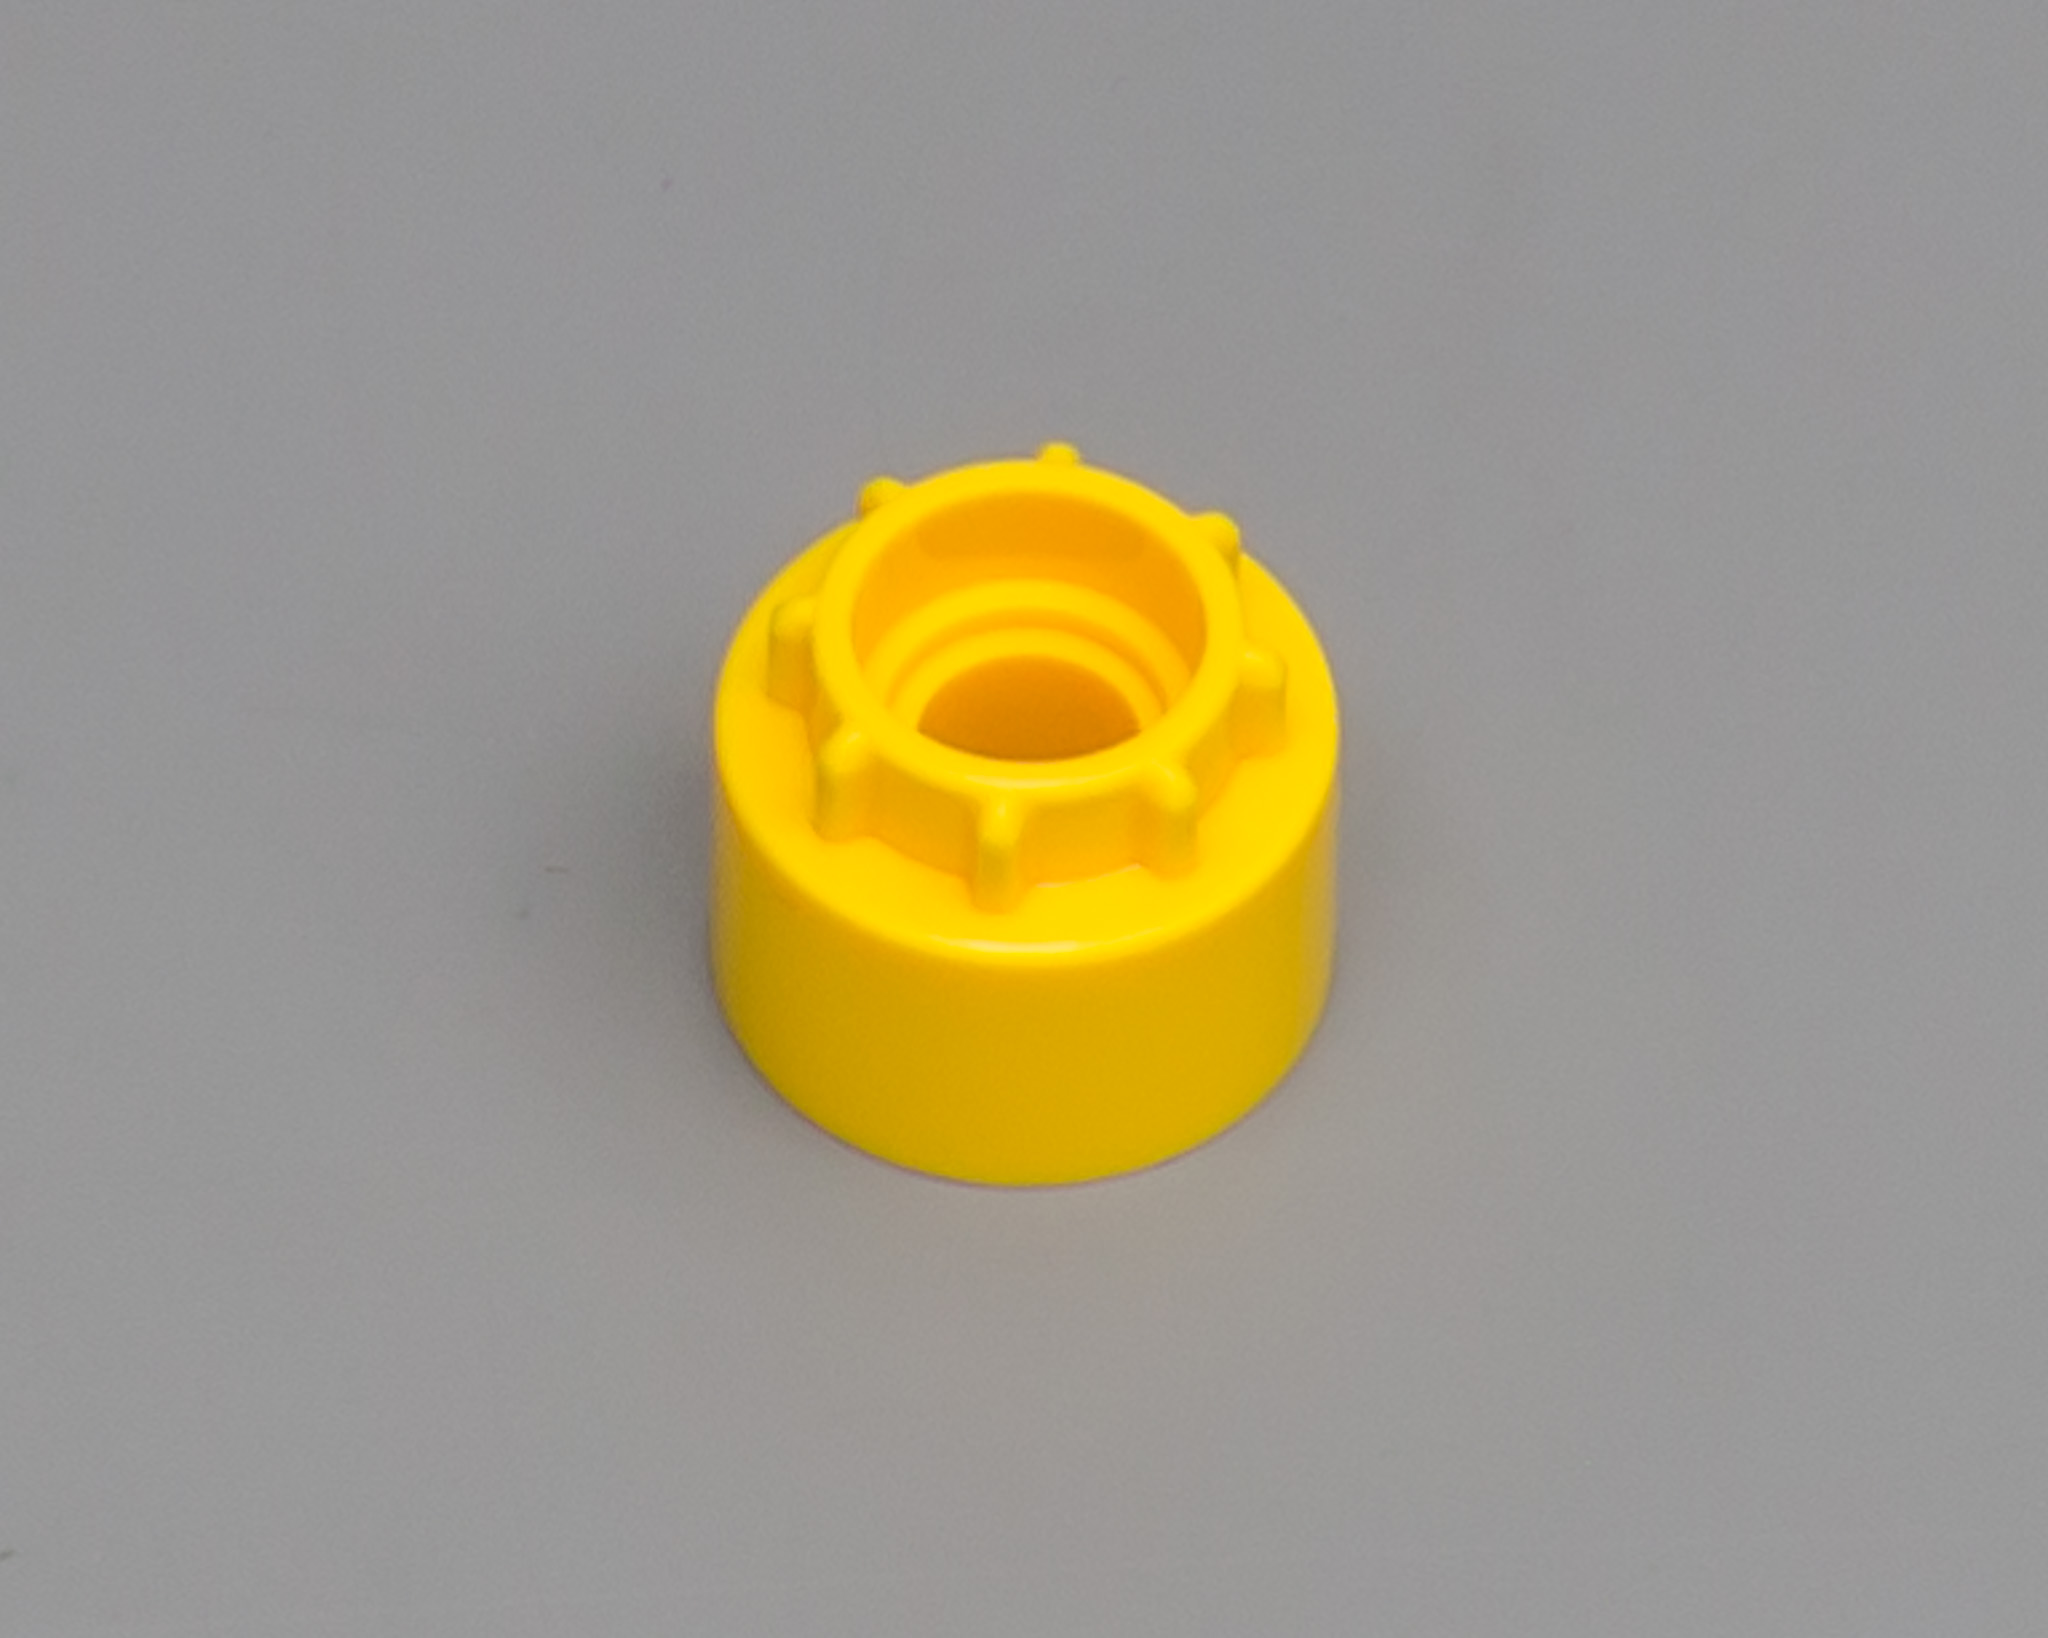
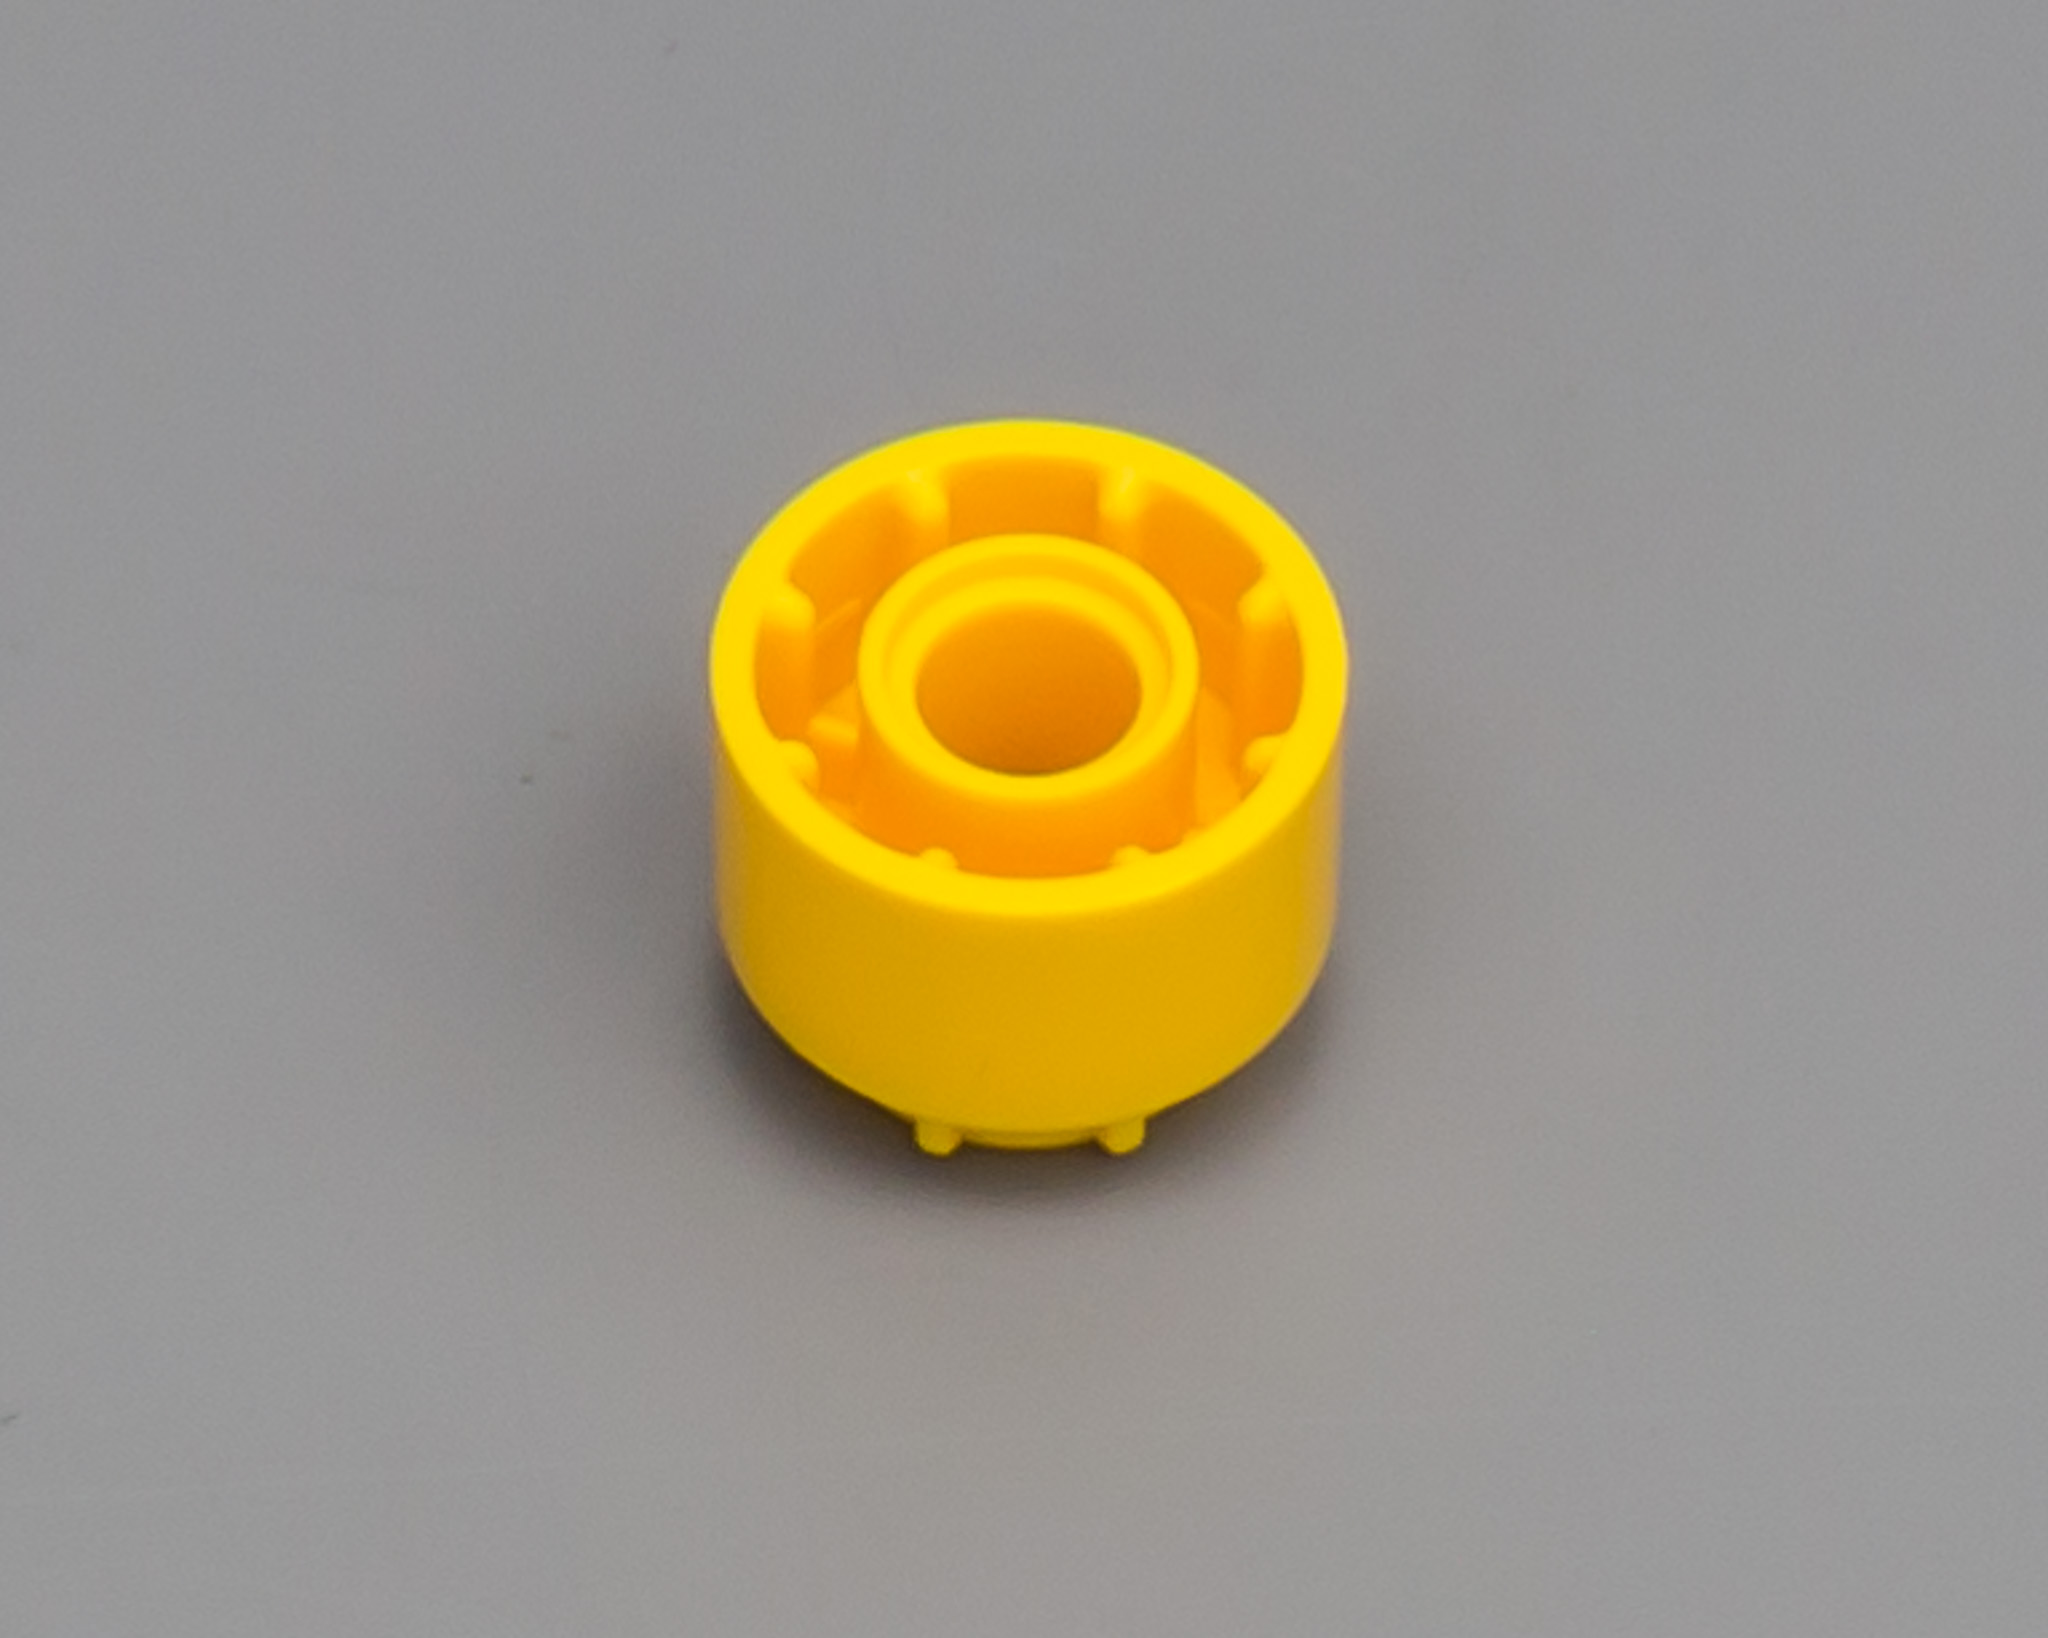
DRIVING RING EXTENSION
This new driving ring extension has 8 teeth inside, which results in less slack.
20T DOUBLE BEVEL GEAR WITH CLUTCH
This gear is basicallyh the same as the regular 20T bevel gear, but it has a pin hole, instead of axle hole. And it has clutches on both sides.

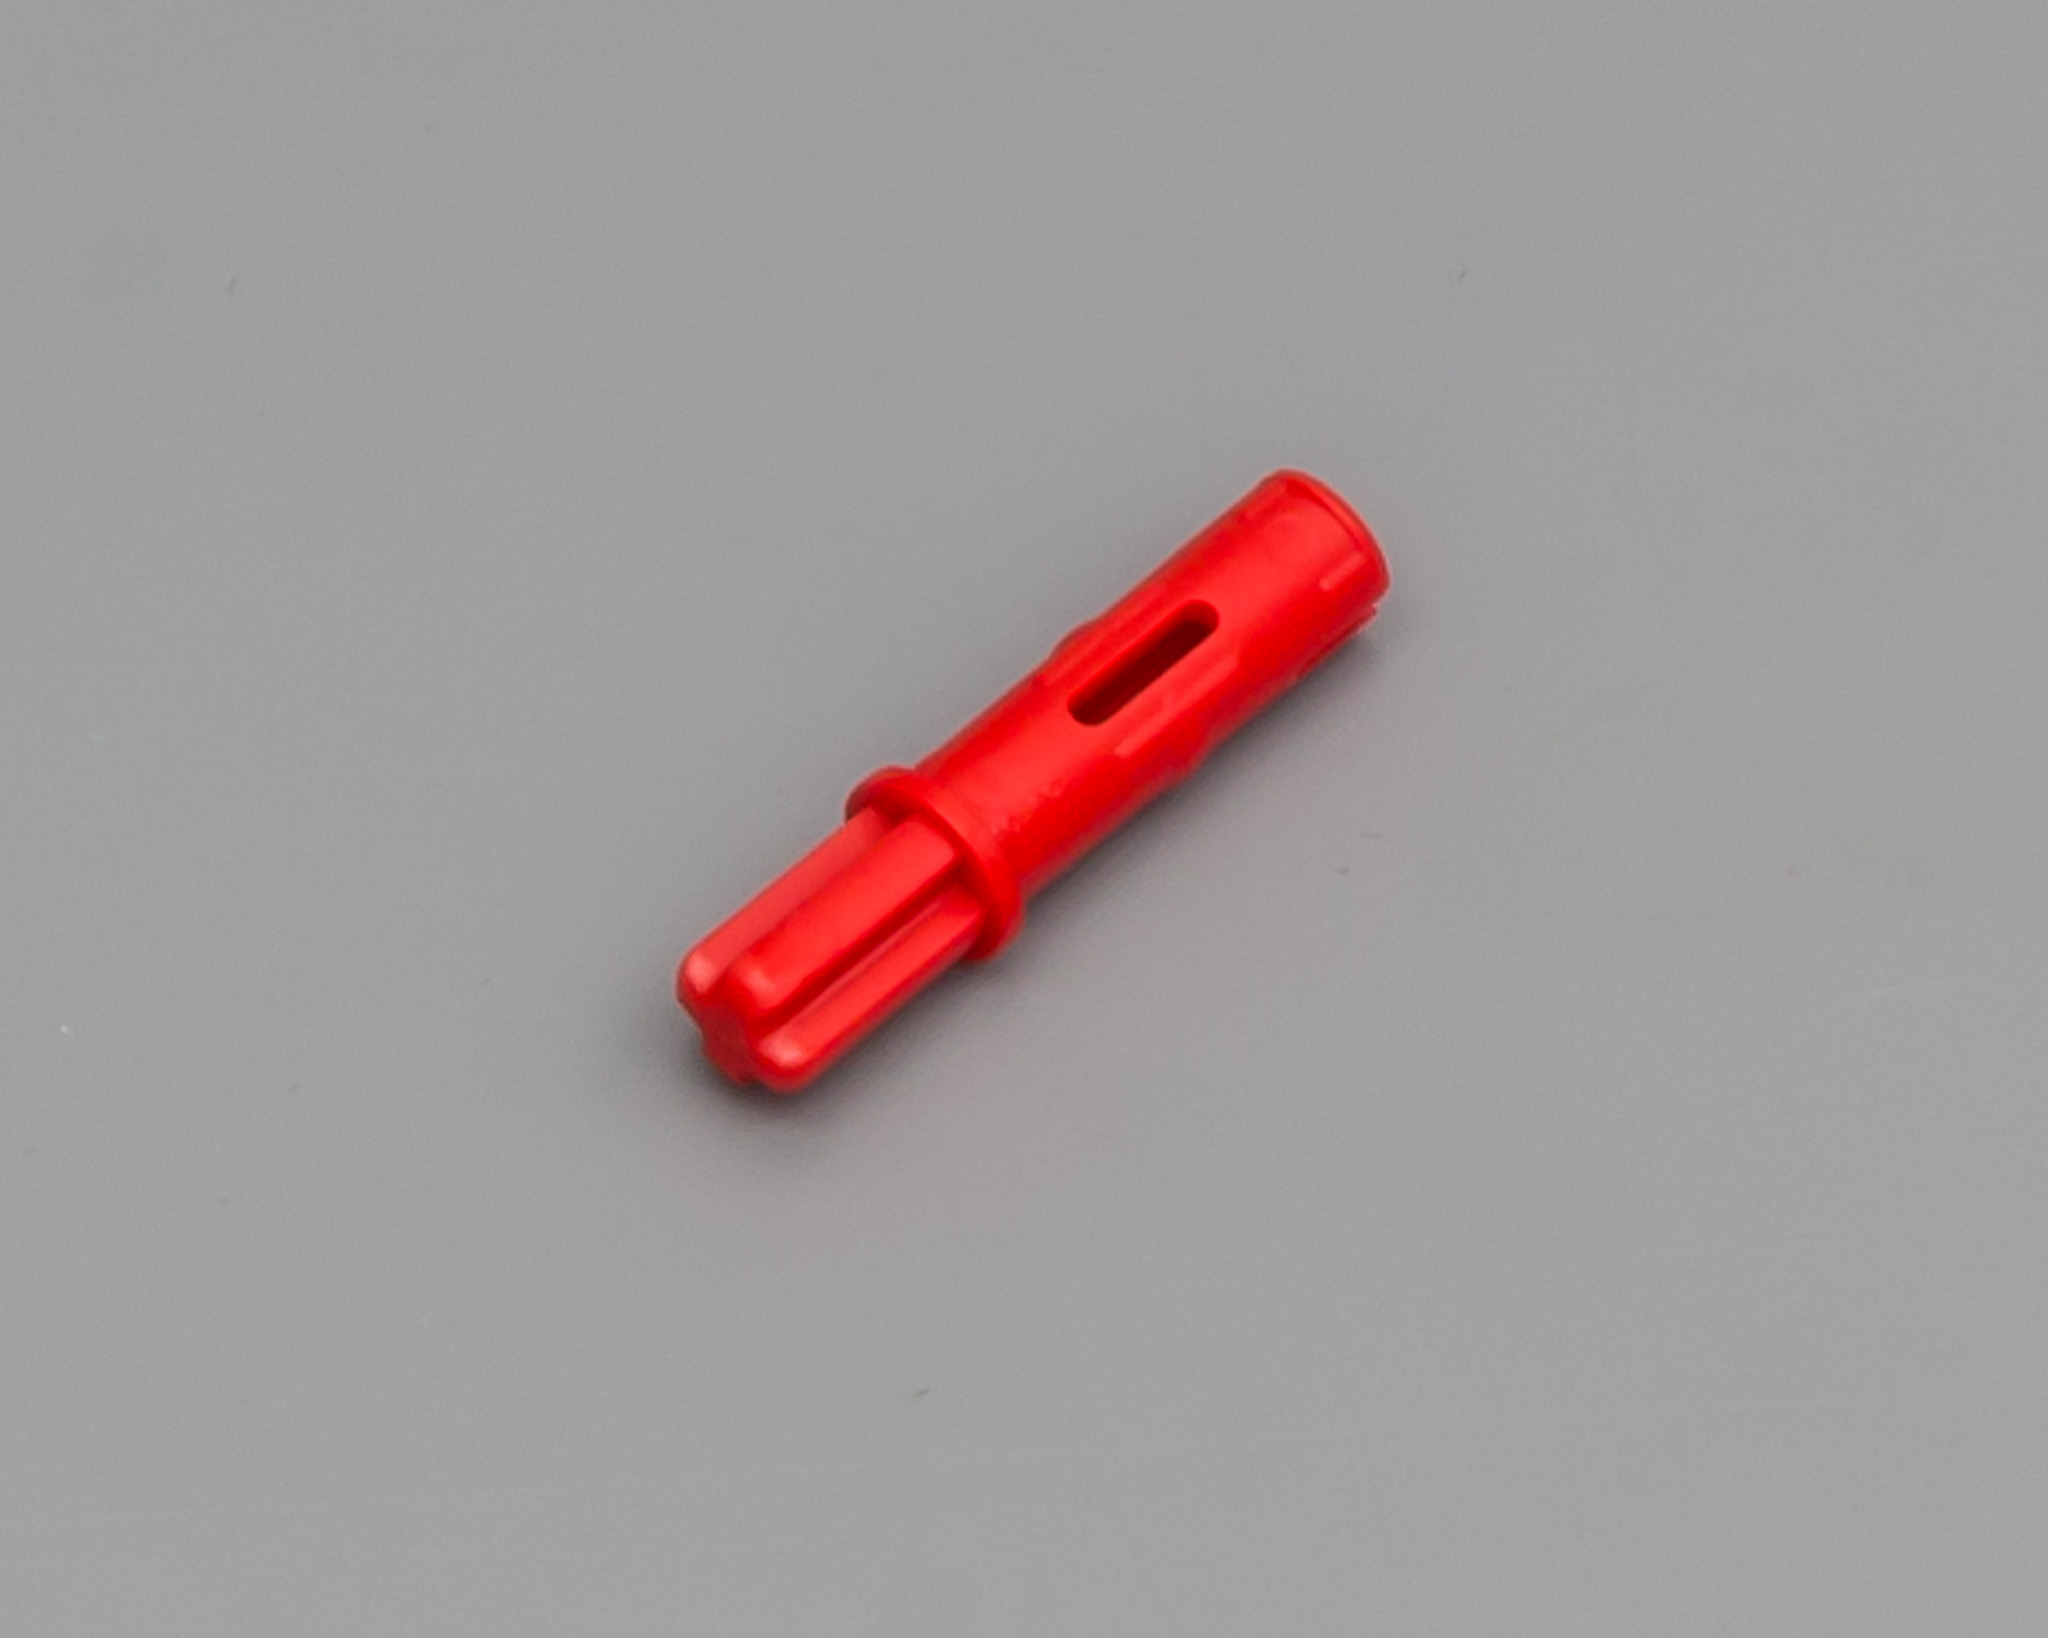
3L AXLE PIN
Most likely, following the "we need more colors" pattern we have seen lately, this part is introduced in red this year. We used to have dark bluish grey for this part, but now we have red too. I wonder if dark bluish grey will be phased out.
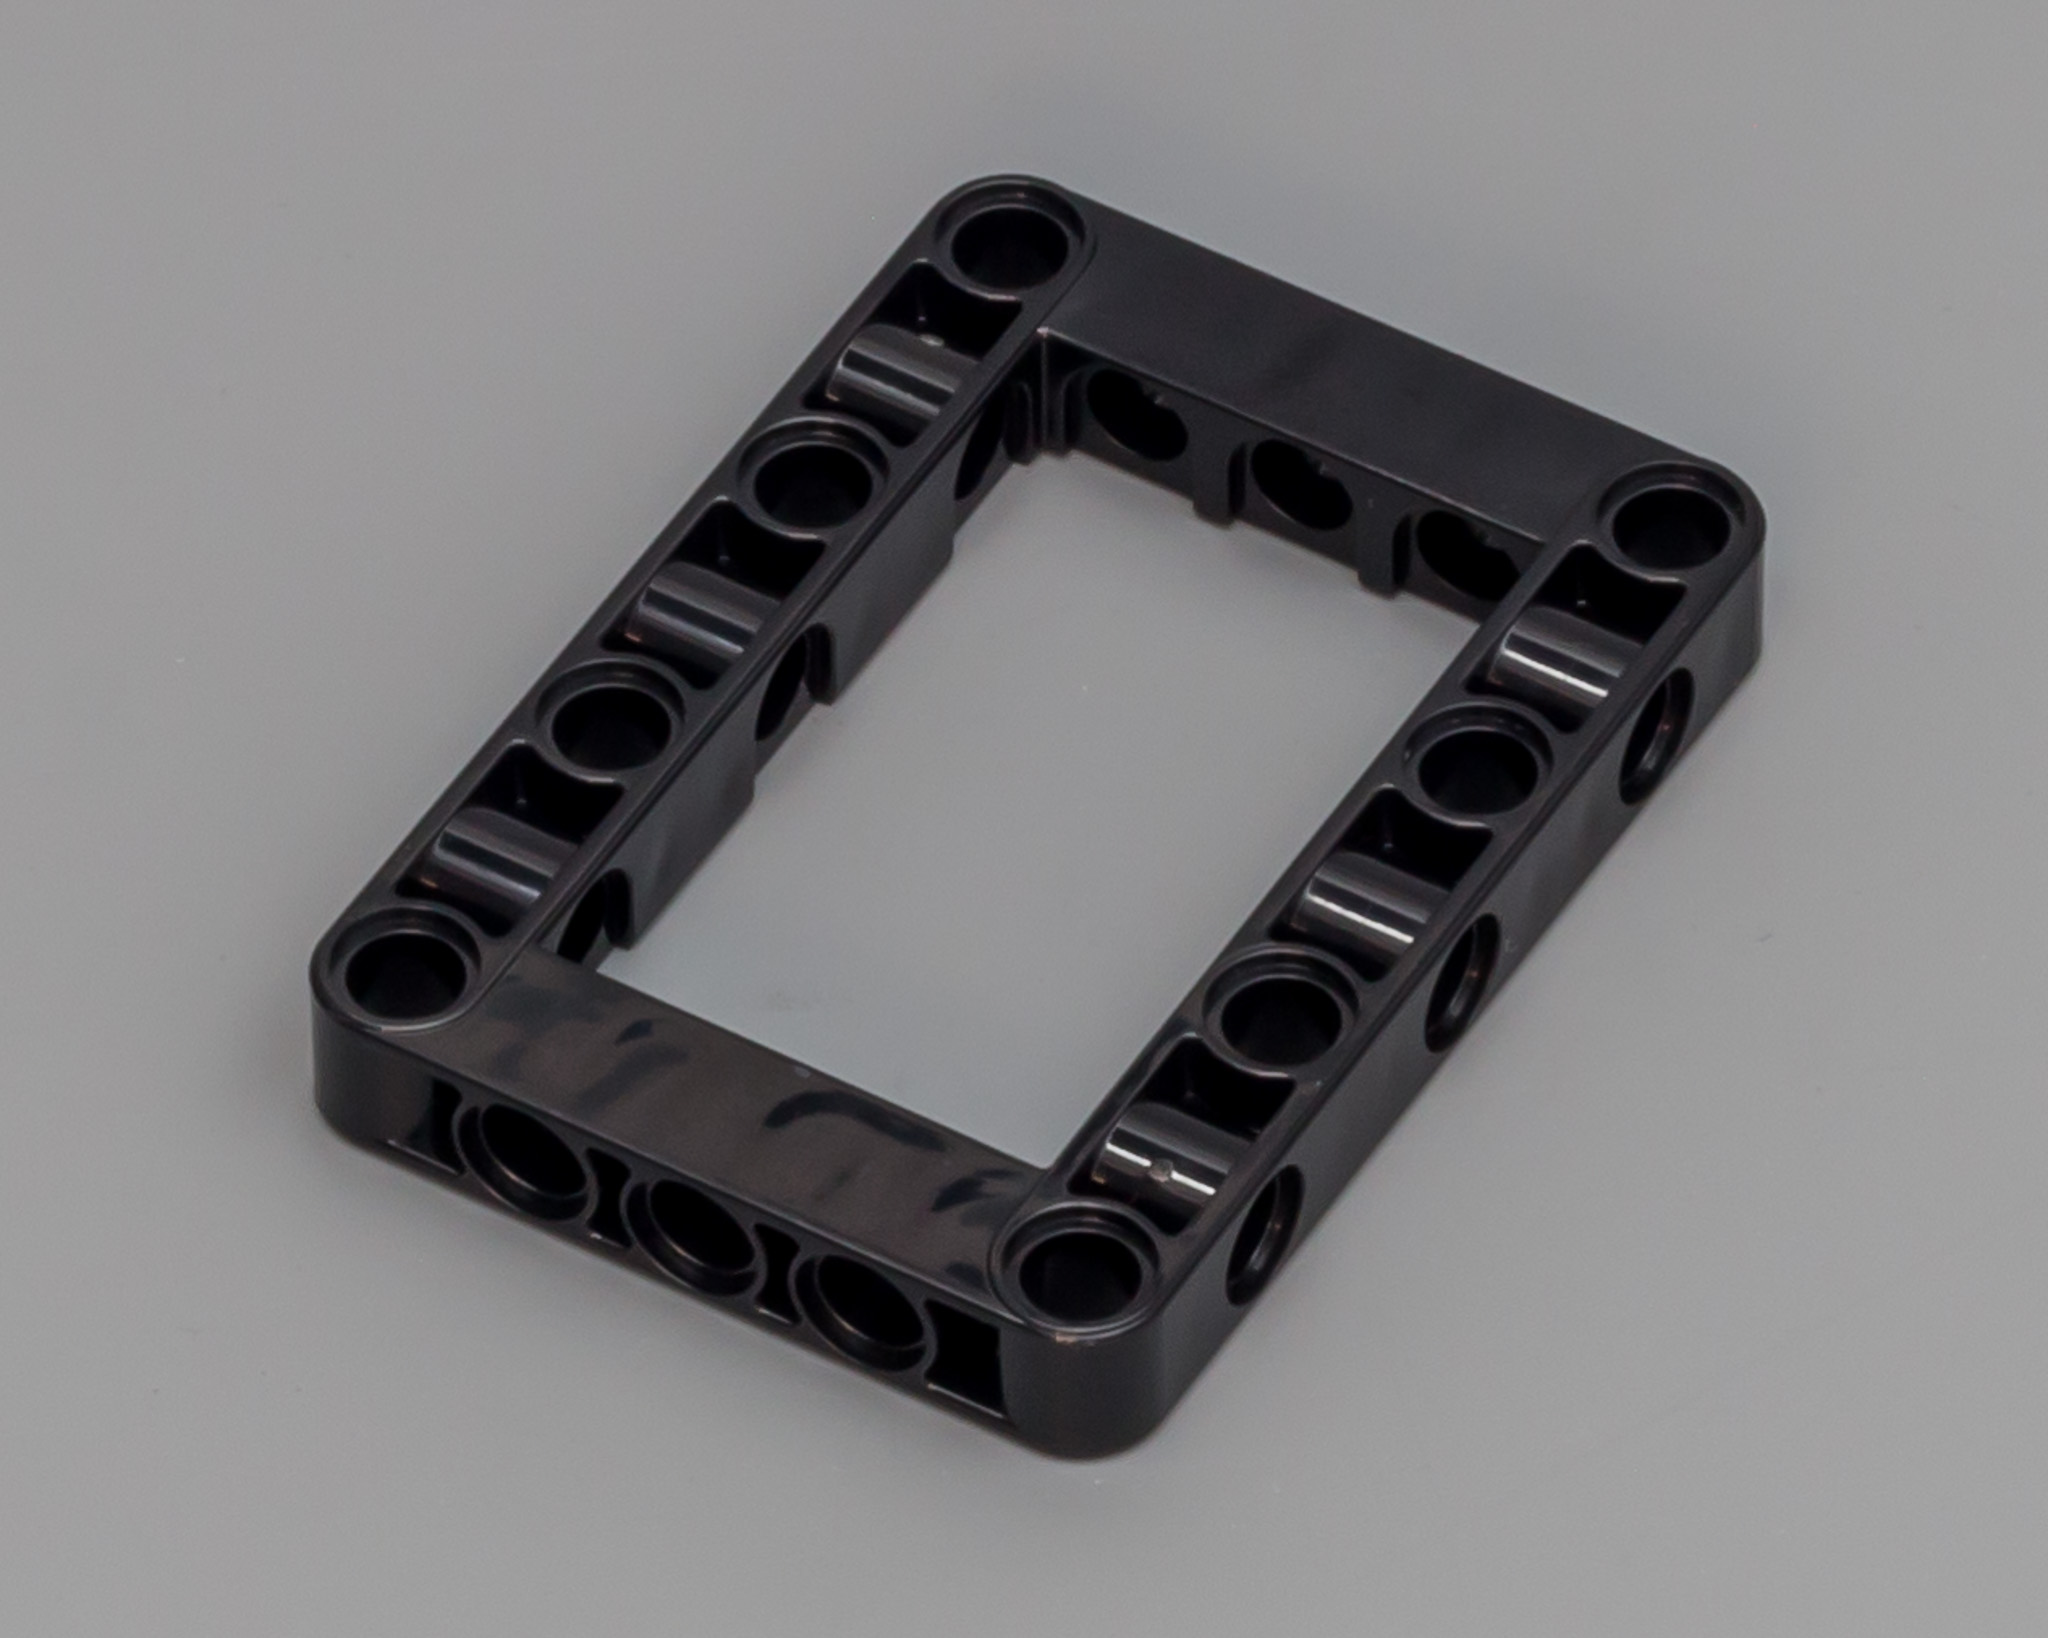
5 x 7 FRAME
If you need 5 x 7 frames in black, this is the set for you. Besides buying them separately, this is your best choice to get lots (16) of 'em.
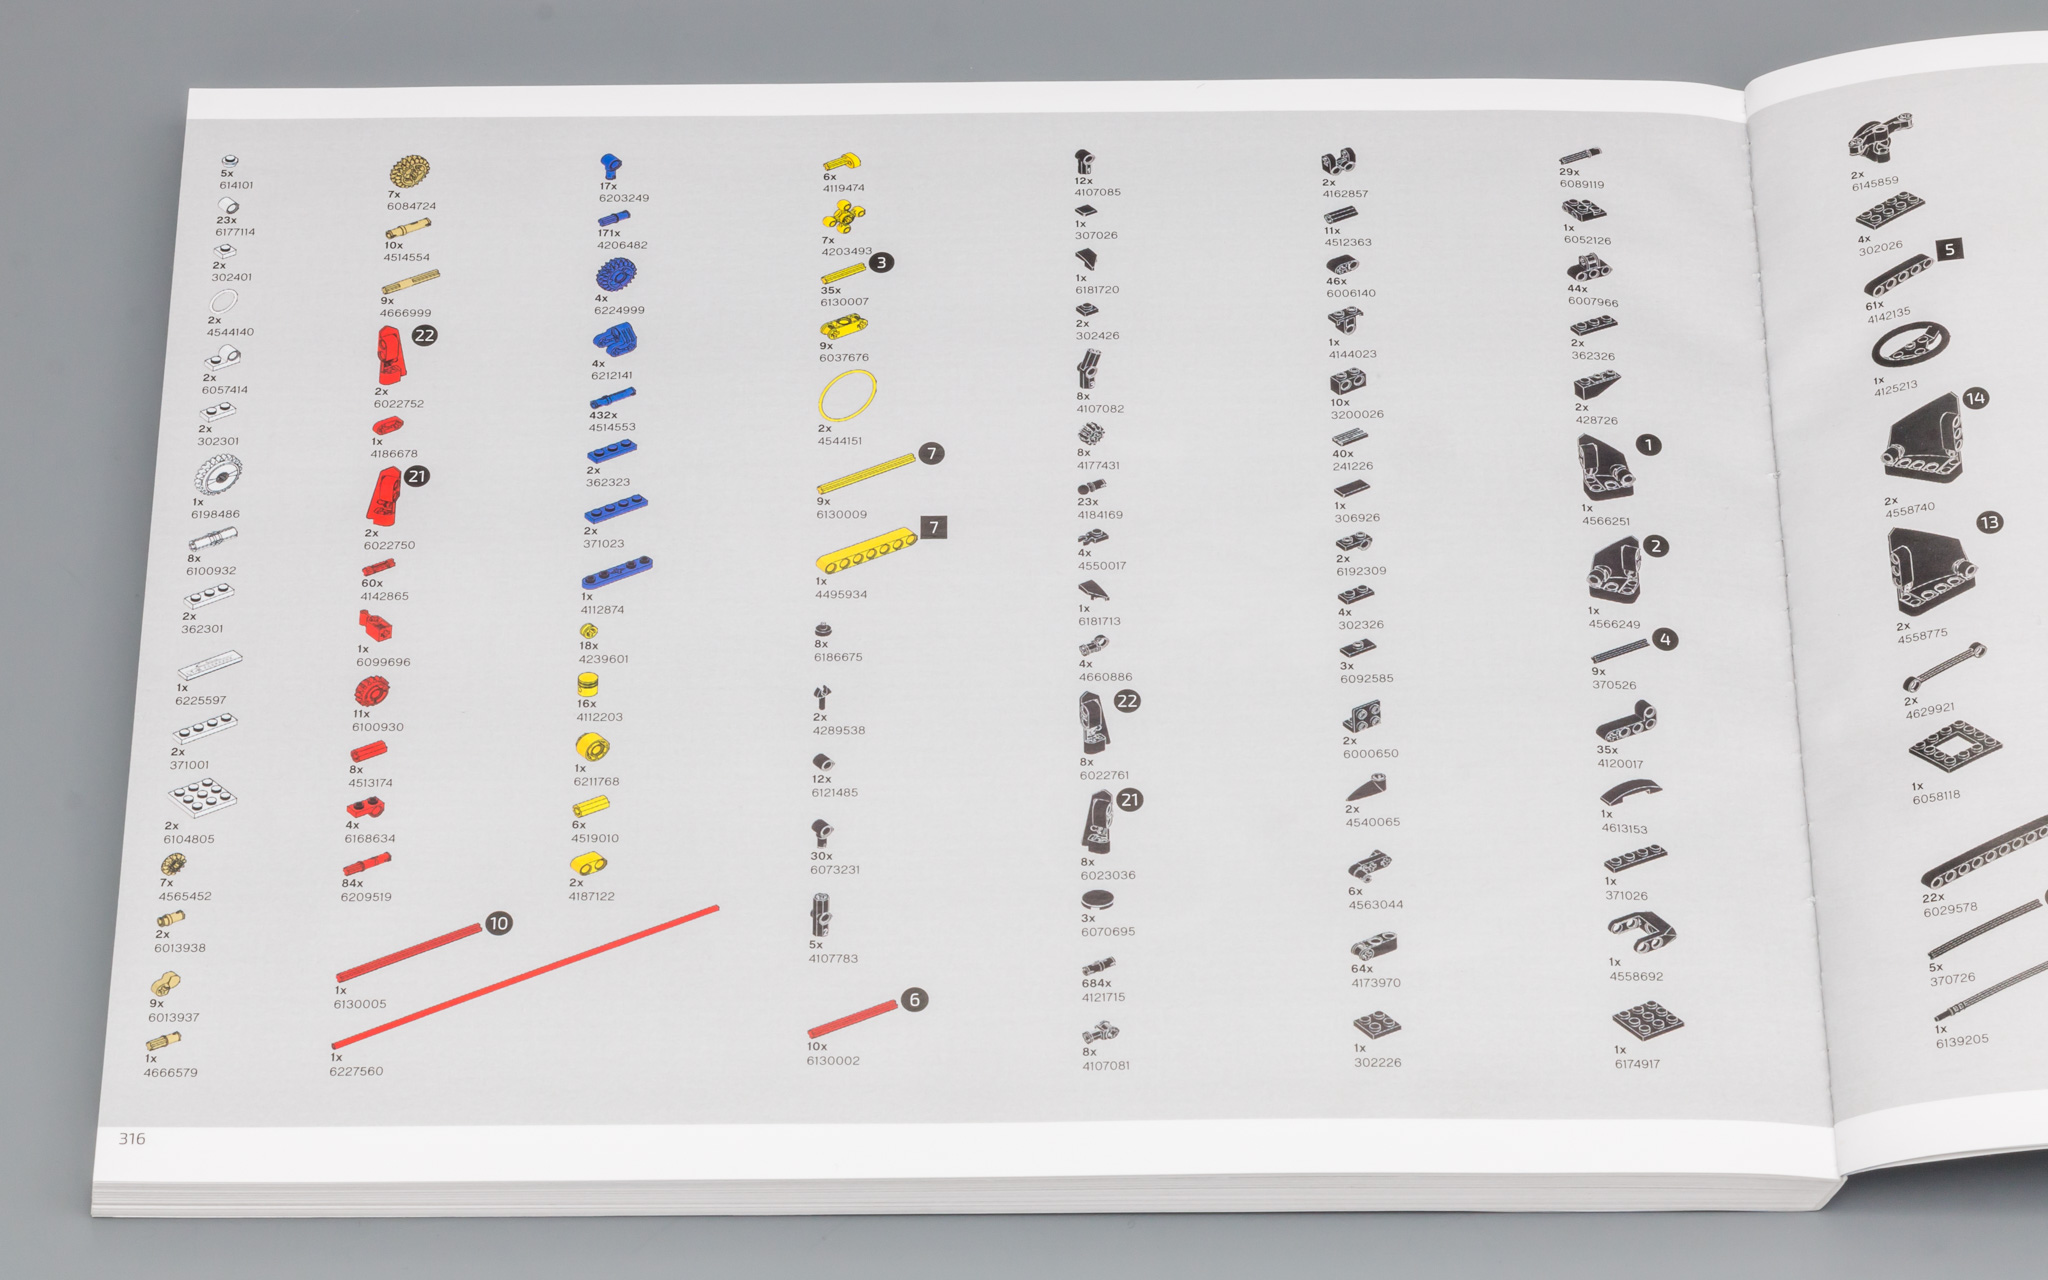
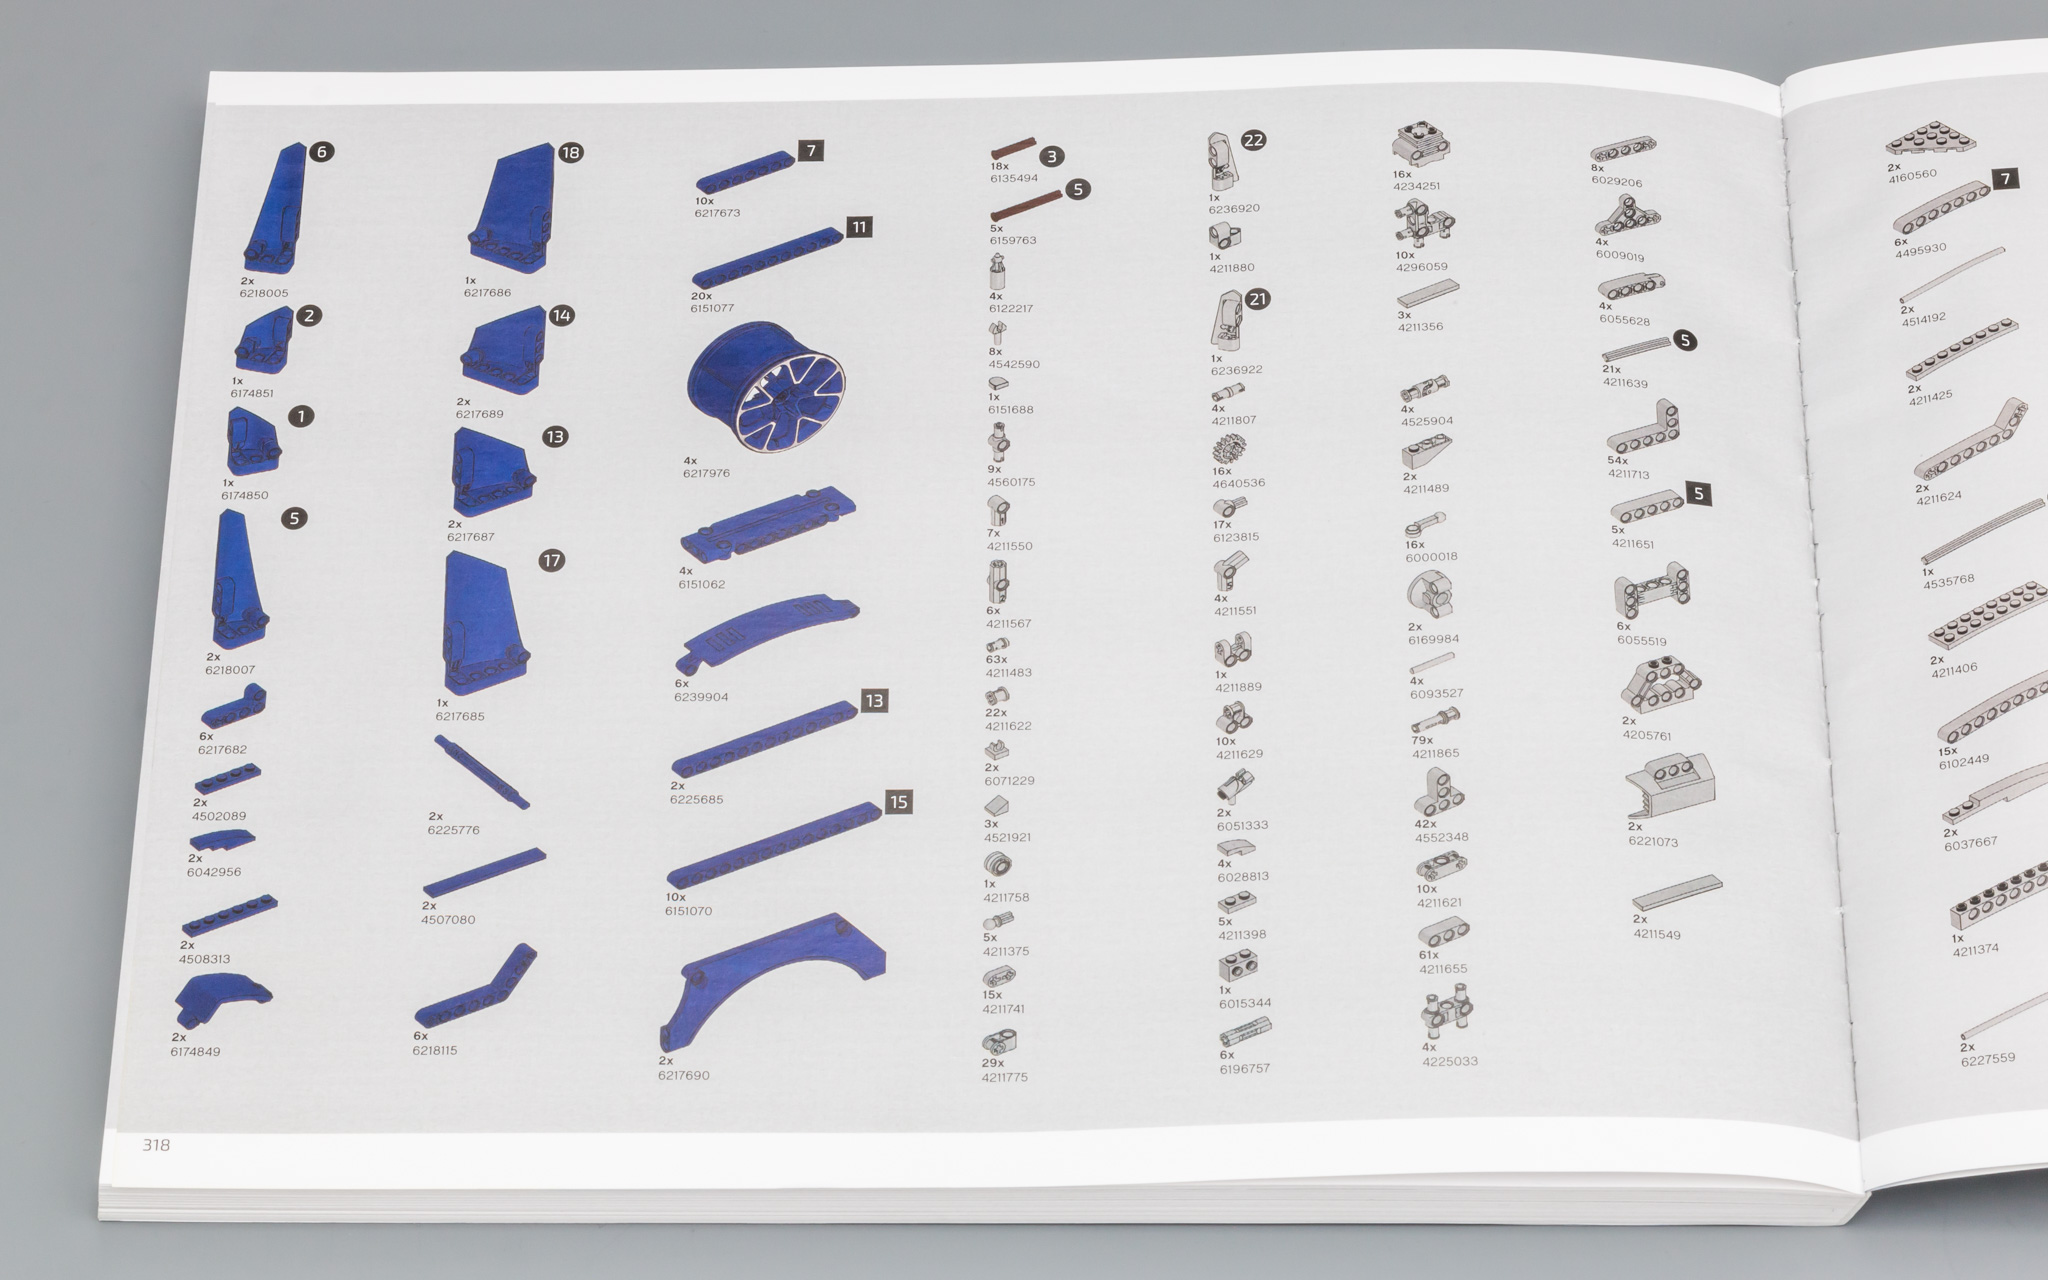
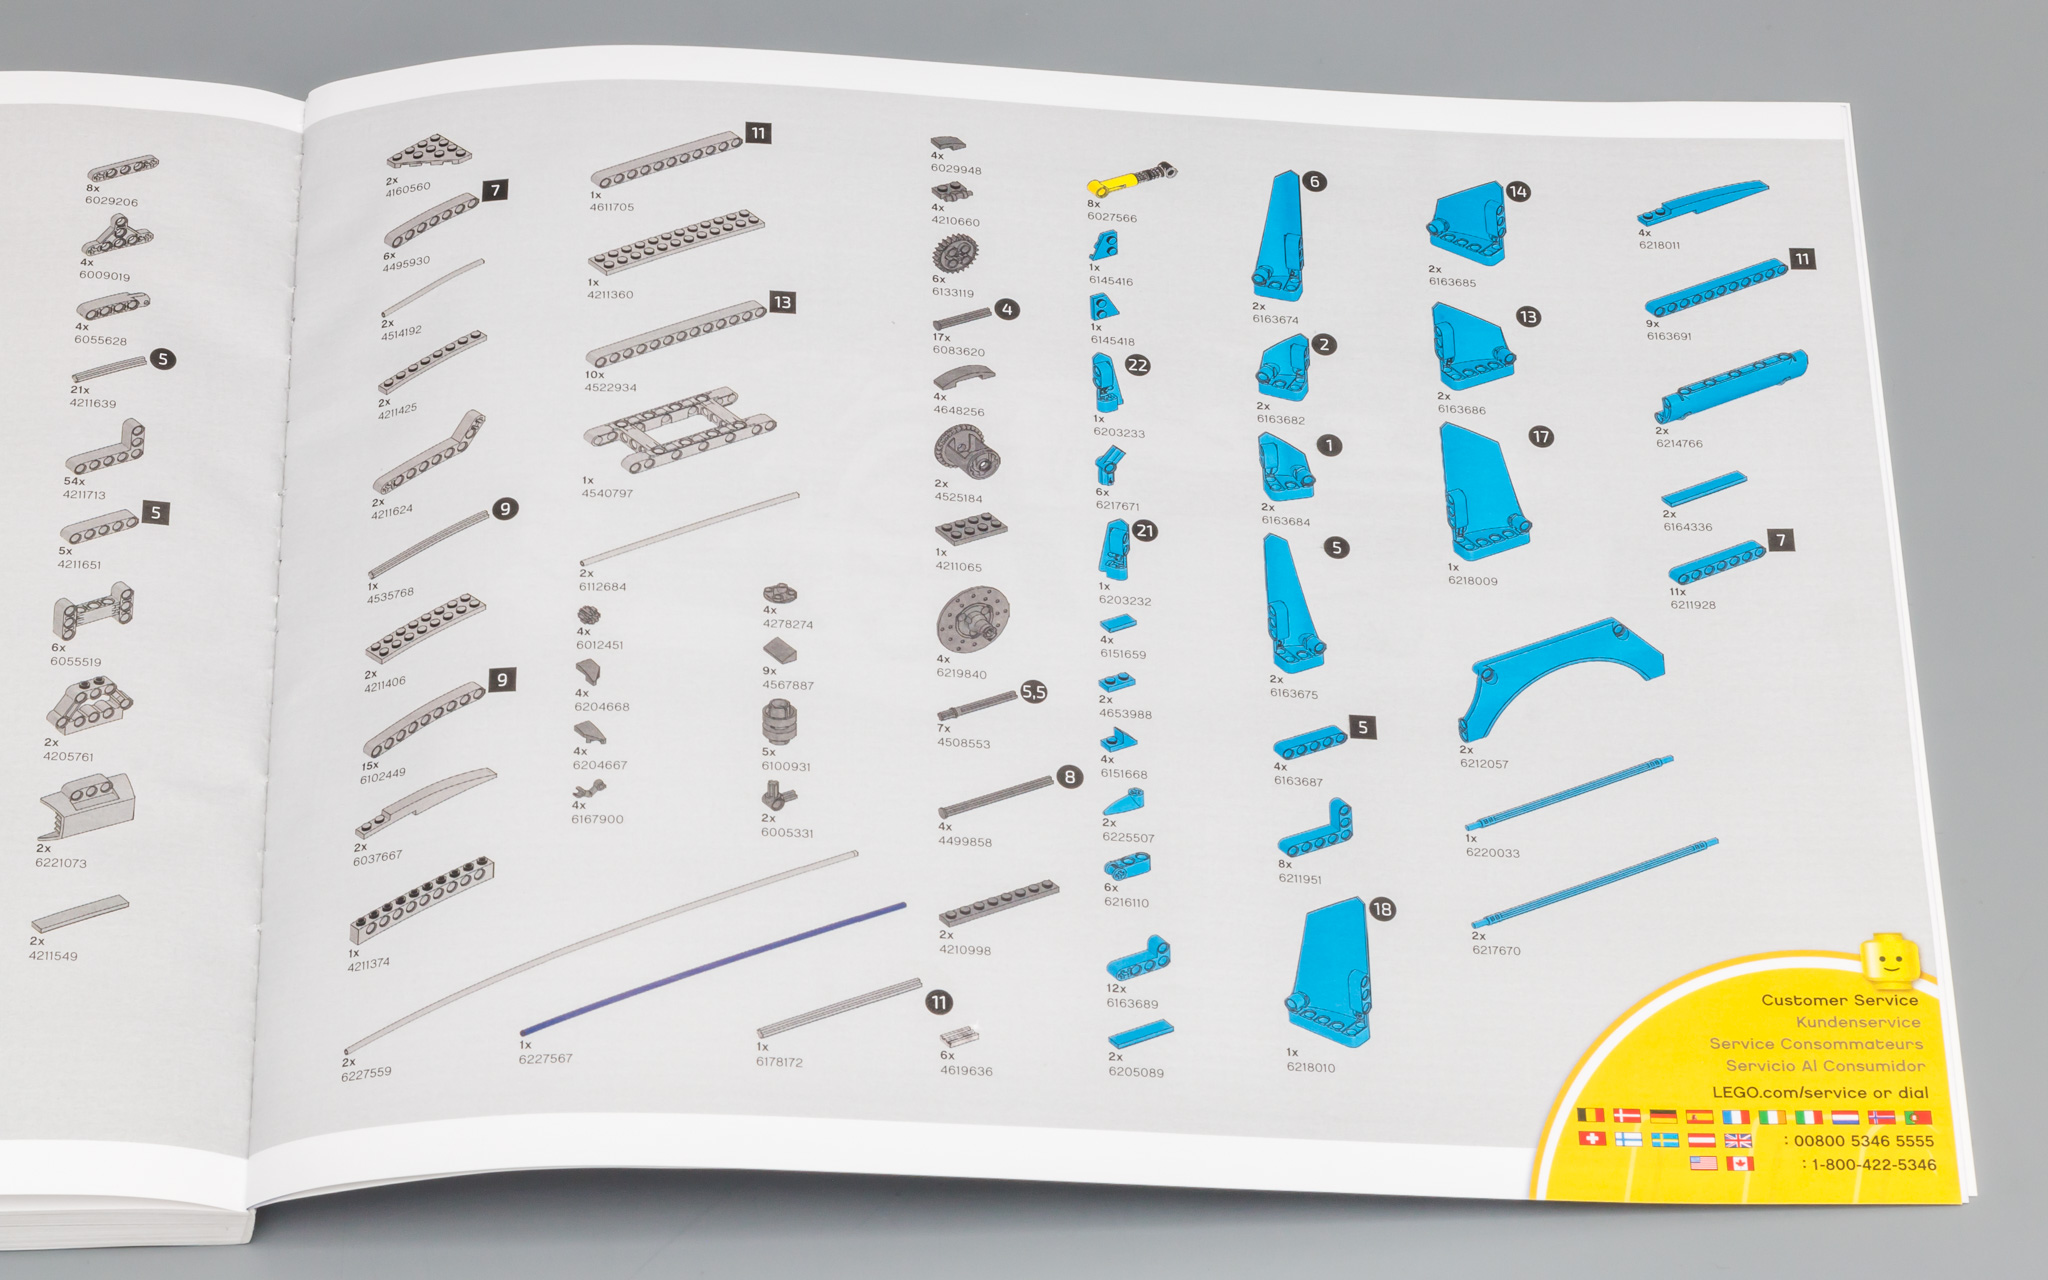
PART LIST

THE BUILD

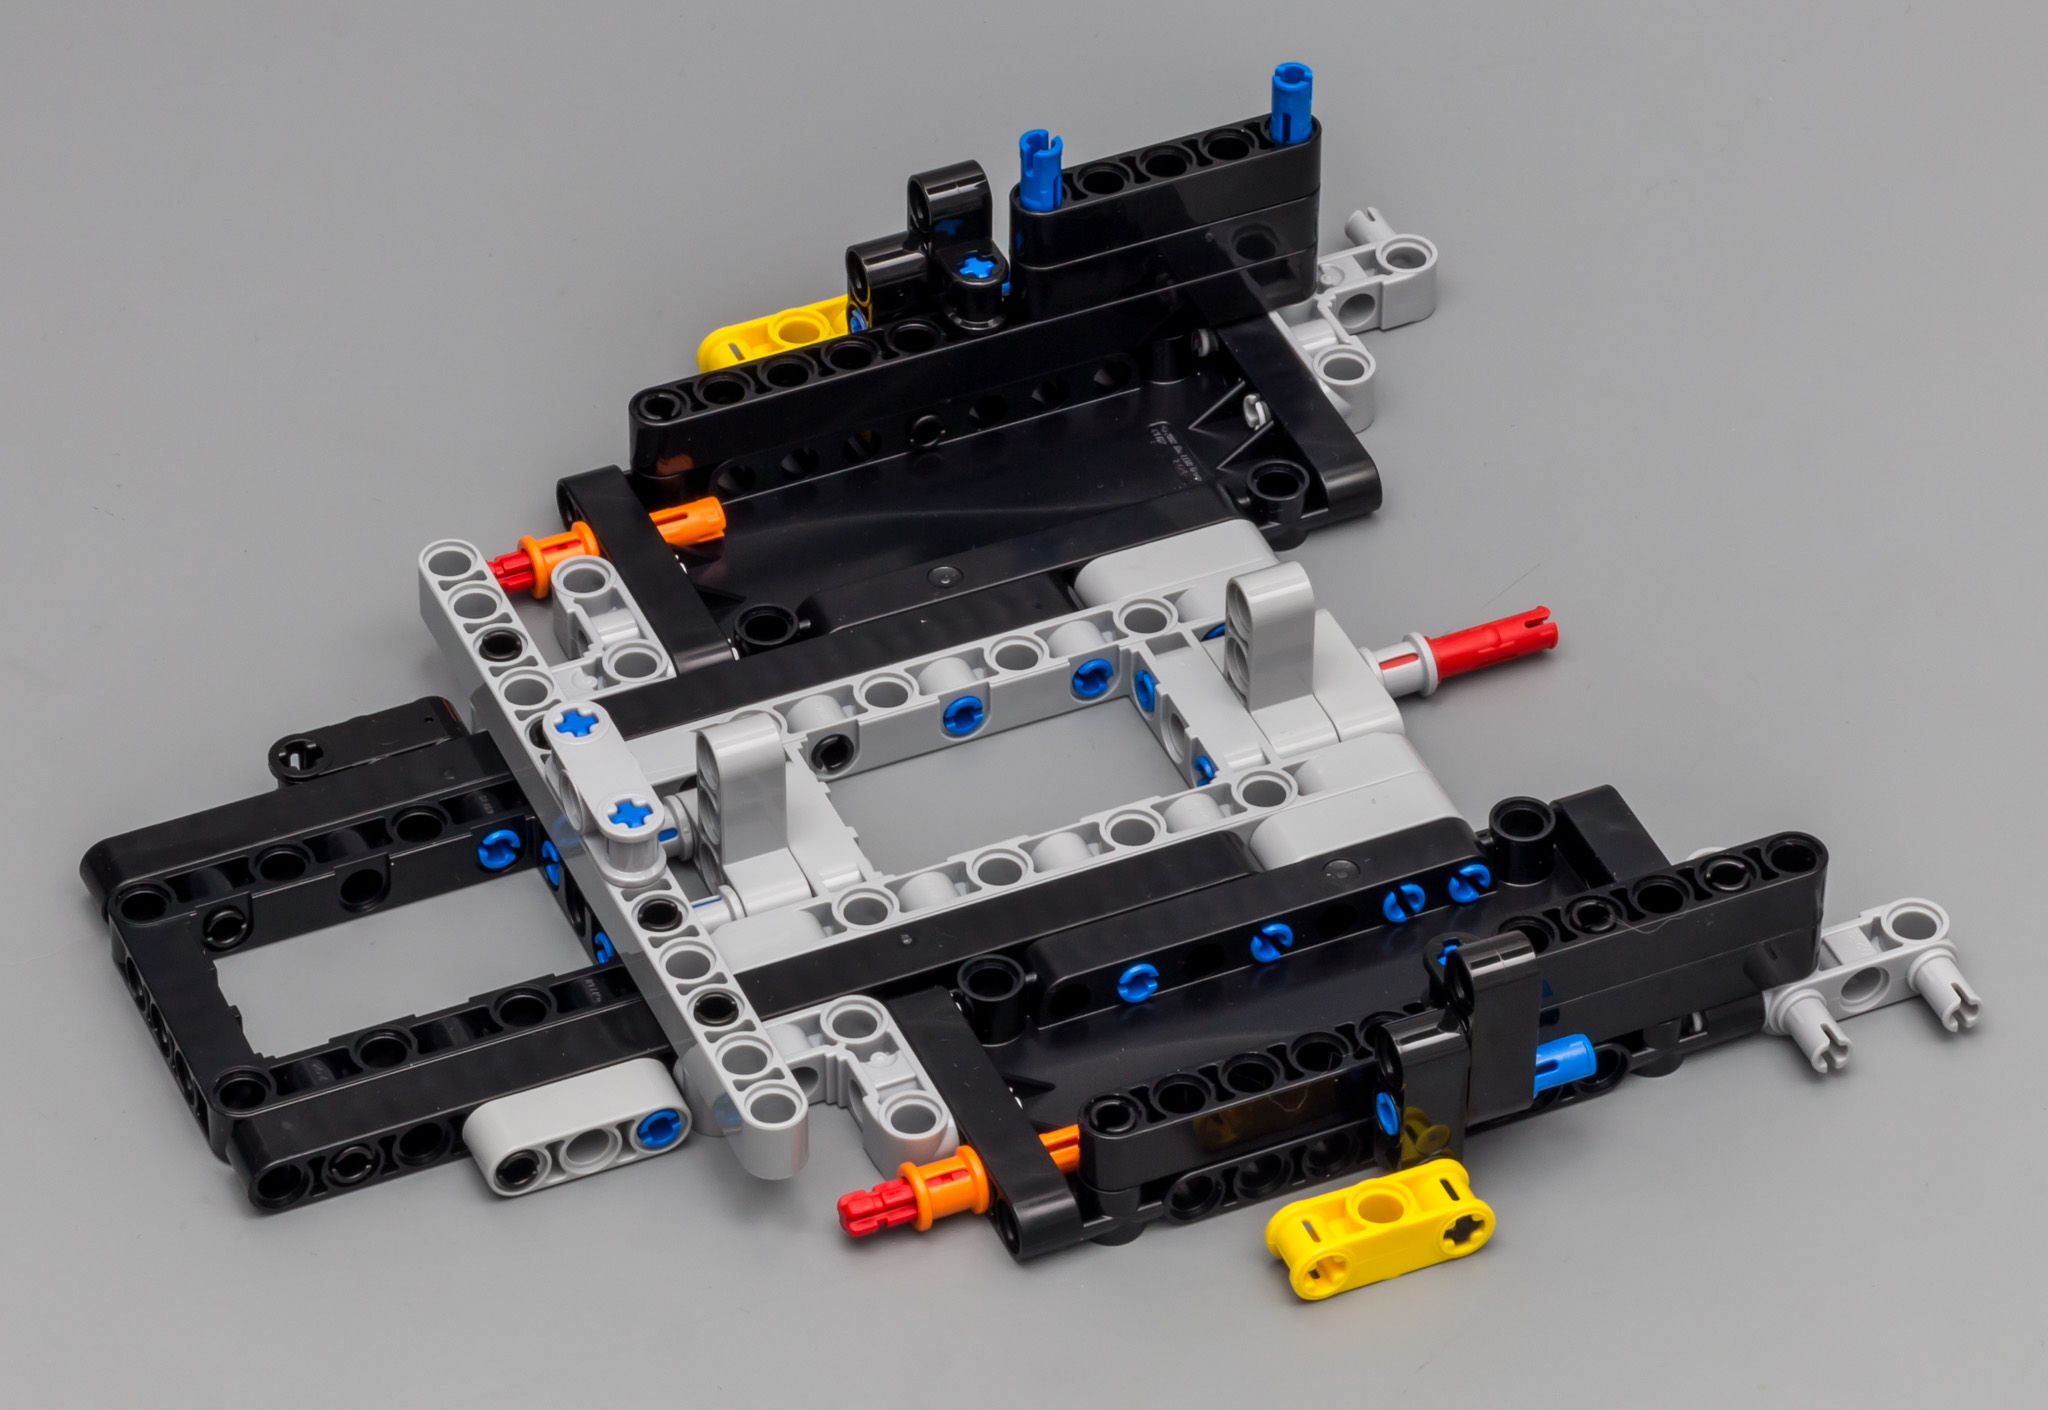
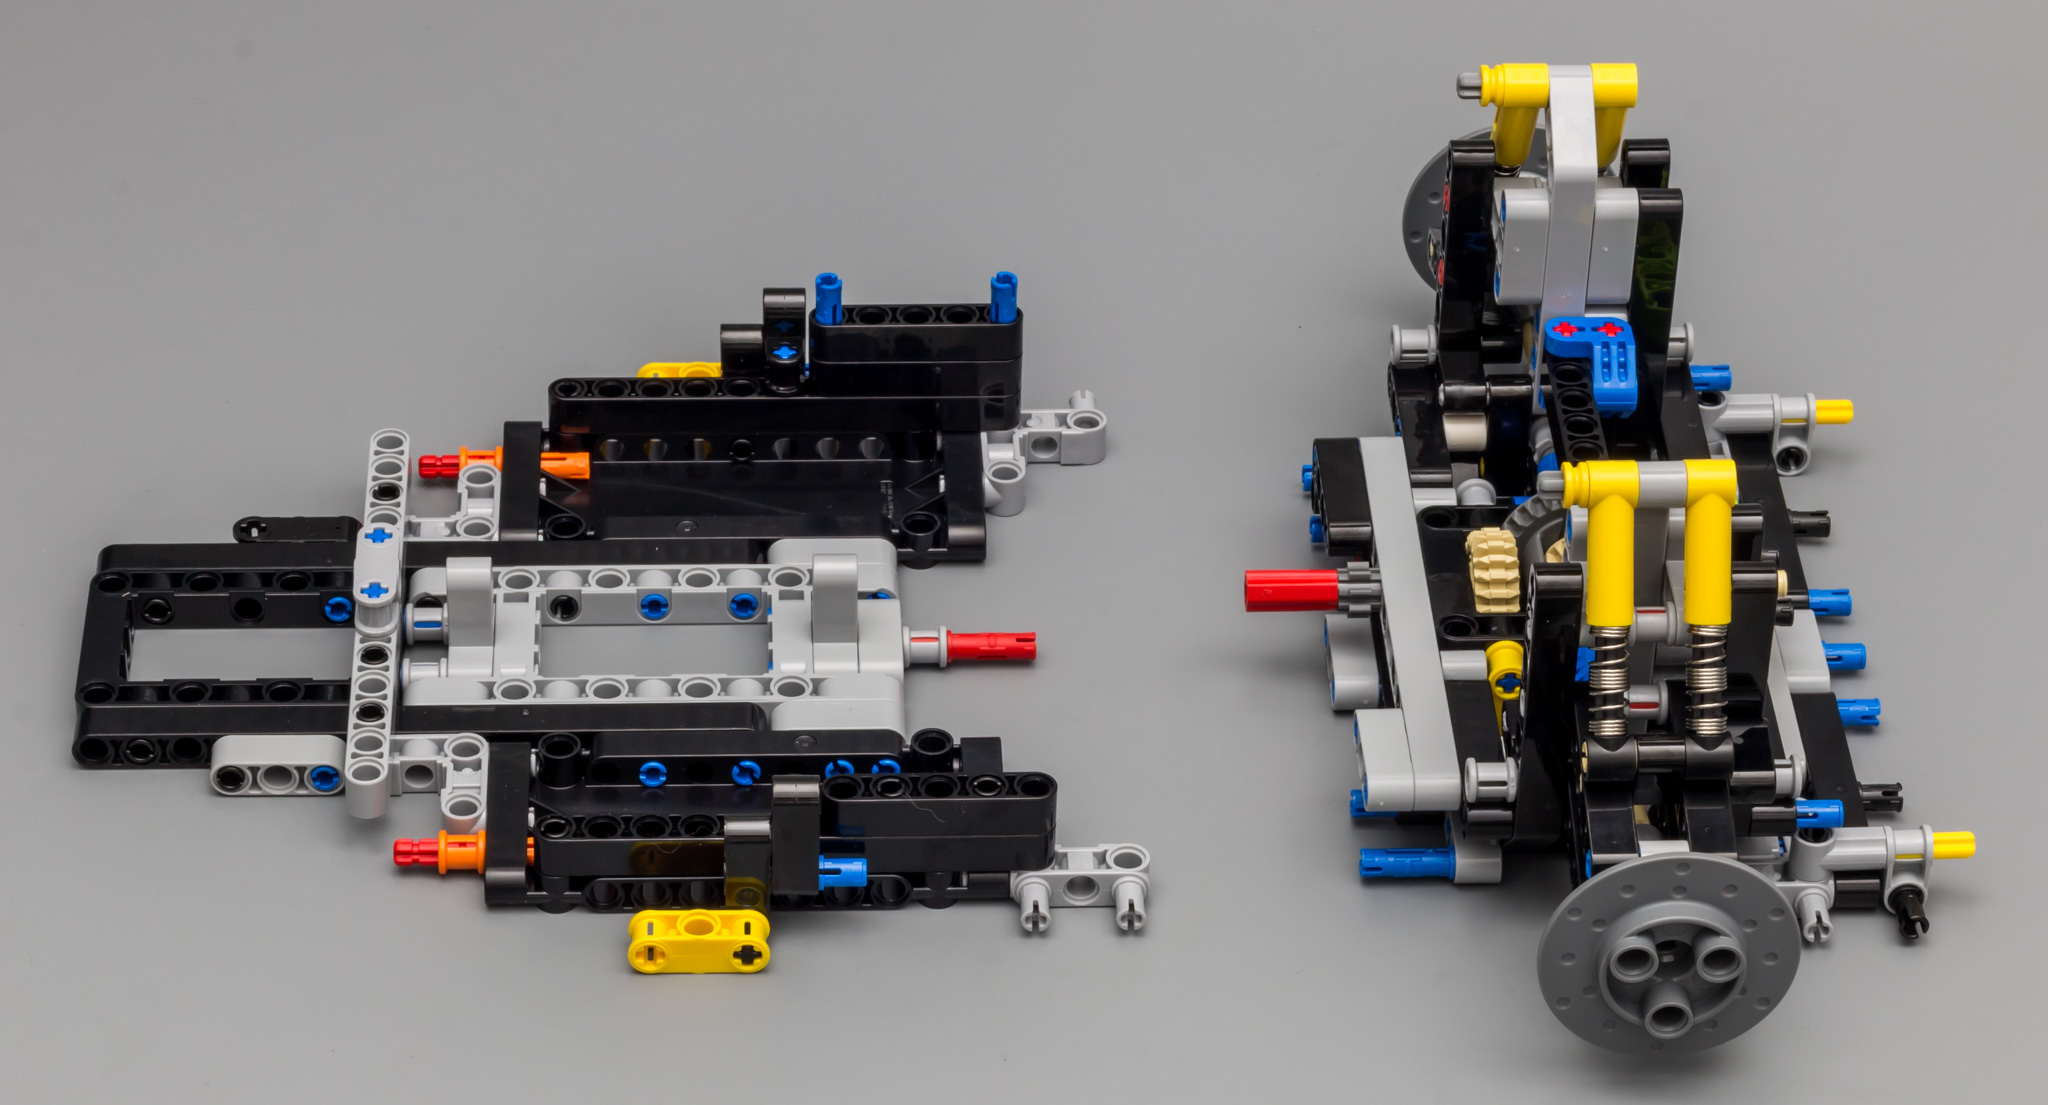
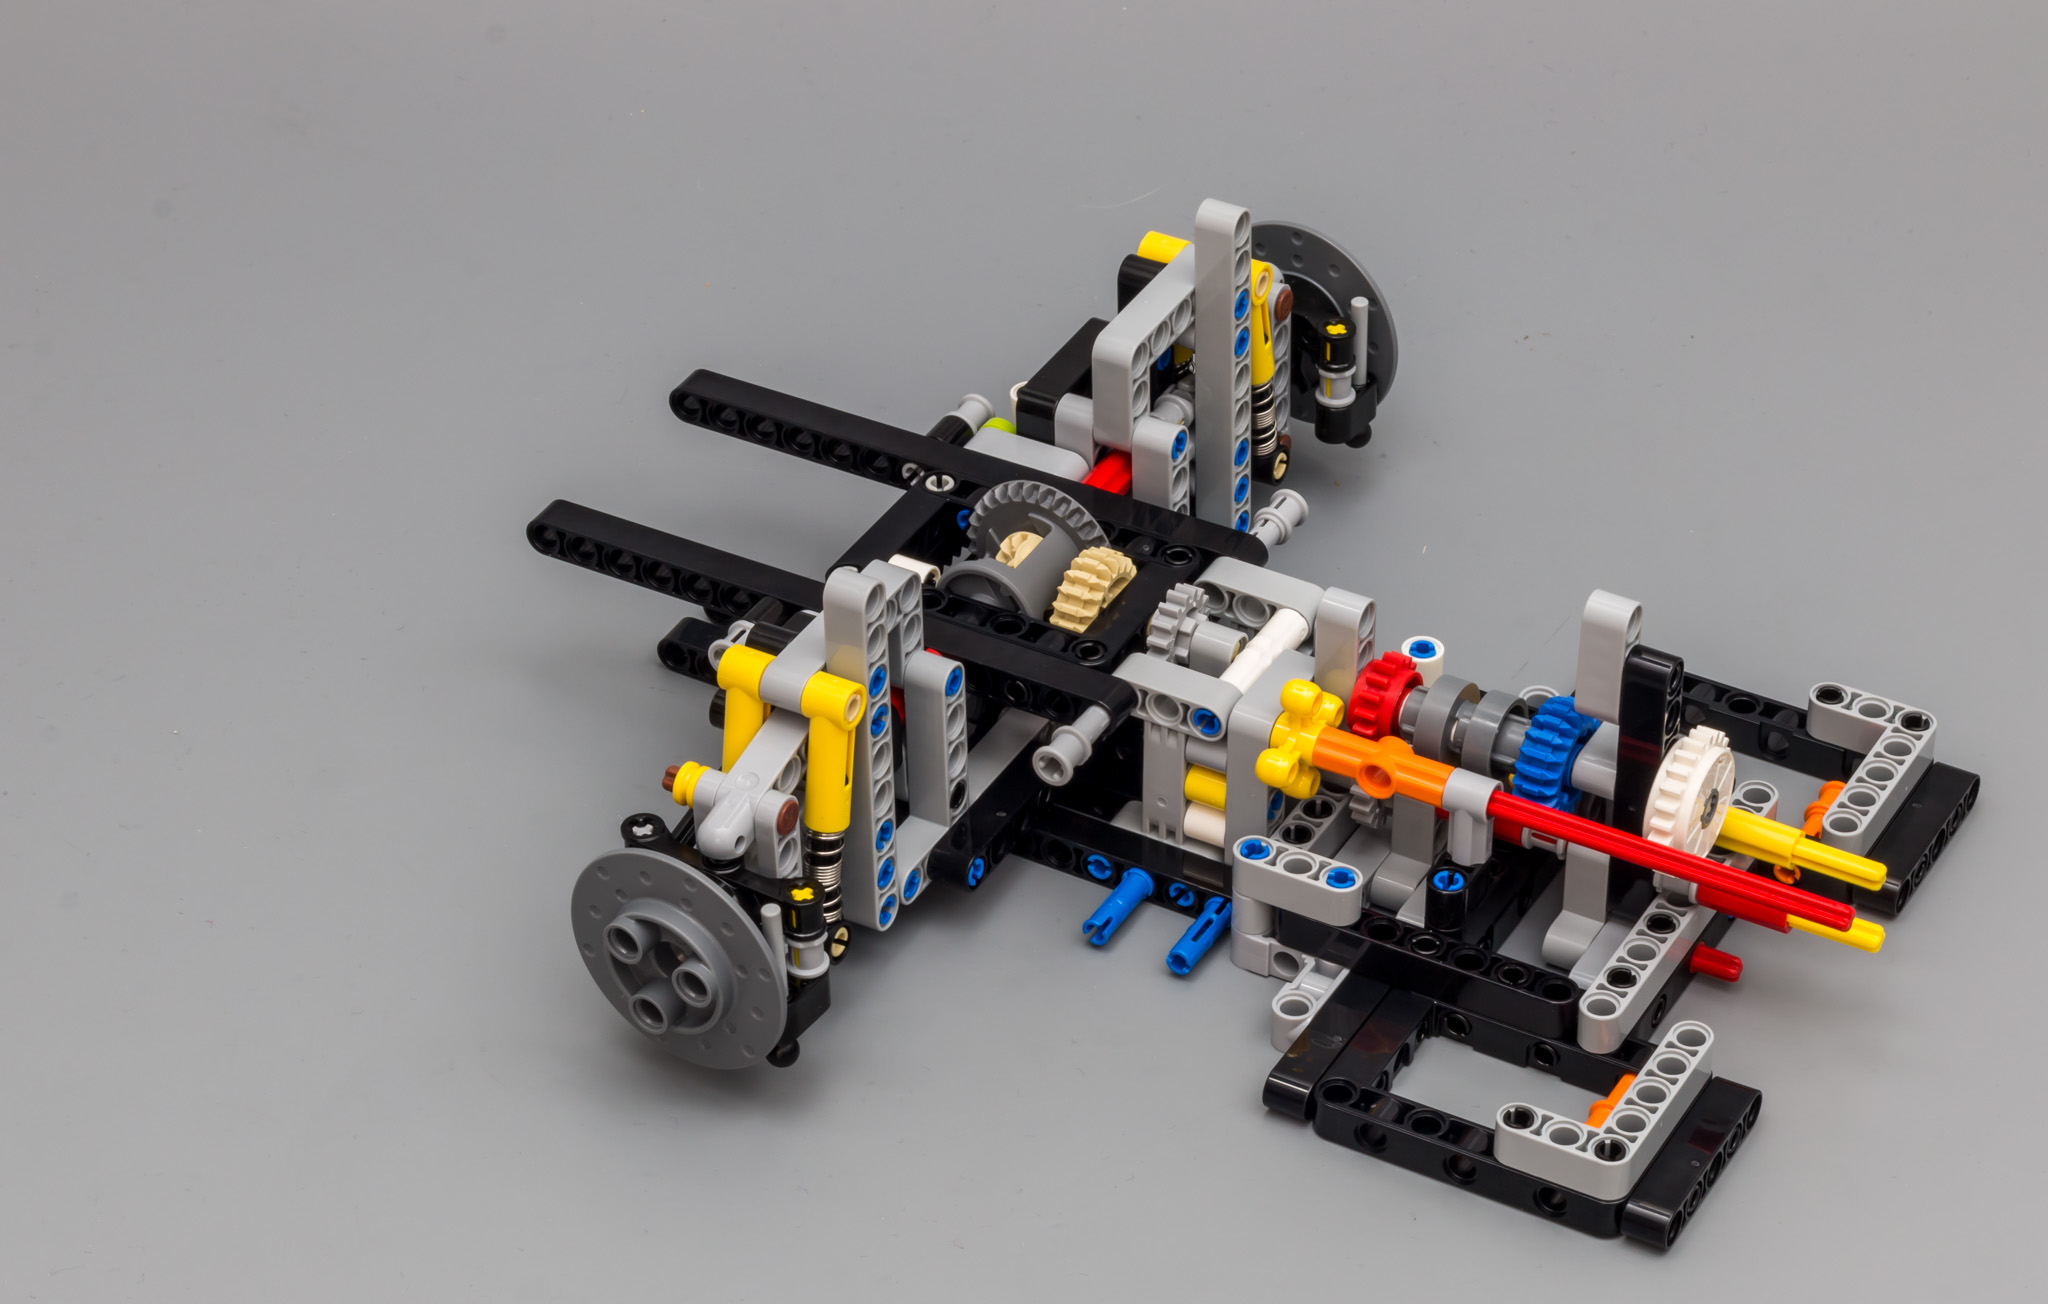
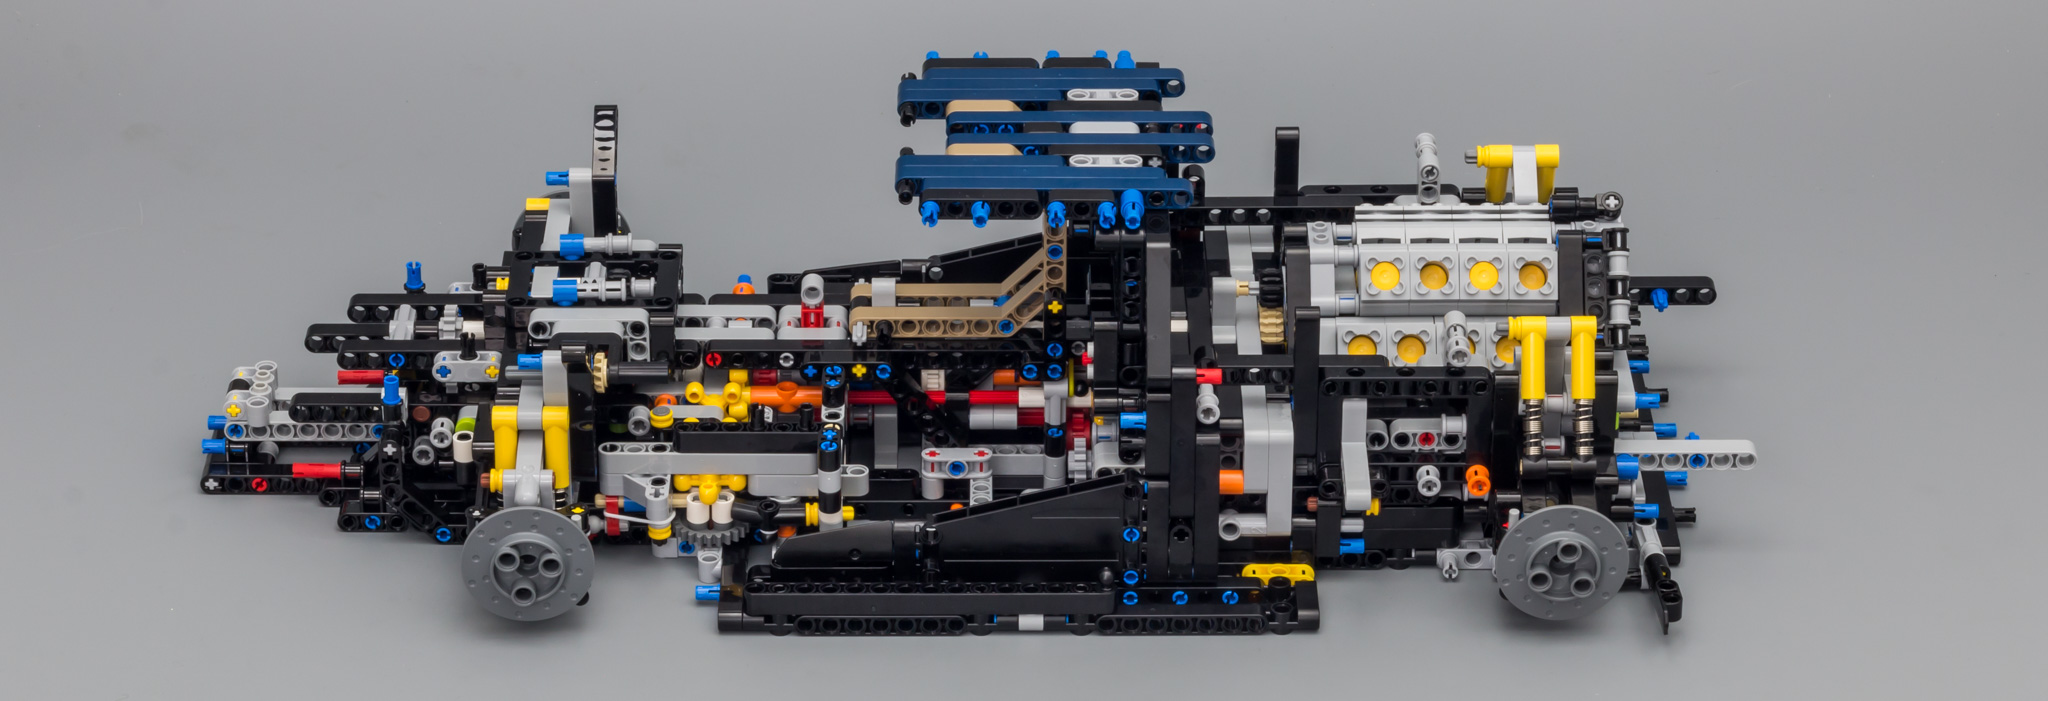
It looks like the build starts with a Monocoque, but that's not the case. This simply is the rear of the chassis.
Lots has been written and said about the suspension in the Chiron. In the following video you can see that even without the springs attached, the liftarms don't move easily. However, with the springs attached, the suspension looks strong enough for the weight of the car. Later we will verify if that is indeed the case.
https://www.youtube.com/watch?v=IgLv7R5ywIg
The wheel hubs are connected to the new Steering Wheel Hub (a.k.a. disc brakes). I'm sure we will see these discs in future sets, as brakes or maybe as something totally different.
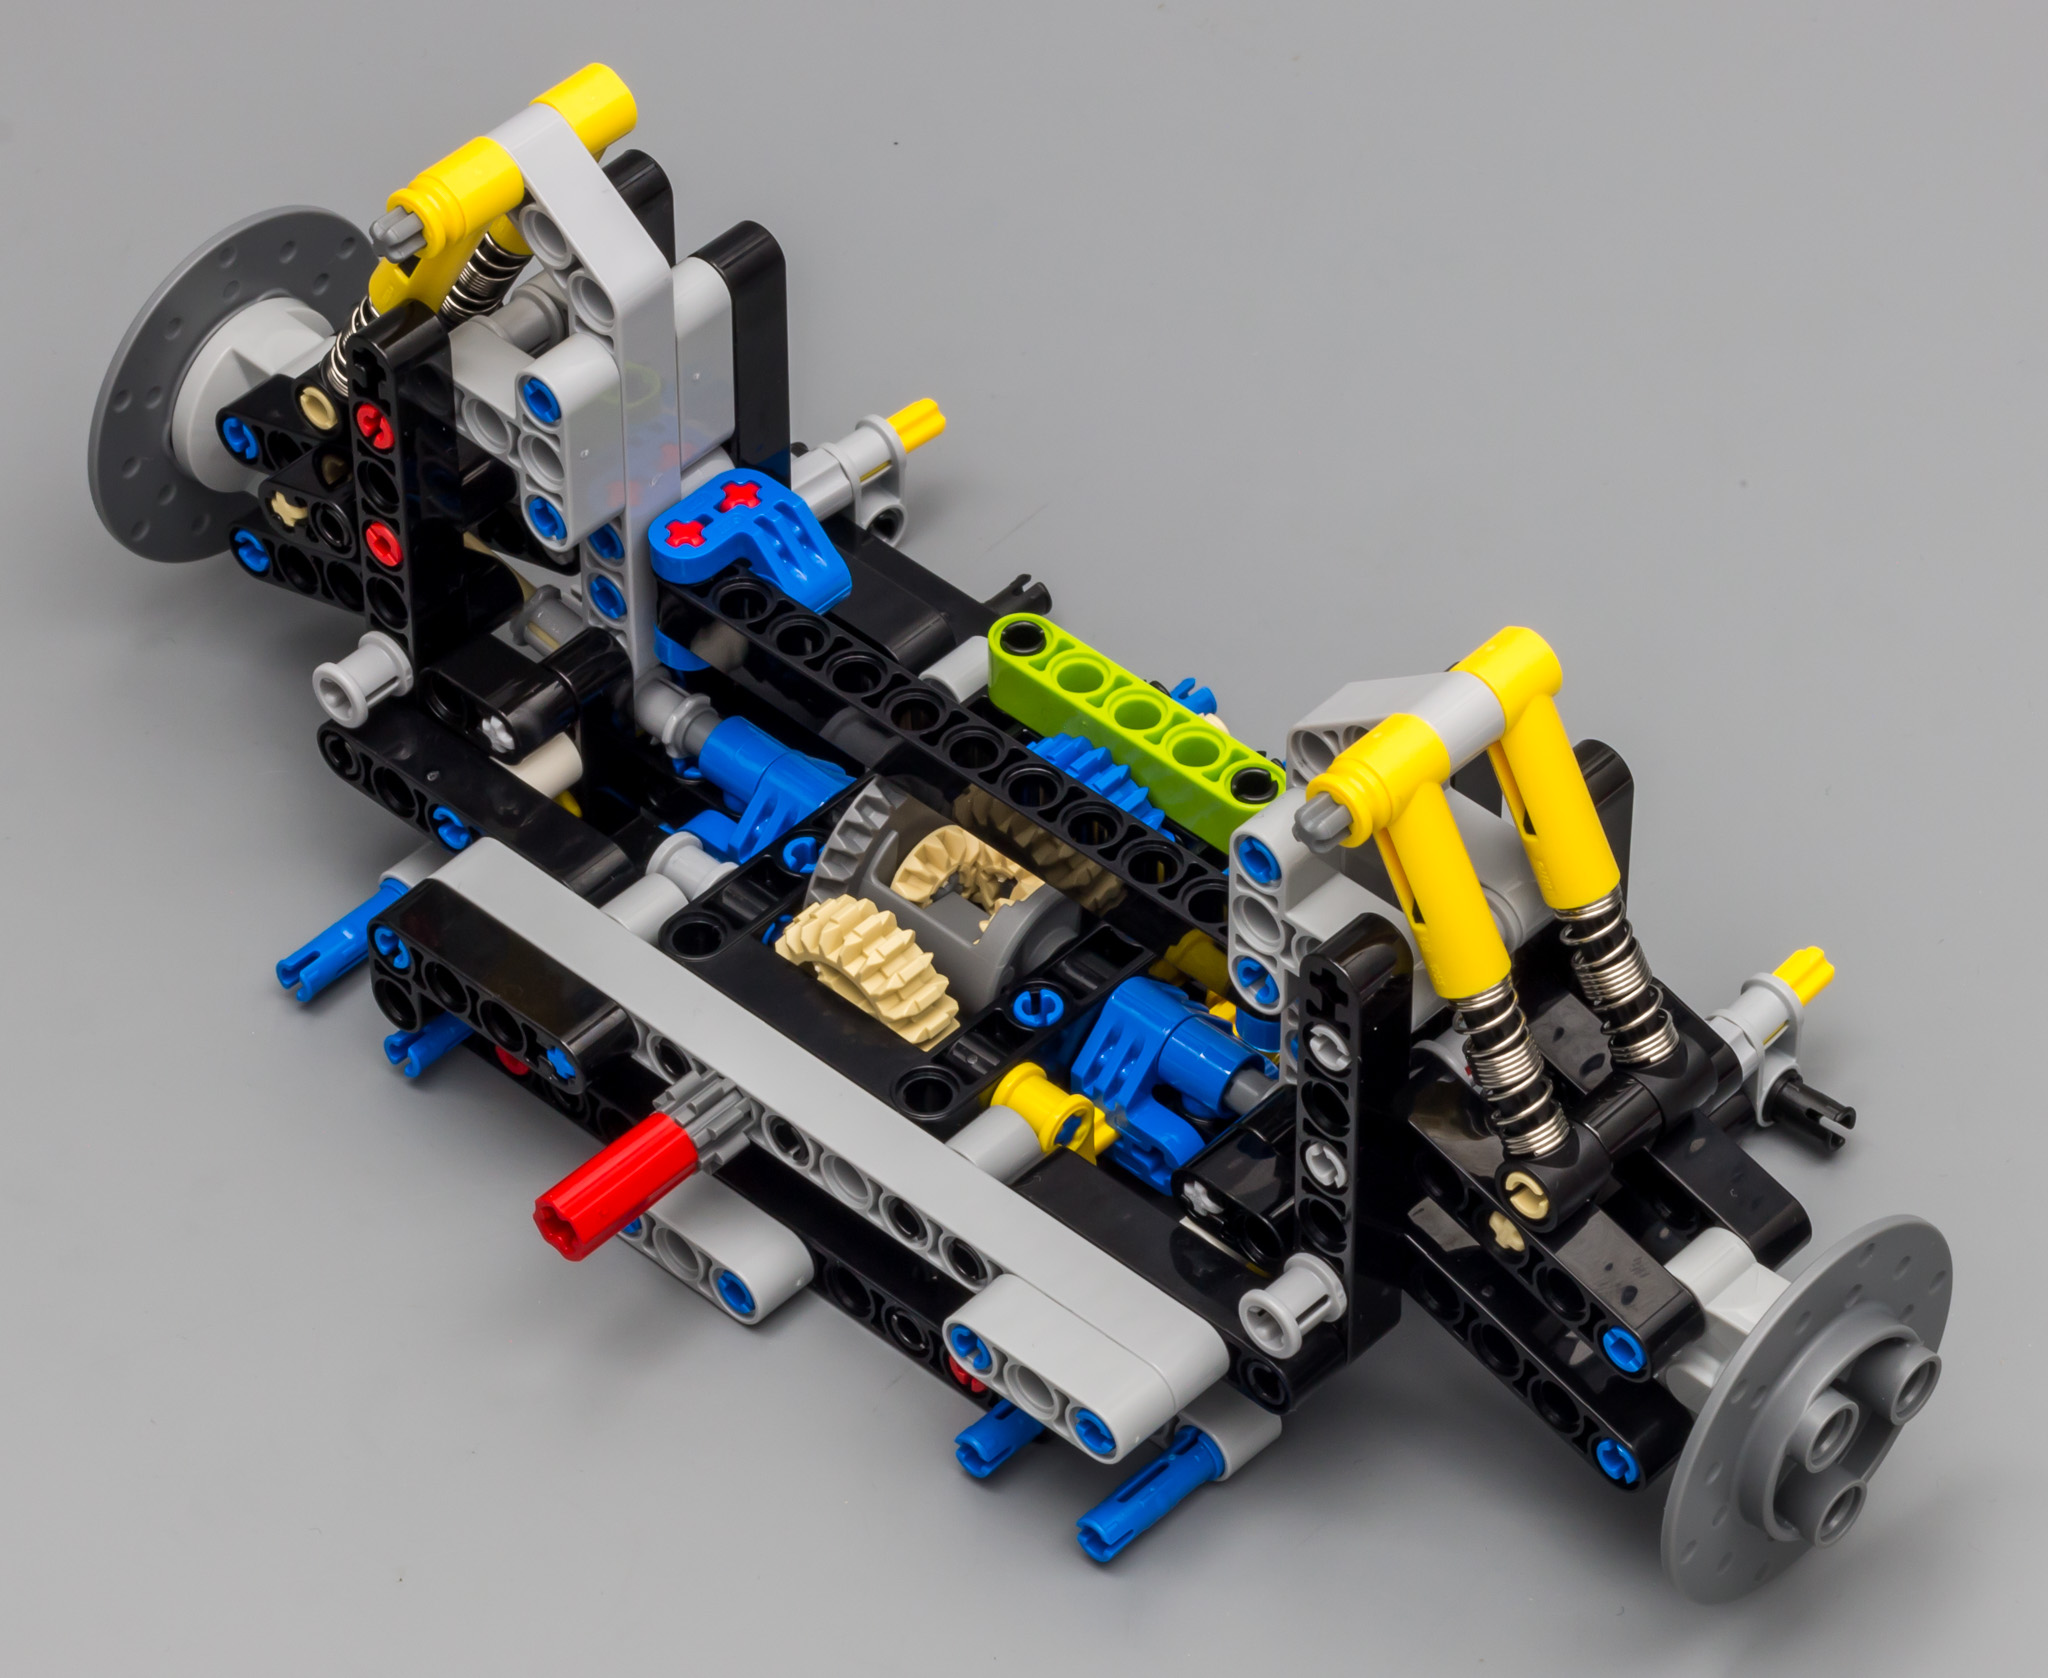
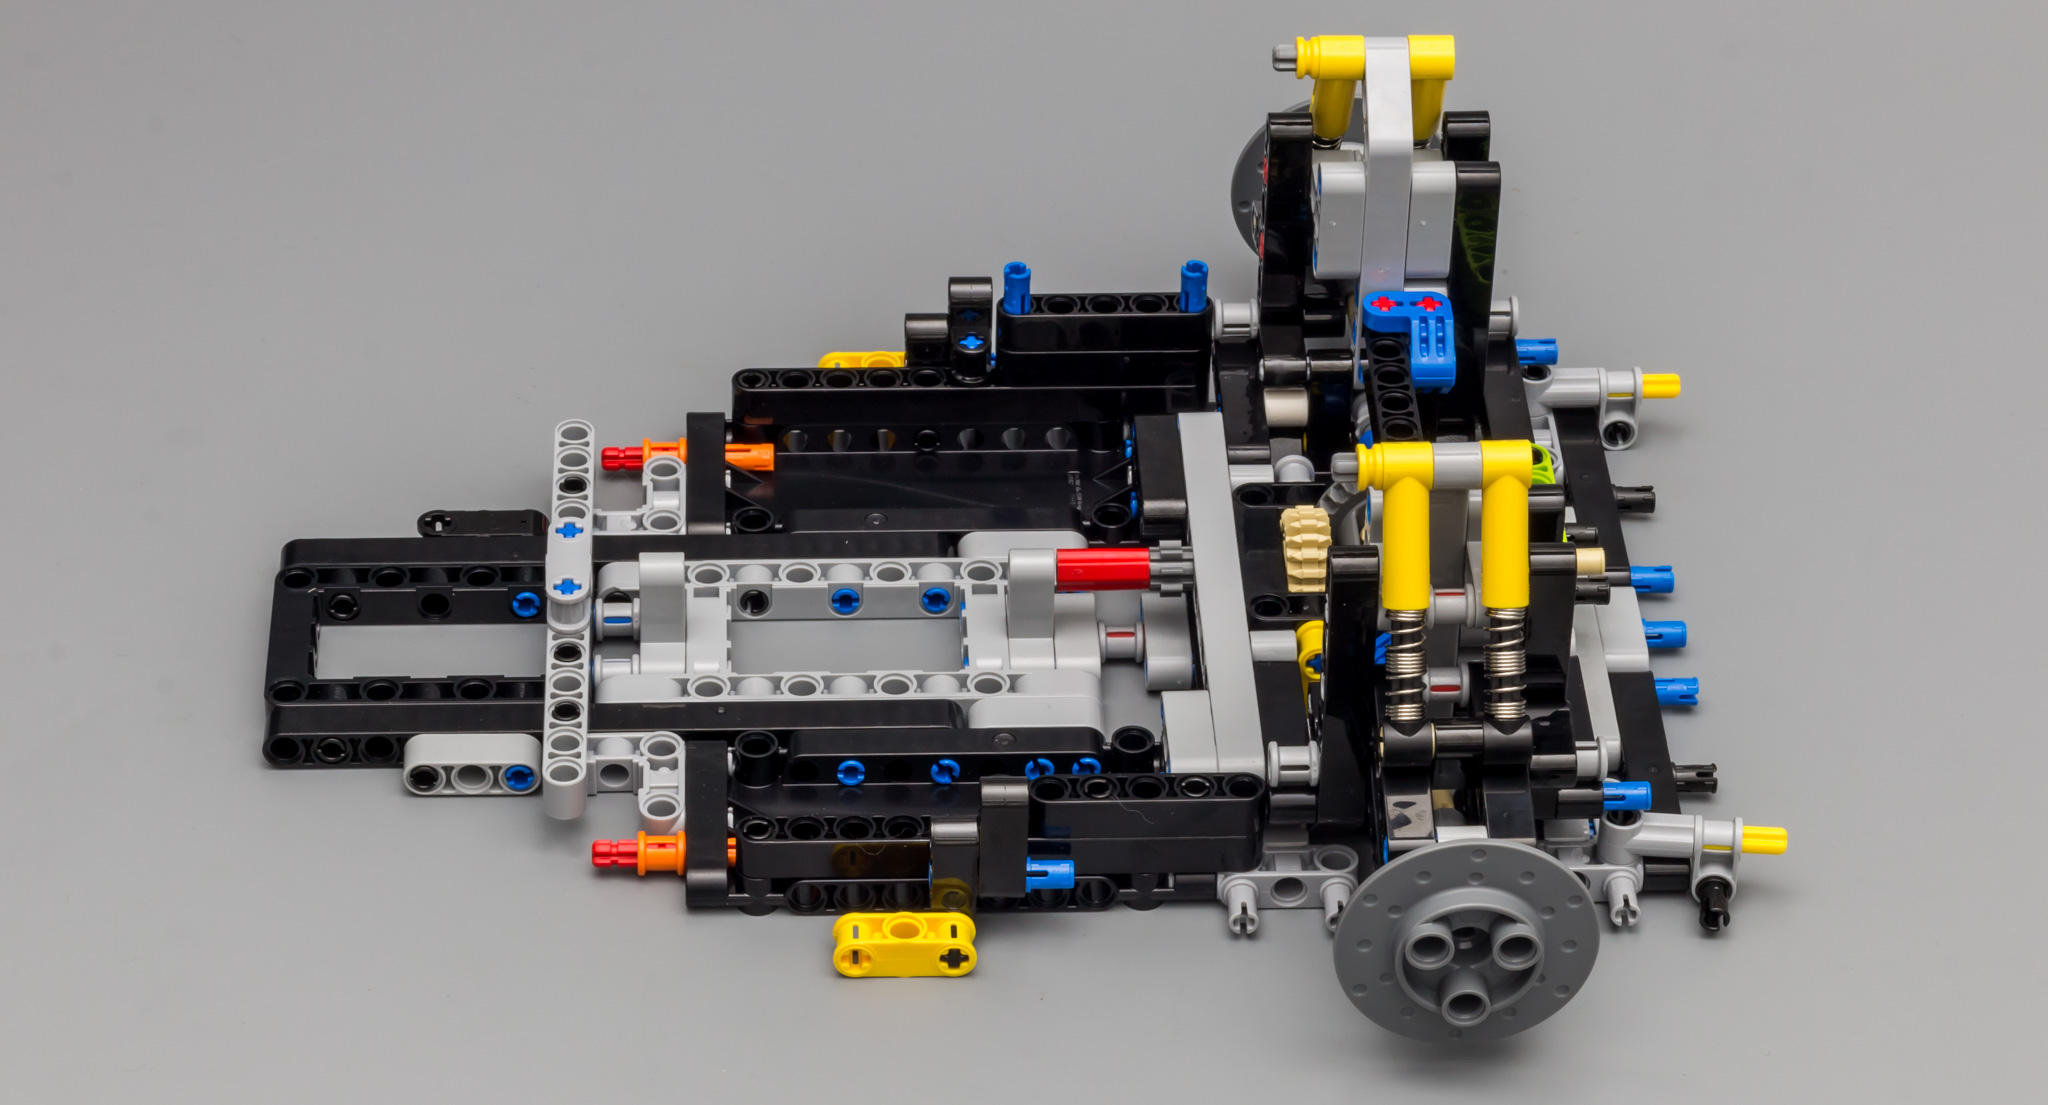
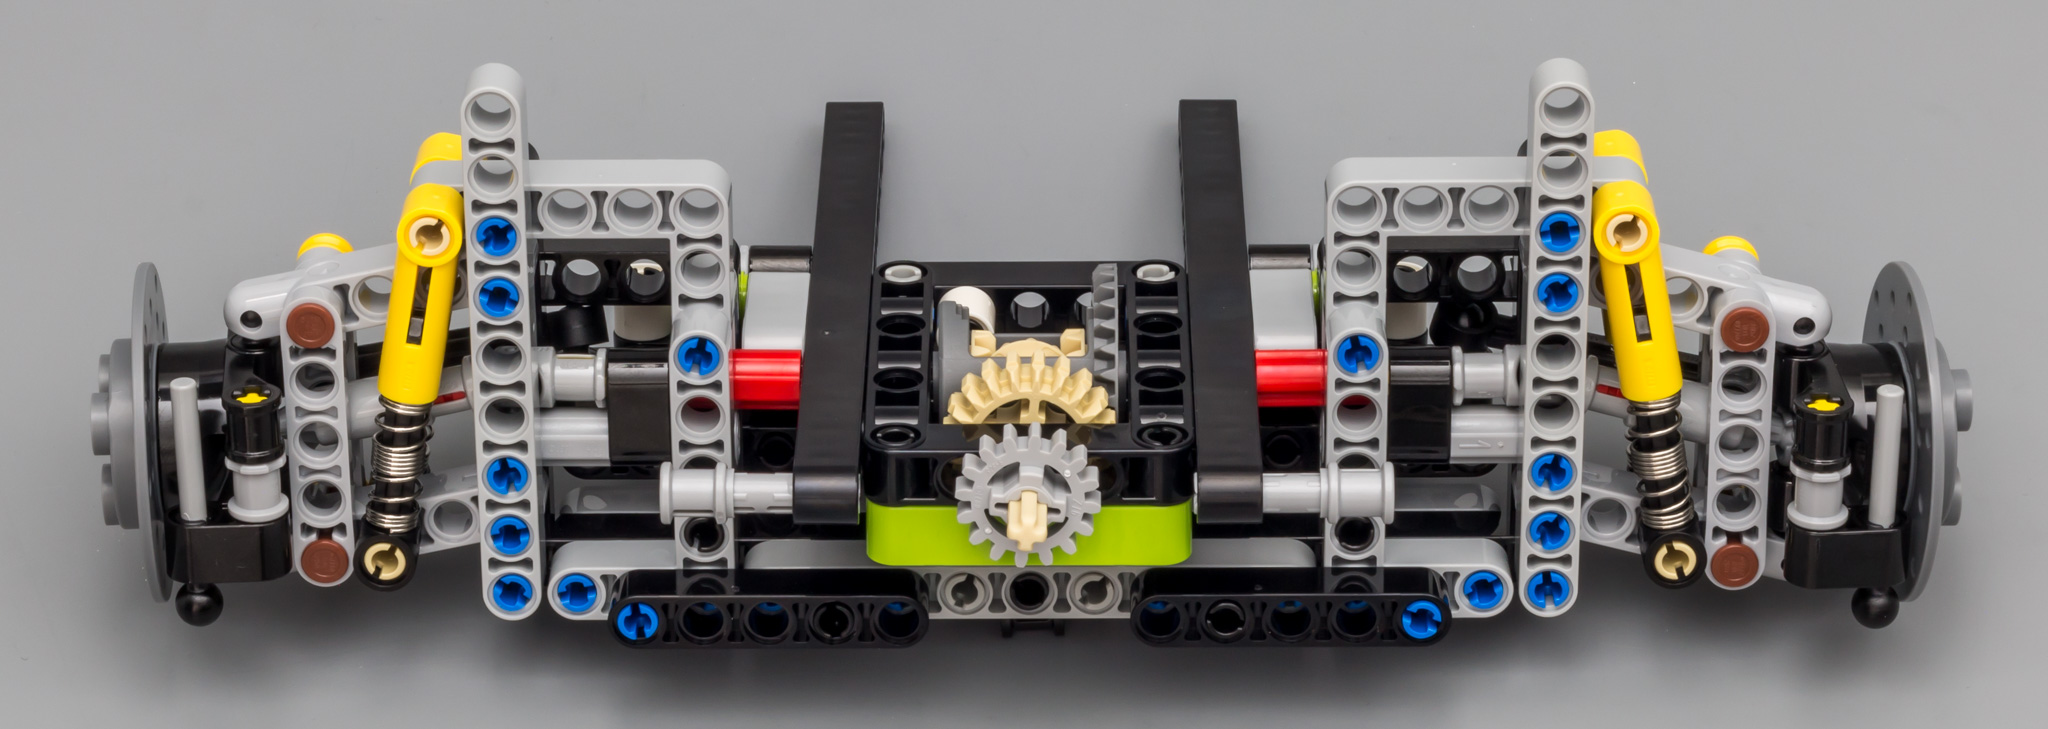
Here's the front view of the rear suspension.
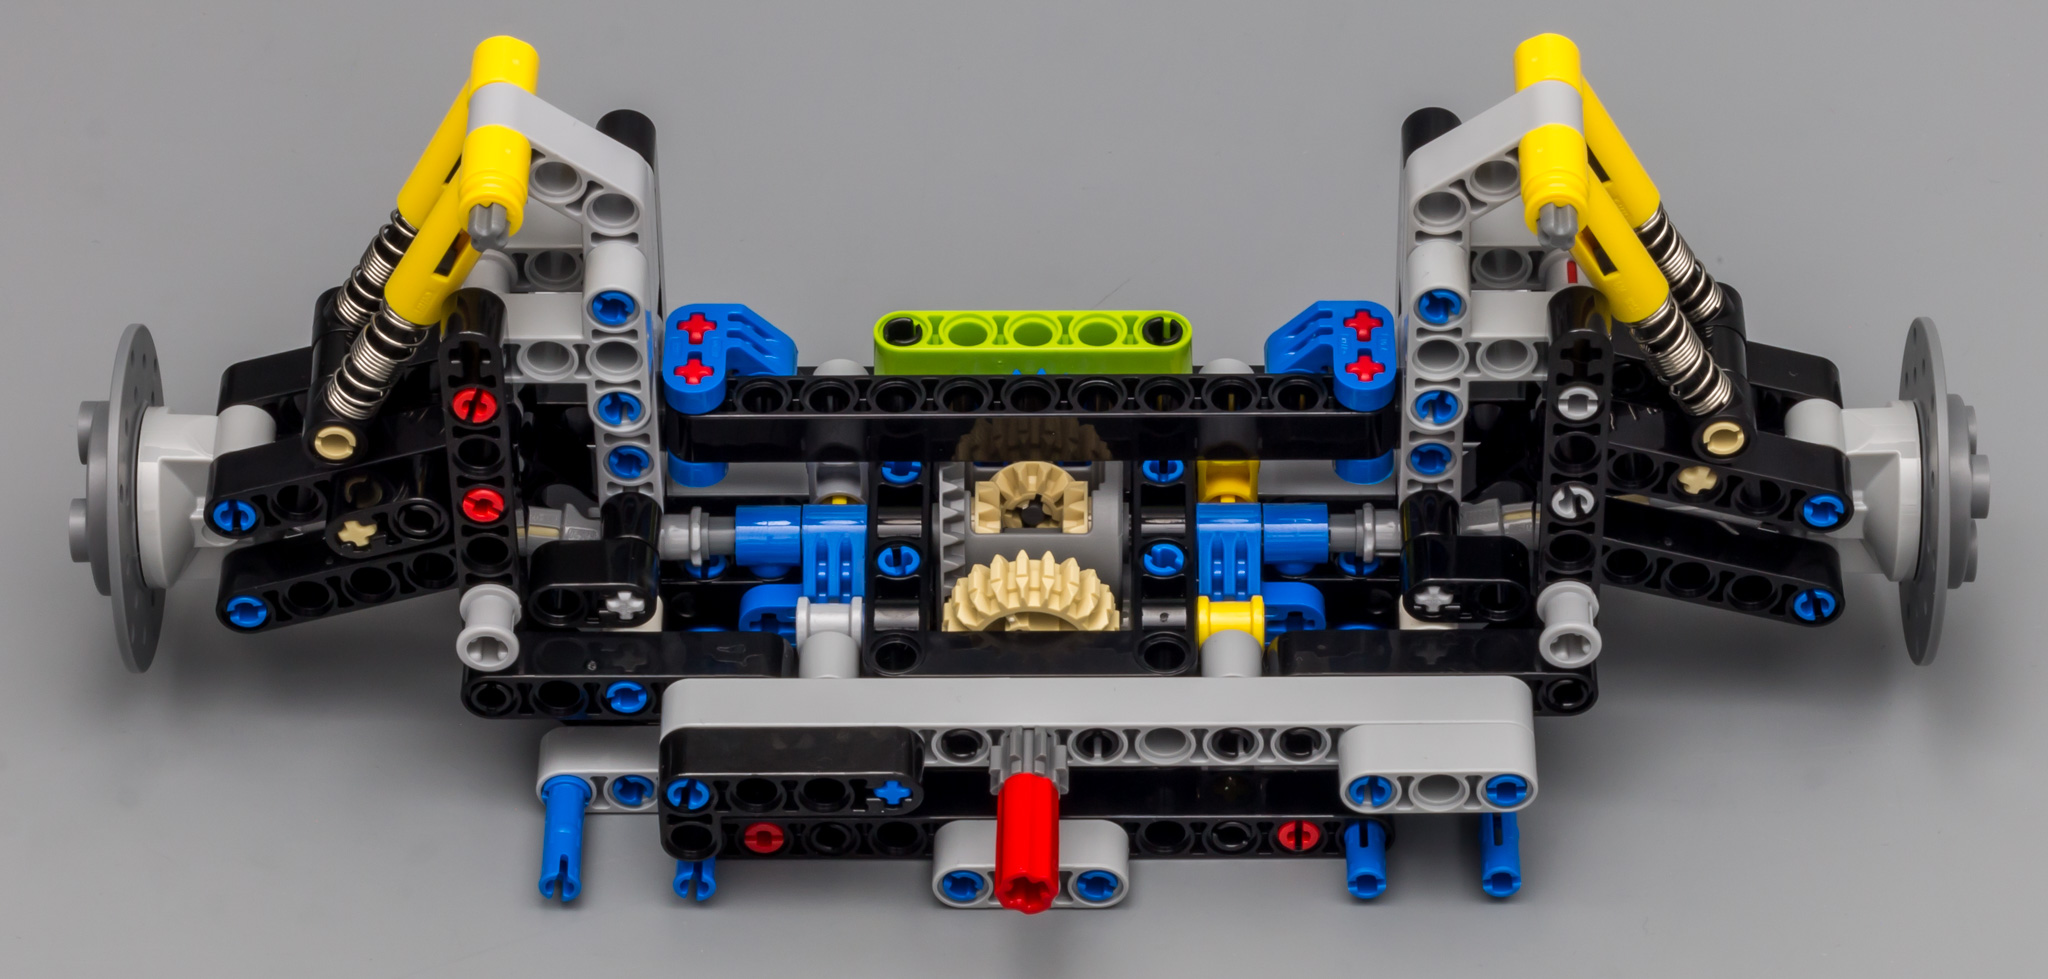
The bottom view shows the new 20T bevel gear with clutch connected to the differential.

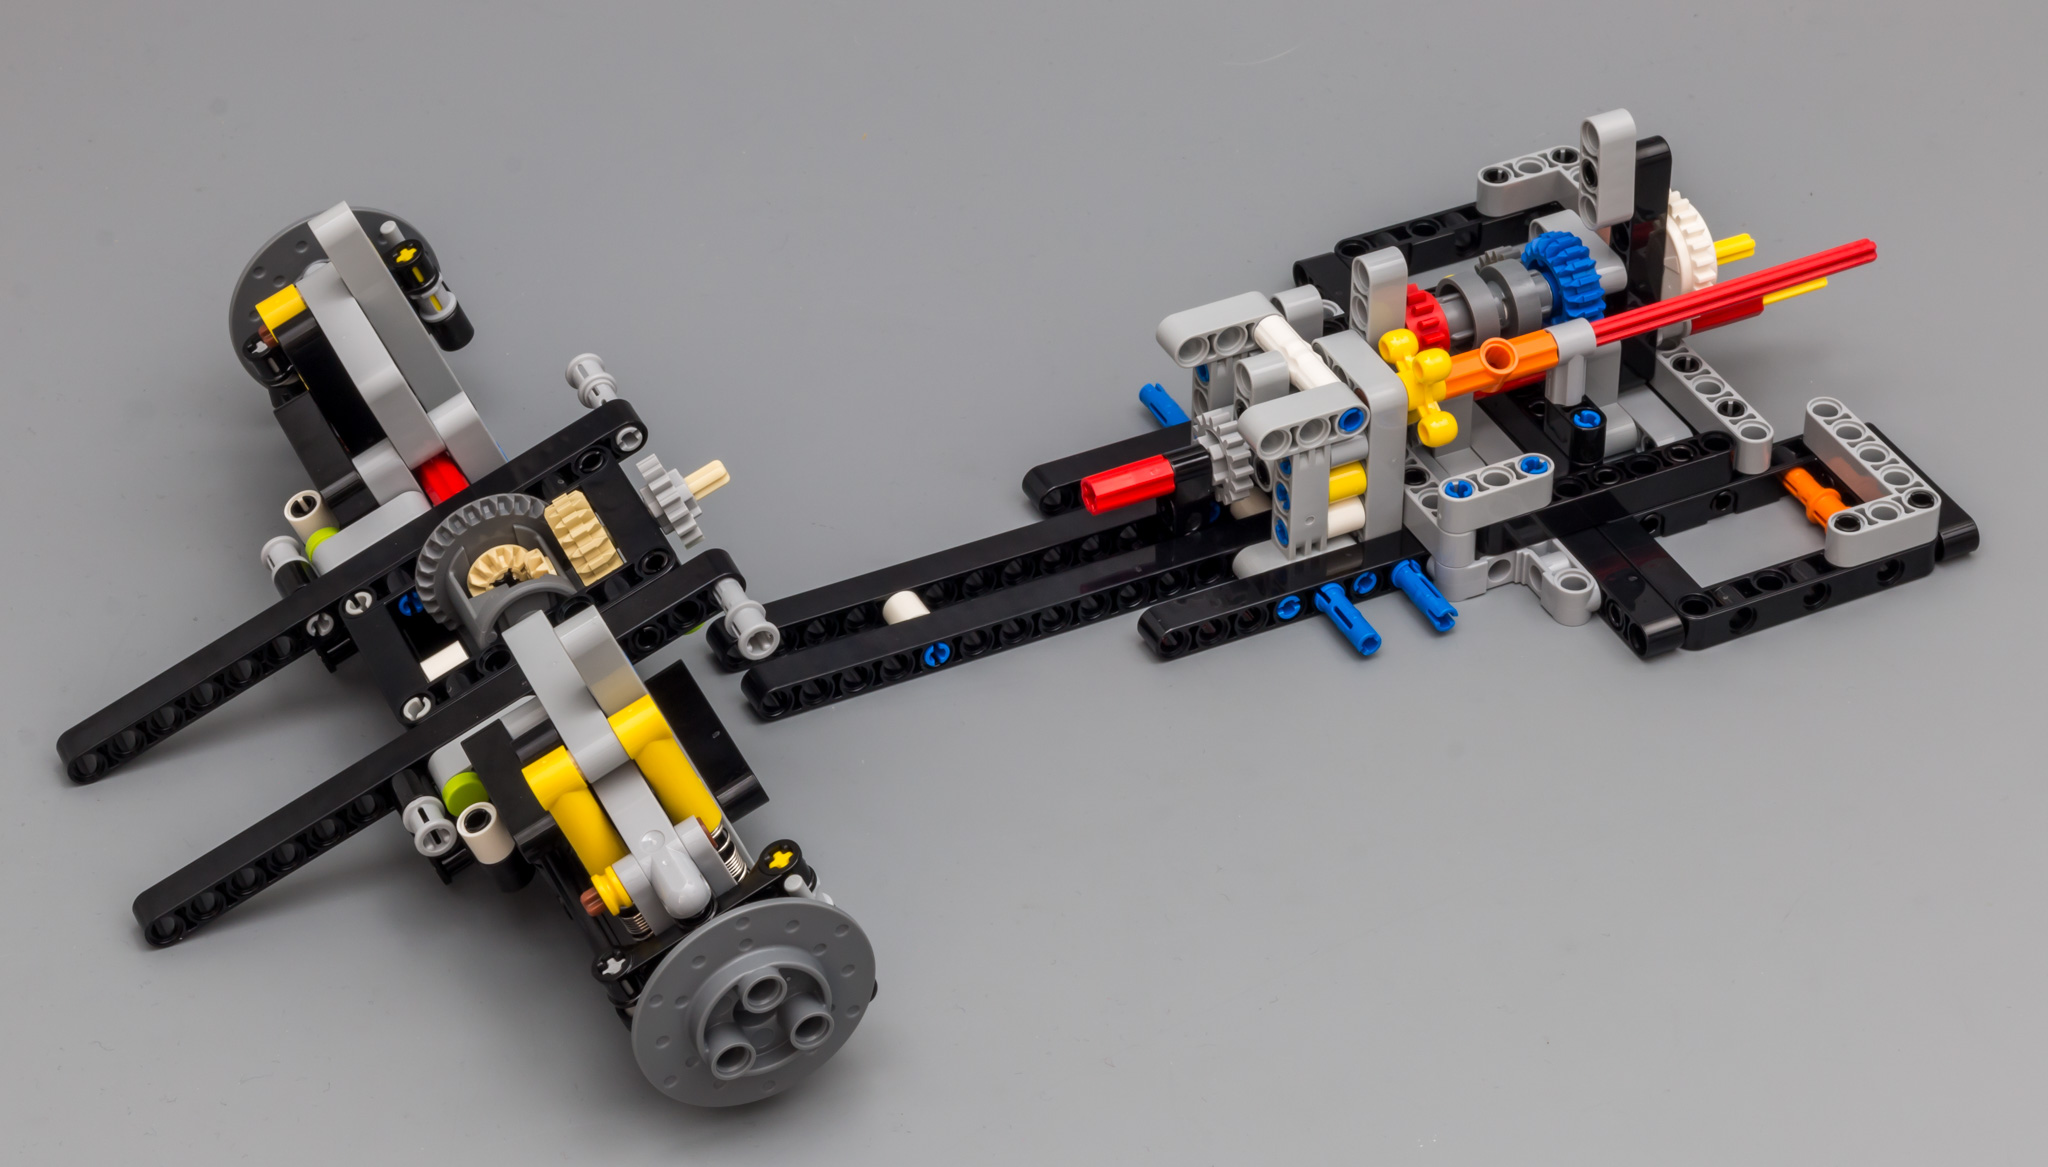
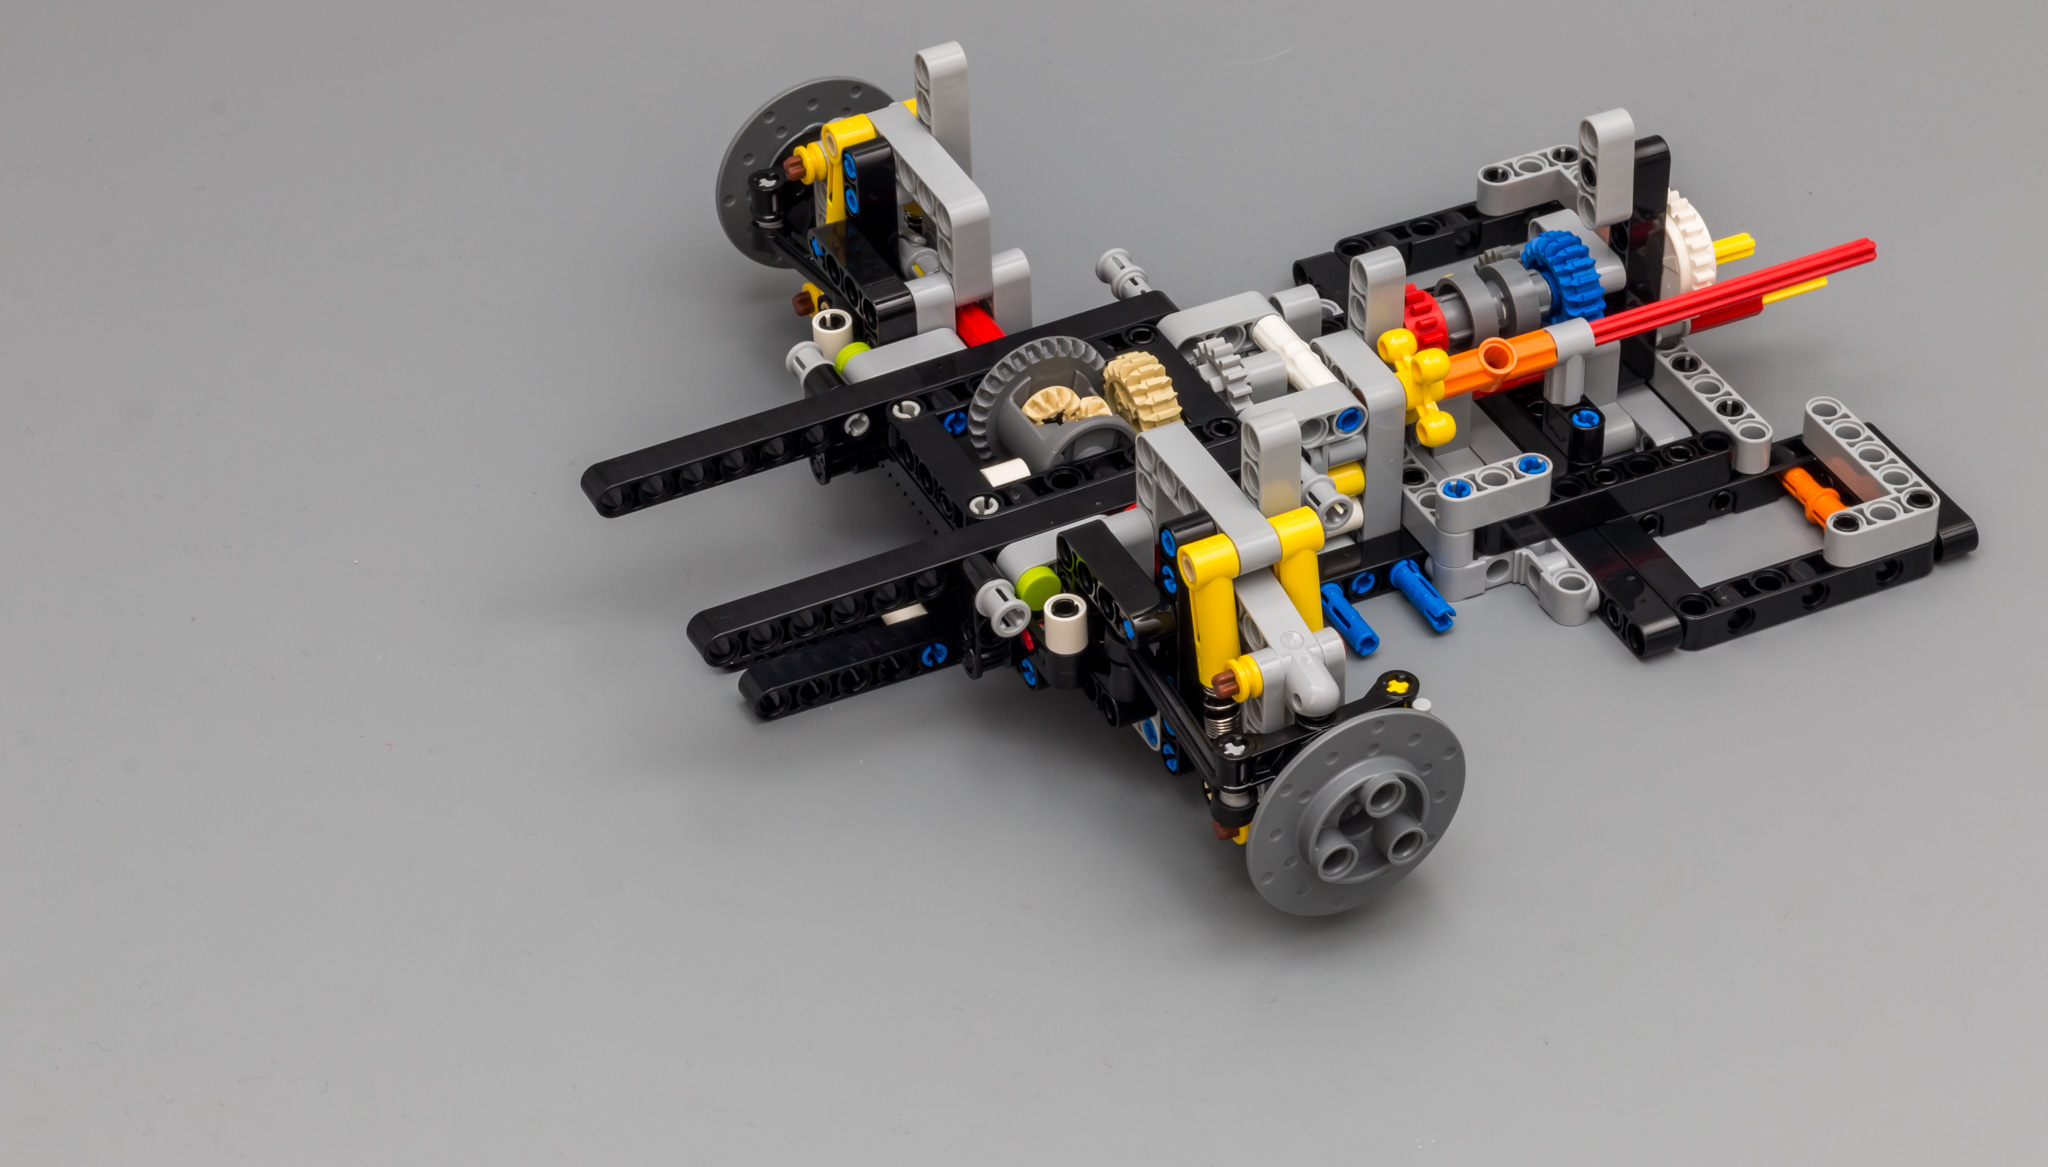
No, this is not the marriage. And I don't think you can call it an engagement either. The first kiss, maybe. Part of the chassis is connected to the rear suspension.
The gearbox uses a new type of axle connector, already used in some earlier sets. Where the white connector has lots of friction, the driving ring can move freely over the grey connector.

The video below demonstrates the two axle connectors.
https://www.youtube.com/watch?v=A-3teRCv4ZY
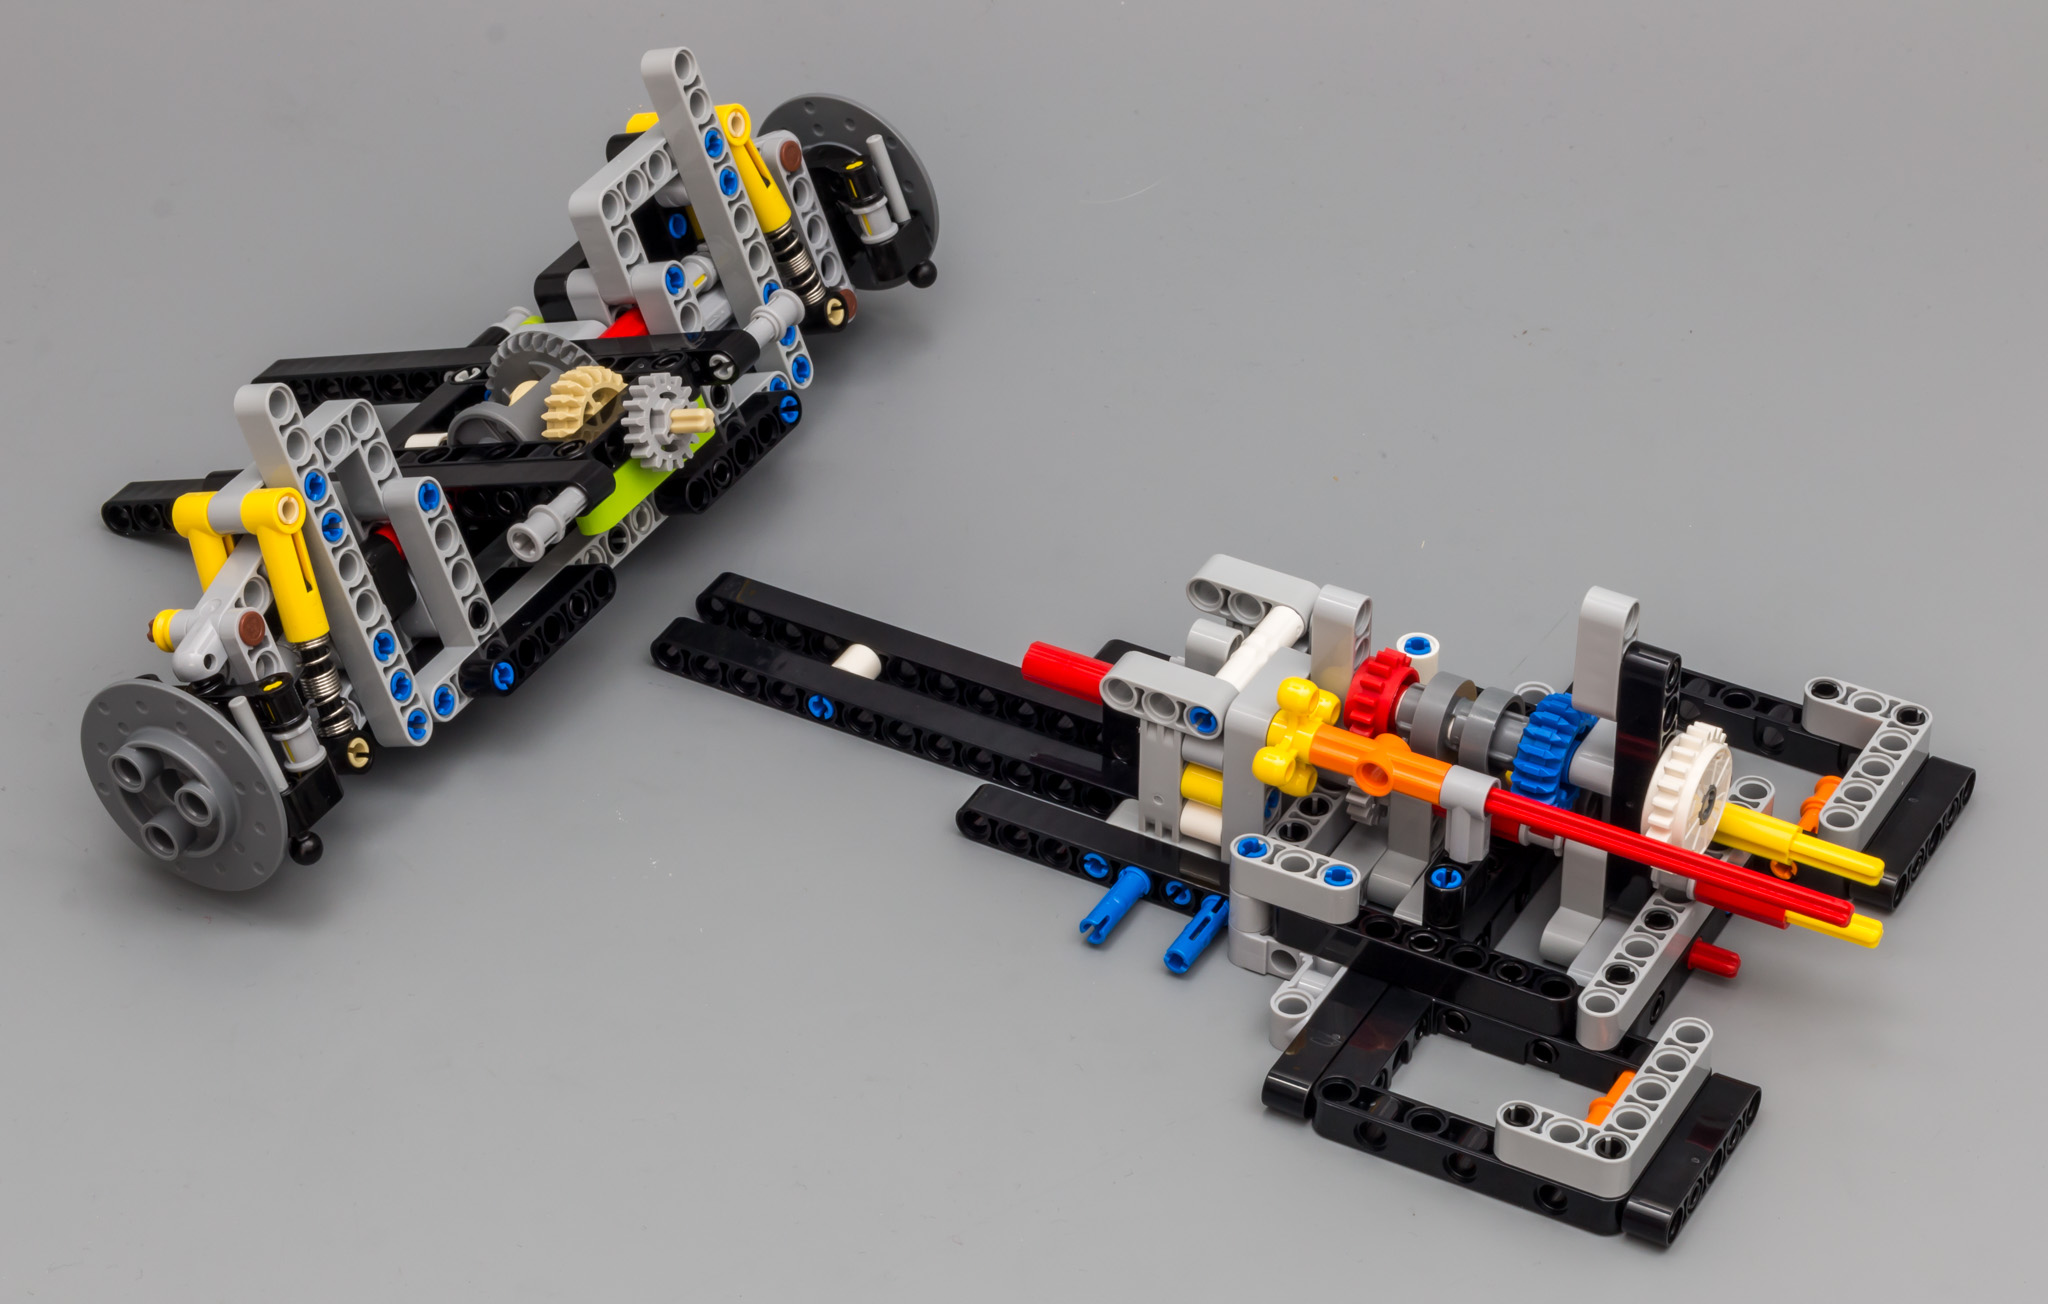
And after the first kiss comes....okay, I won't go any further with this analogy. Anyway, the gearbox is connected to the rear of the chassis.

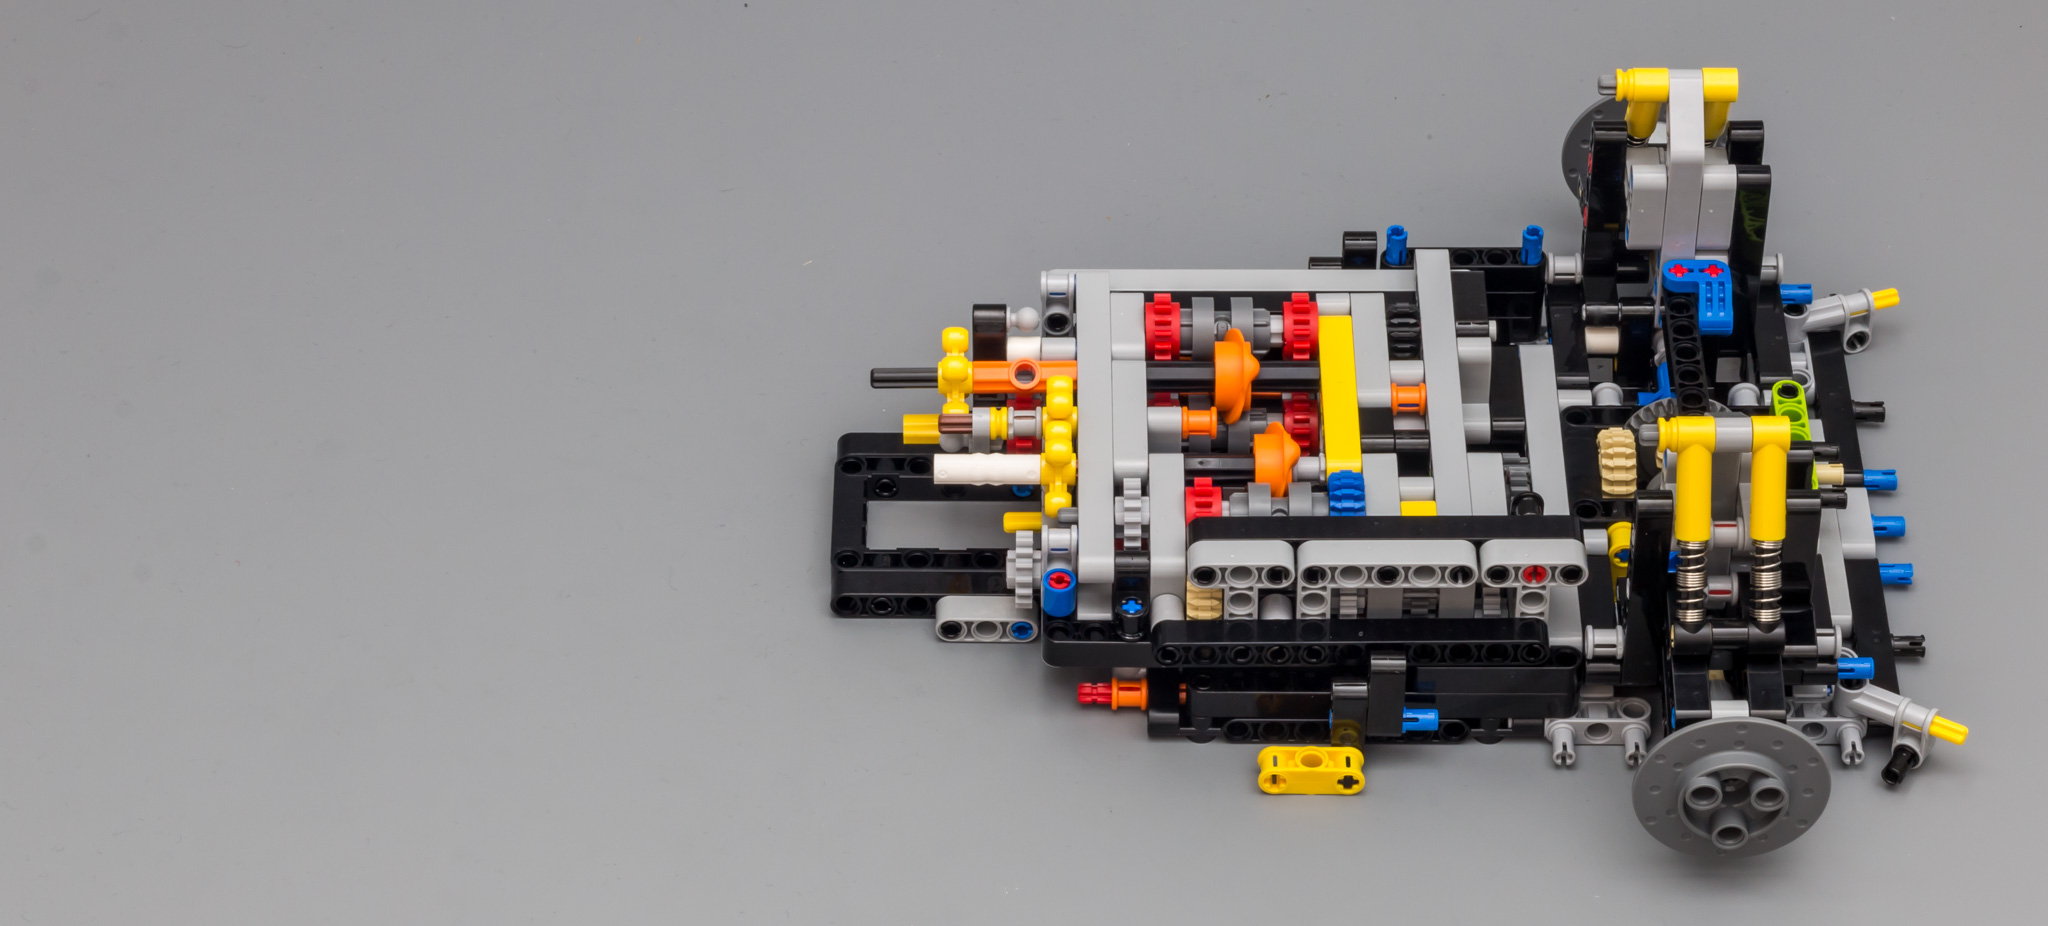
Again from a different angle.


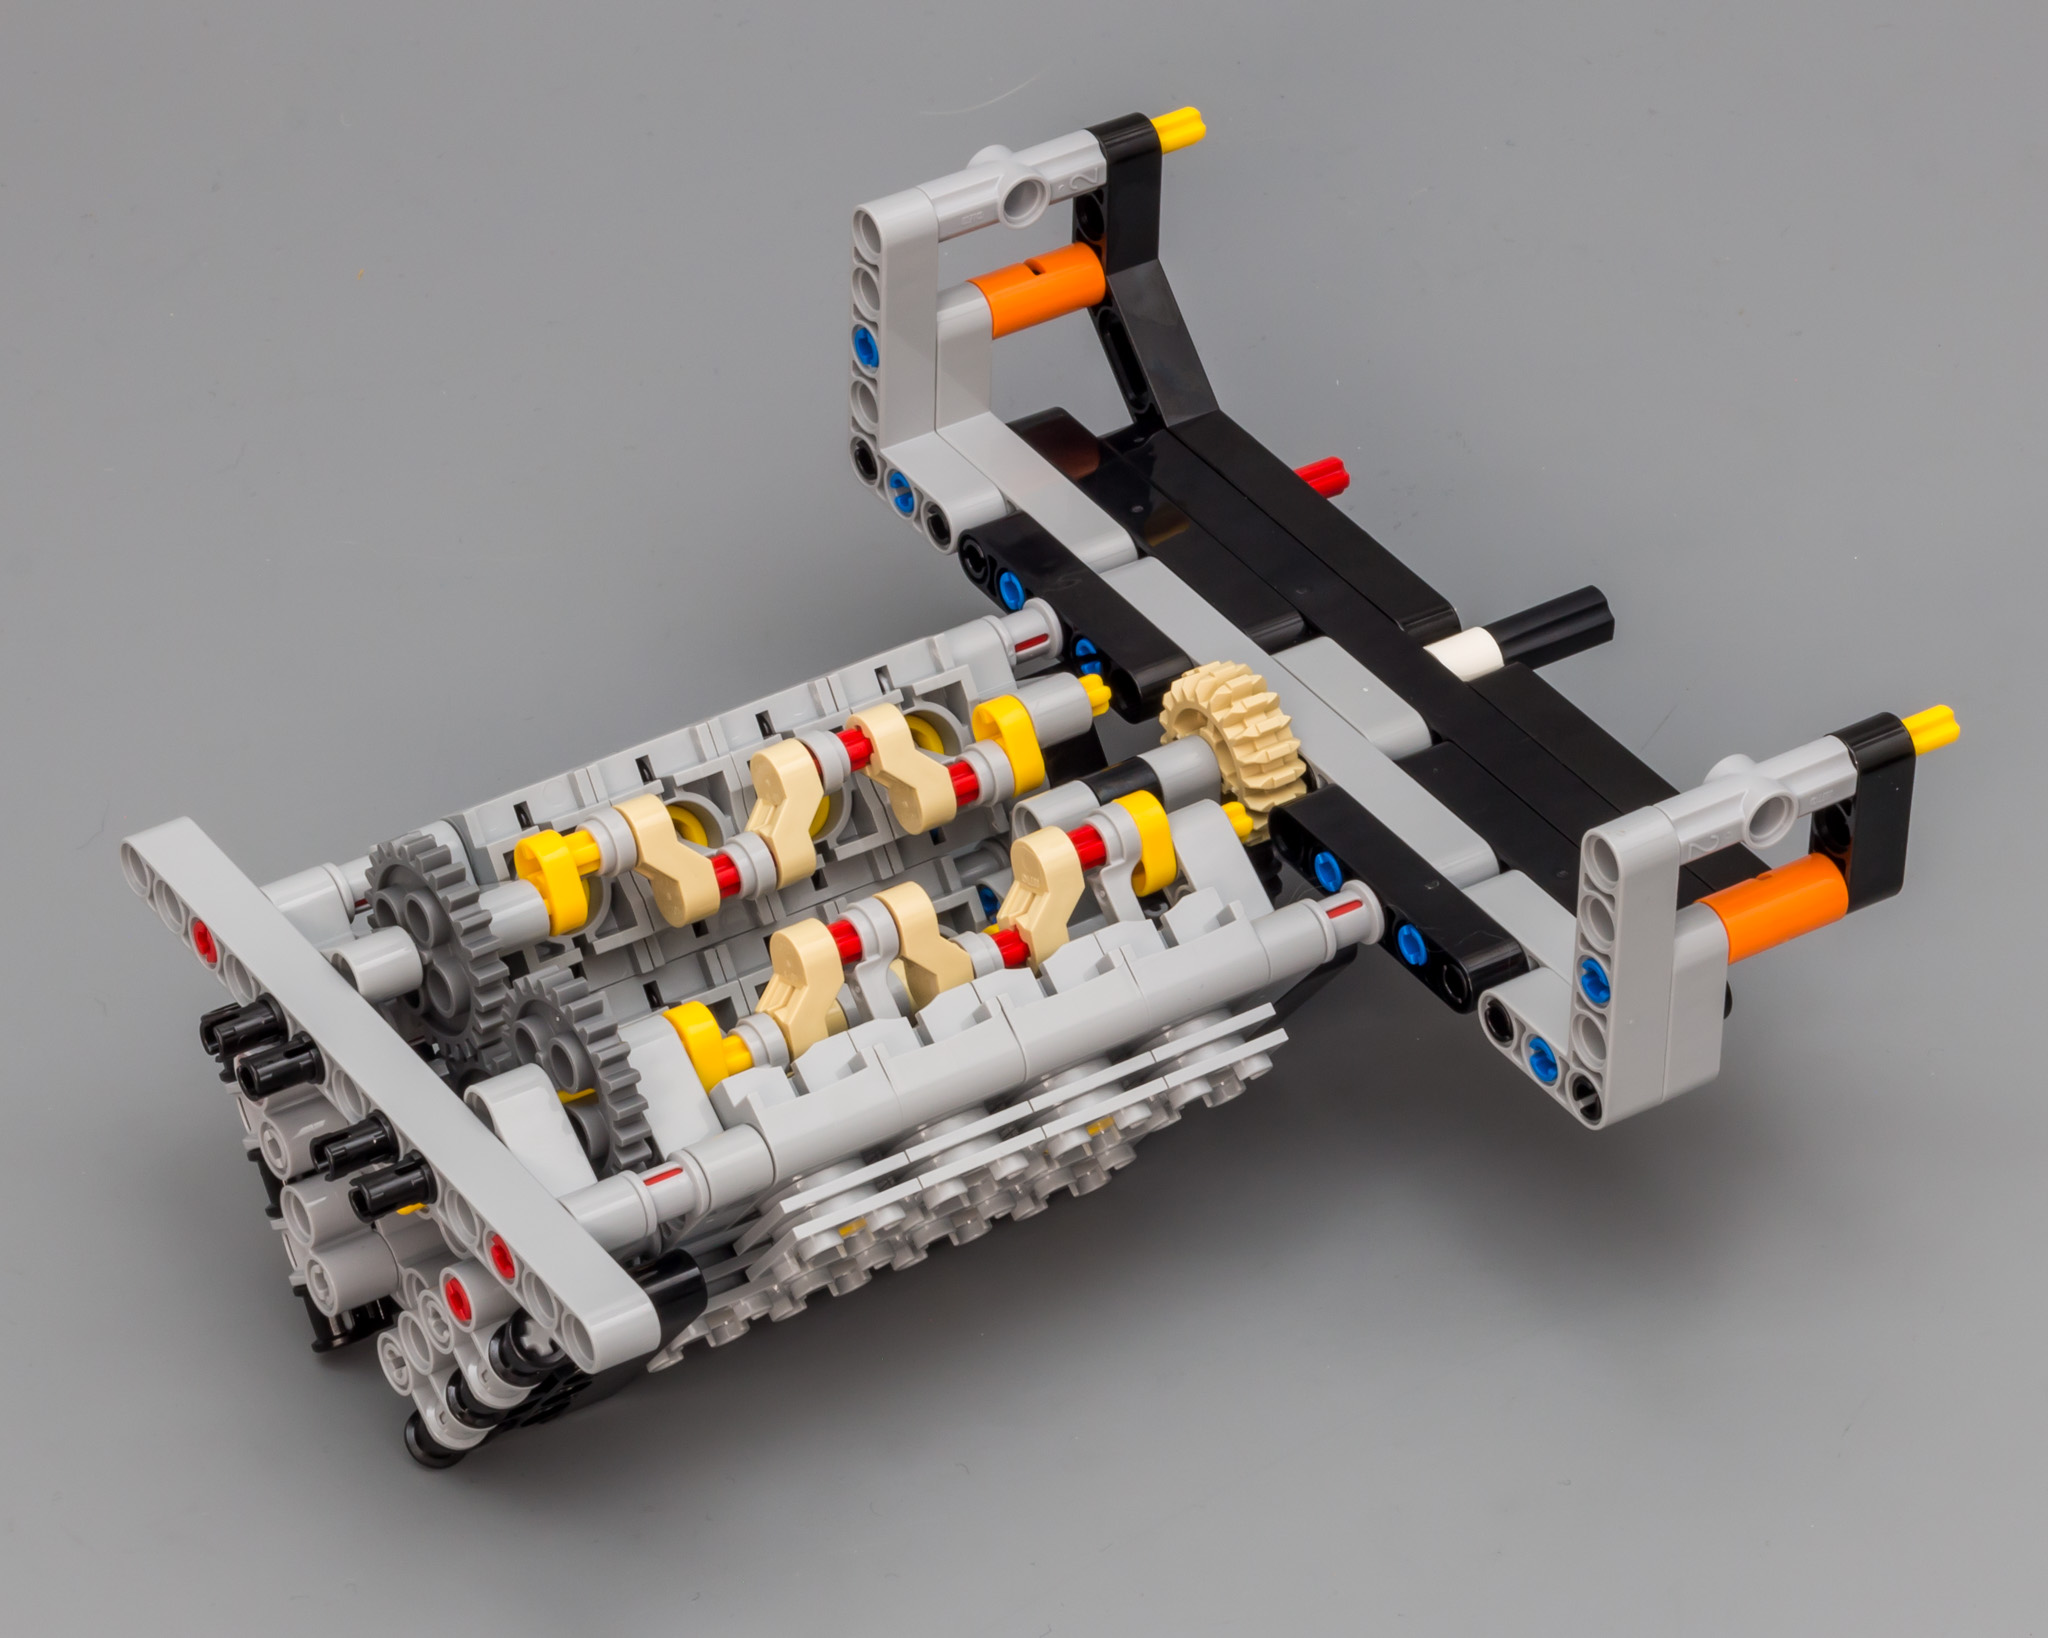
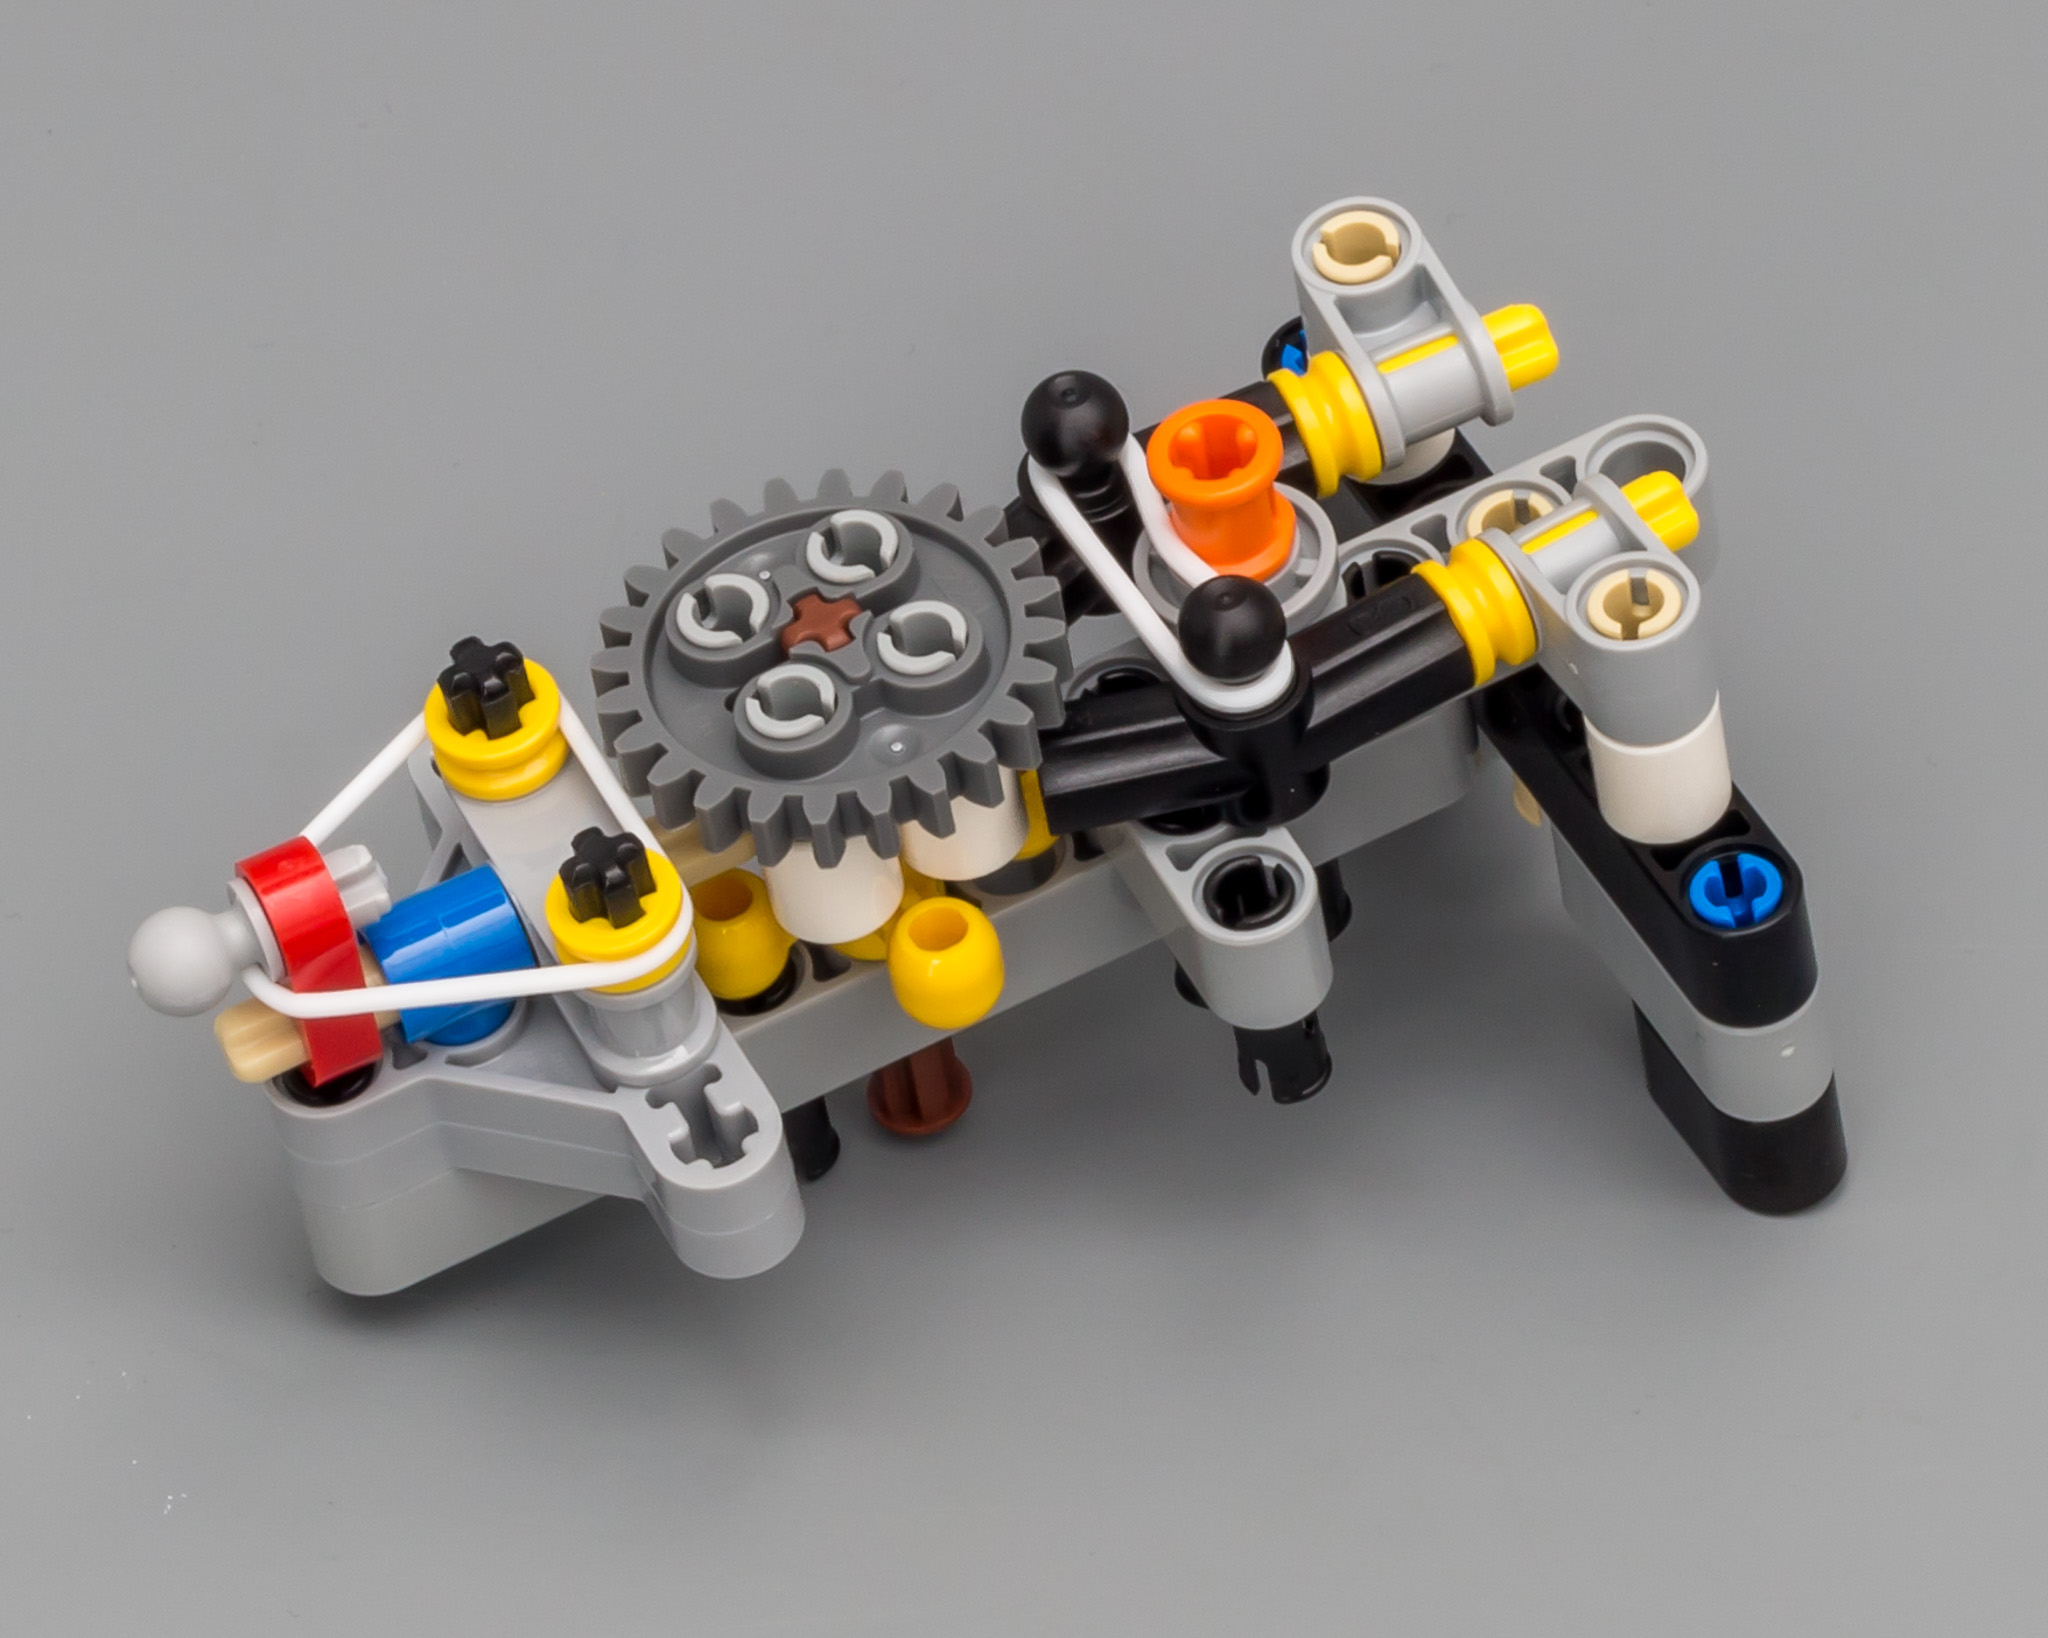
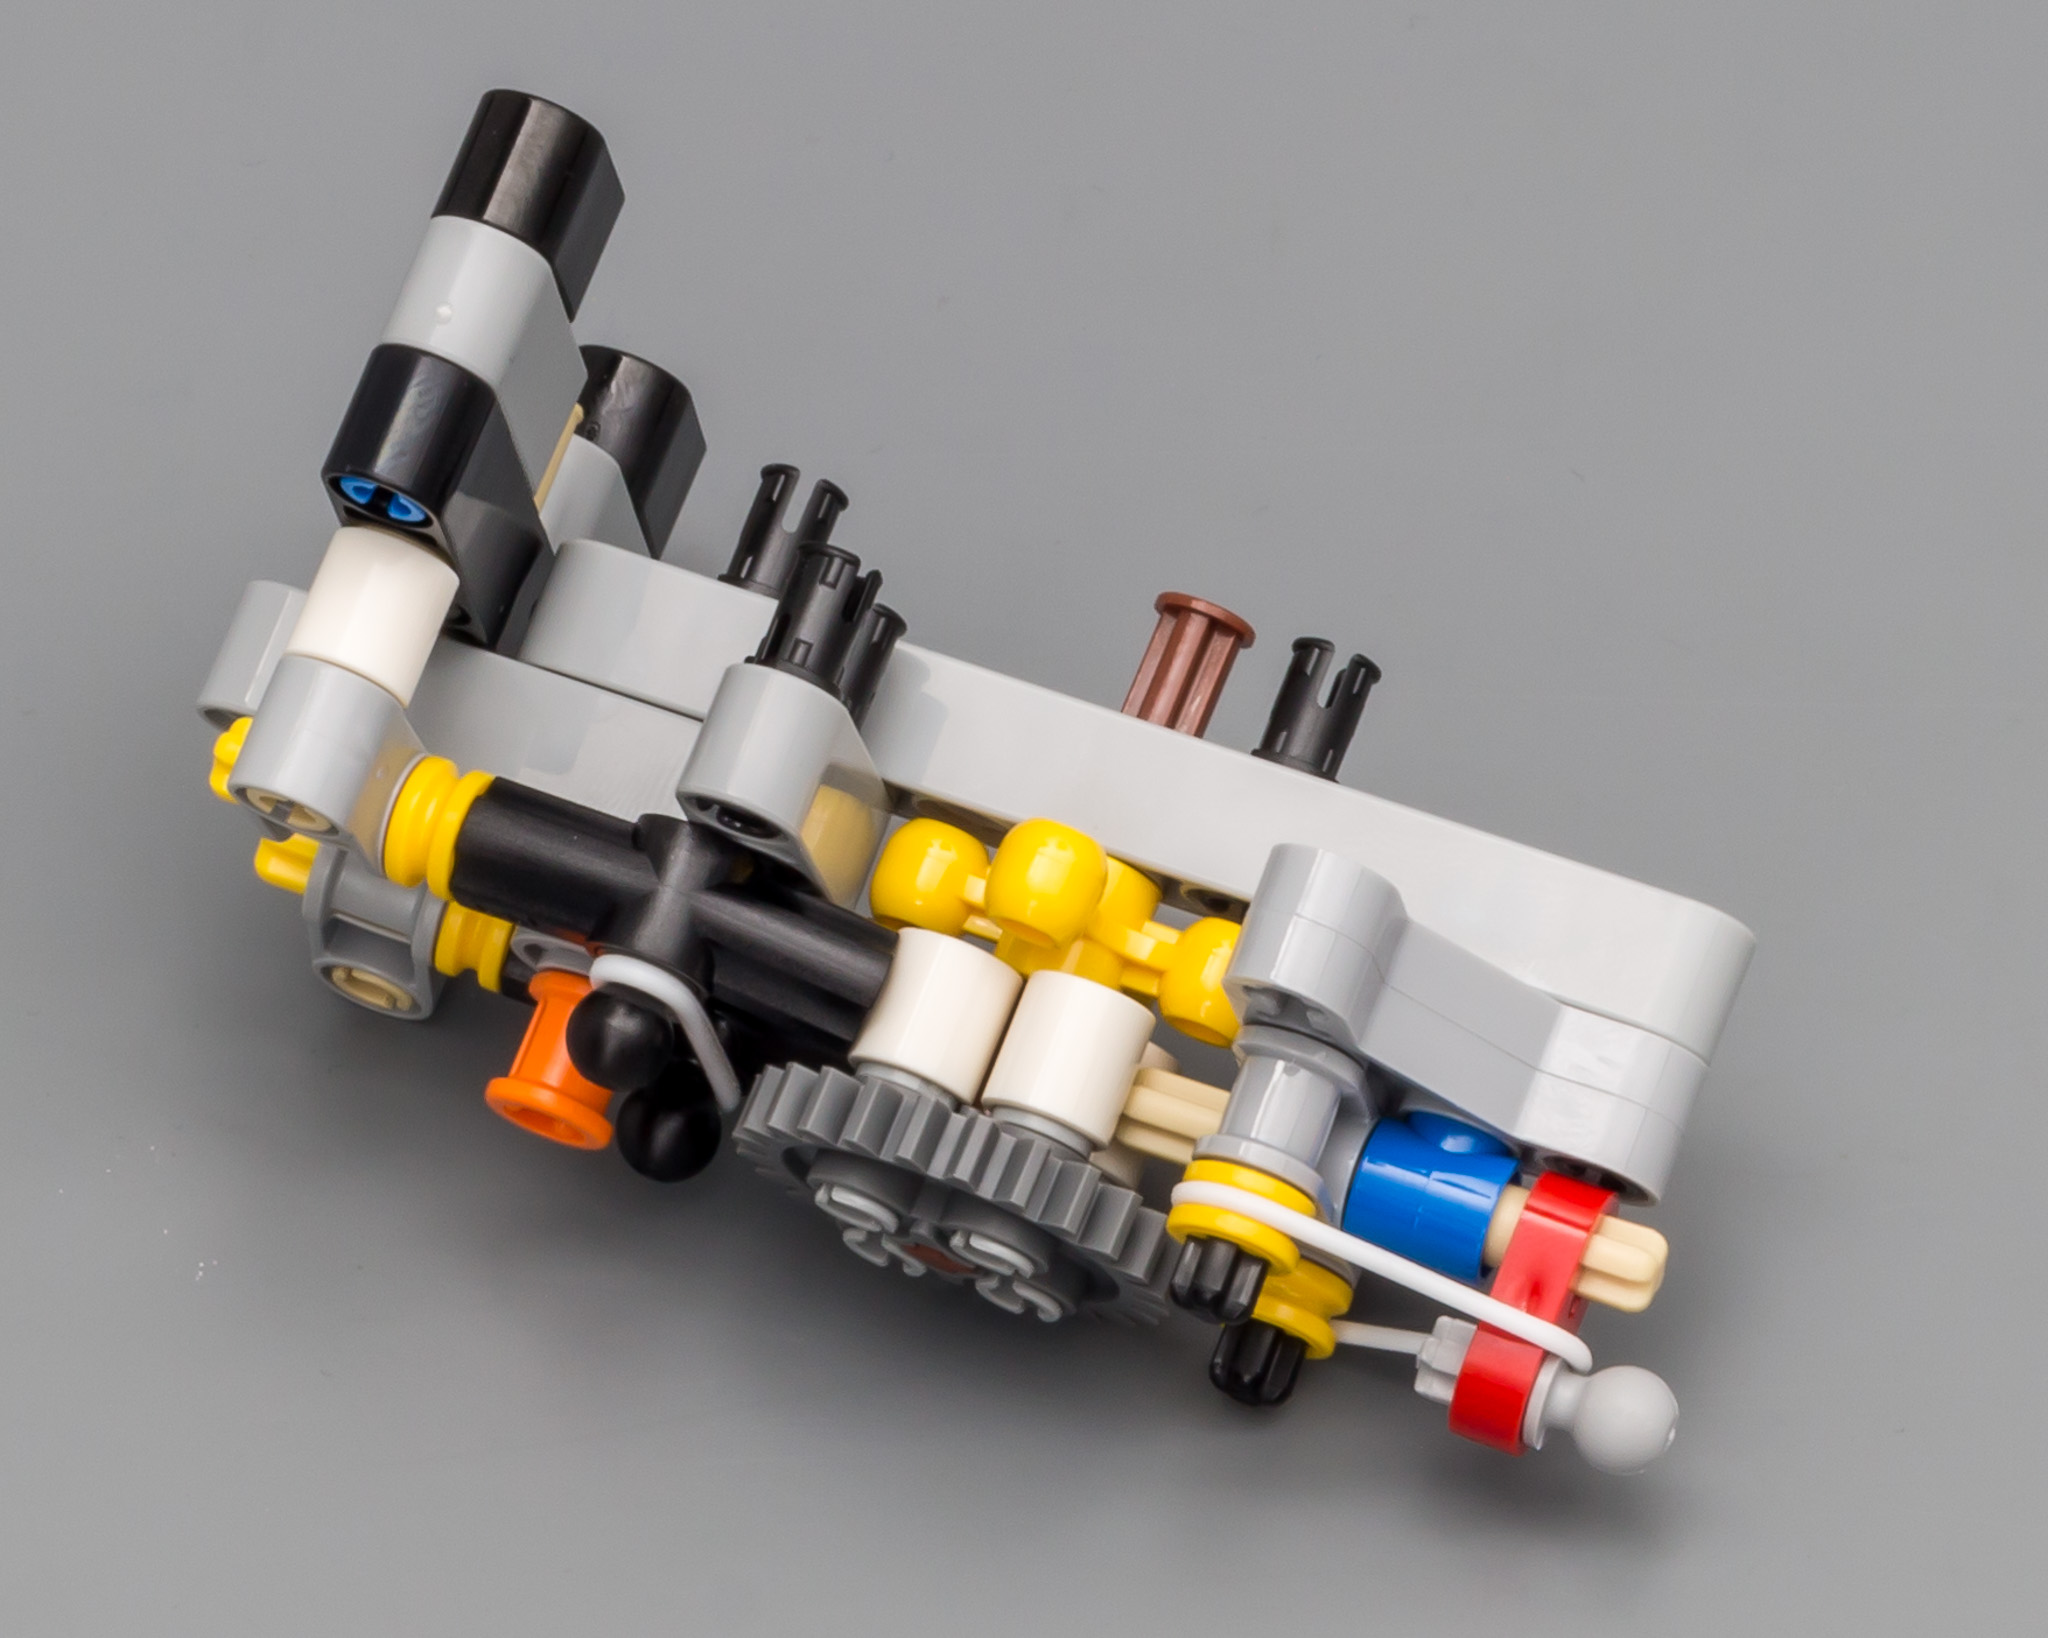
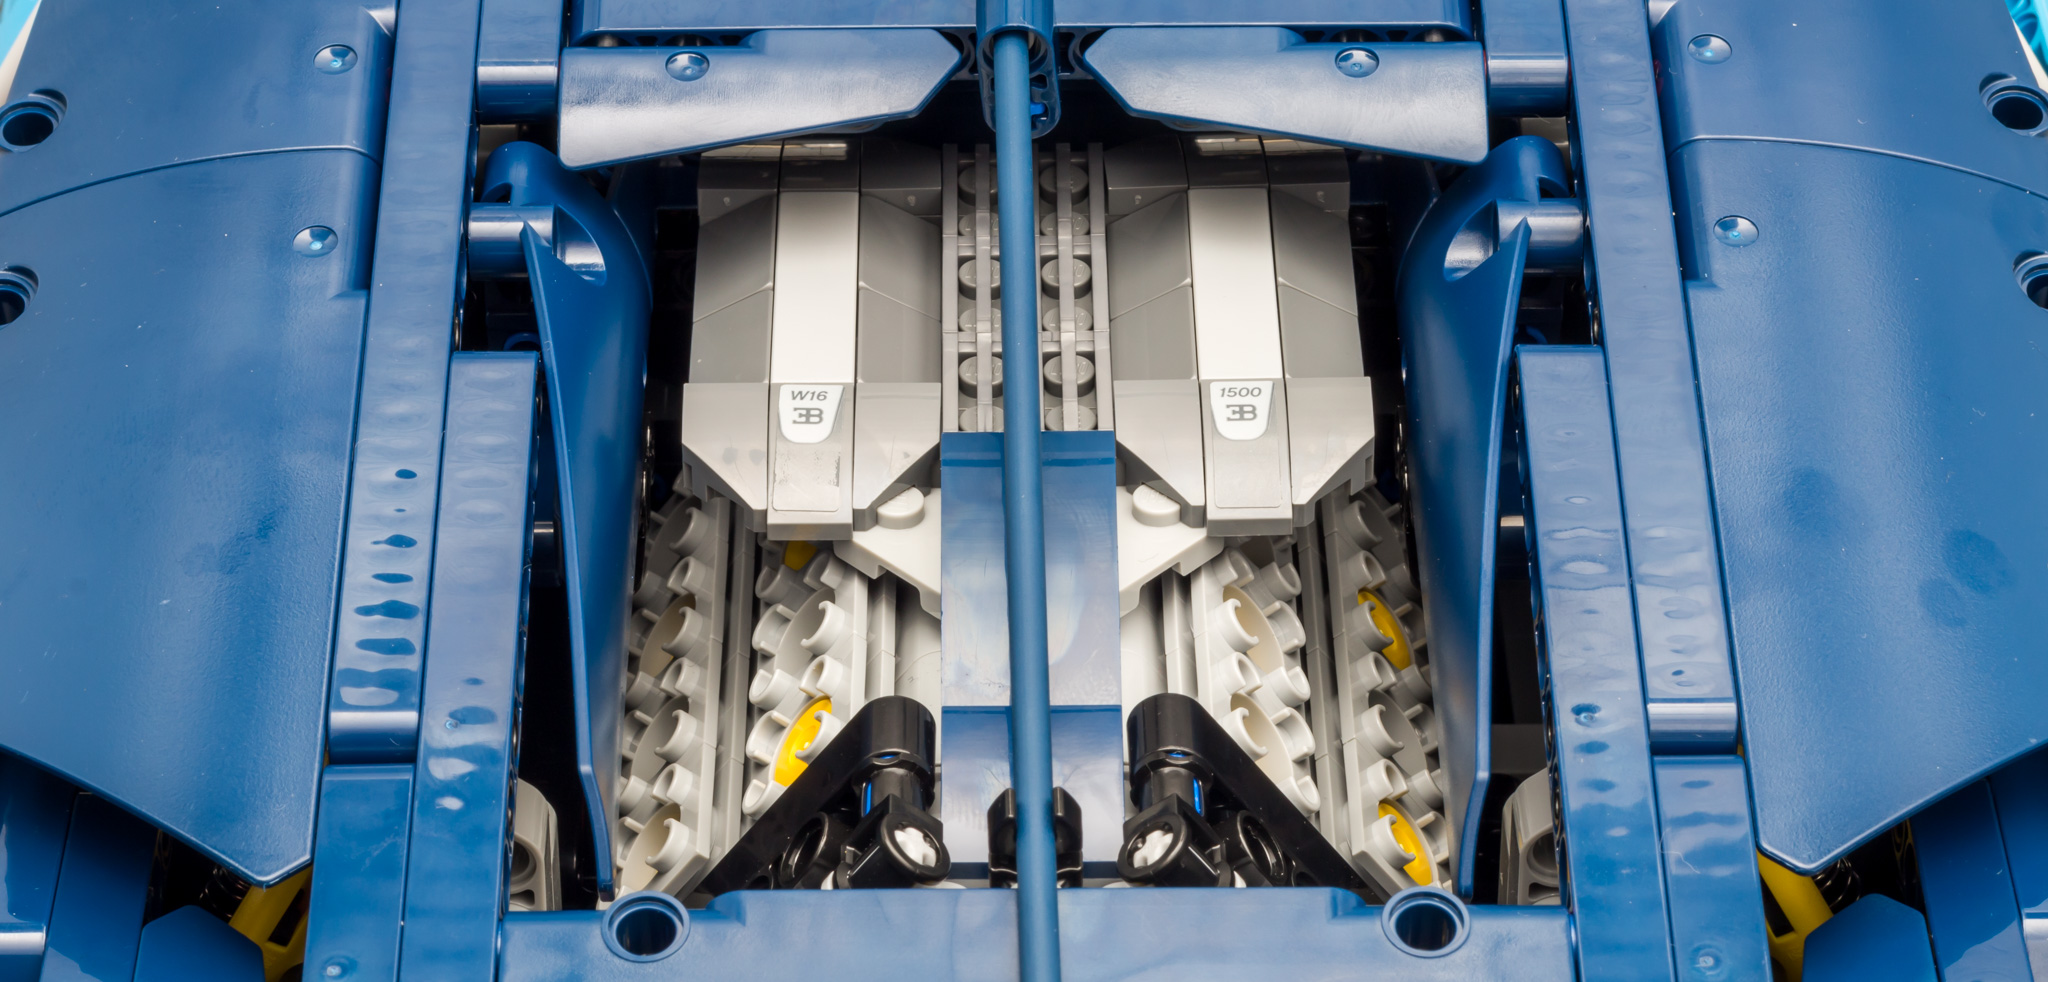
W16 ENGINE
Here's the top and bottom view of the W16 engine. The engine doesn't use a single crankshaft, but a construction with three axles and three 24T gears. Admittedly, I would have loved to see a custom built engine with other parts than the standard pistons and cylinders, like the MACK truck. However, I don't think this is a bad solution. The engine operates smoothly and it's fun the see all the pistons moving. It does feel like a beast of an engine.

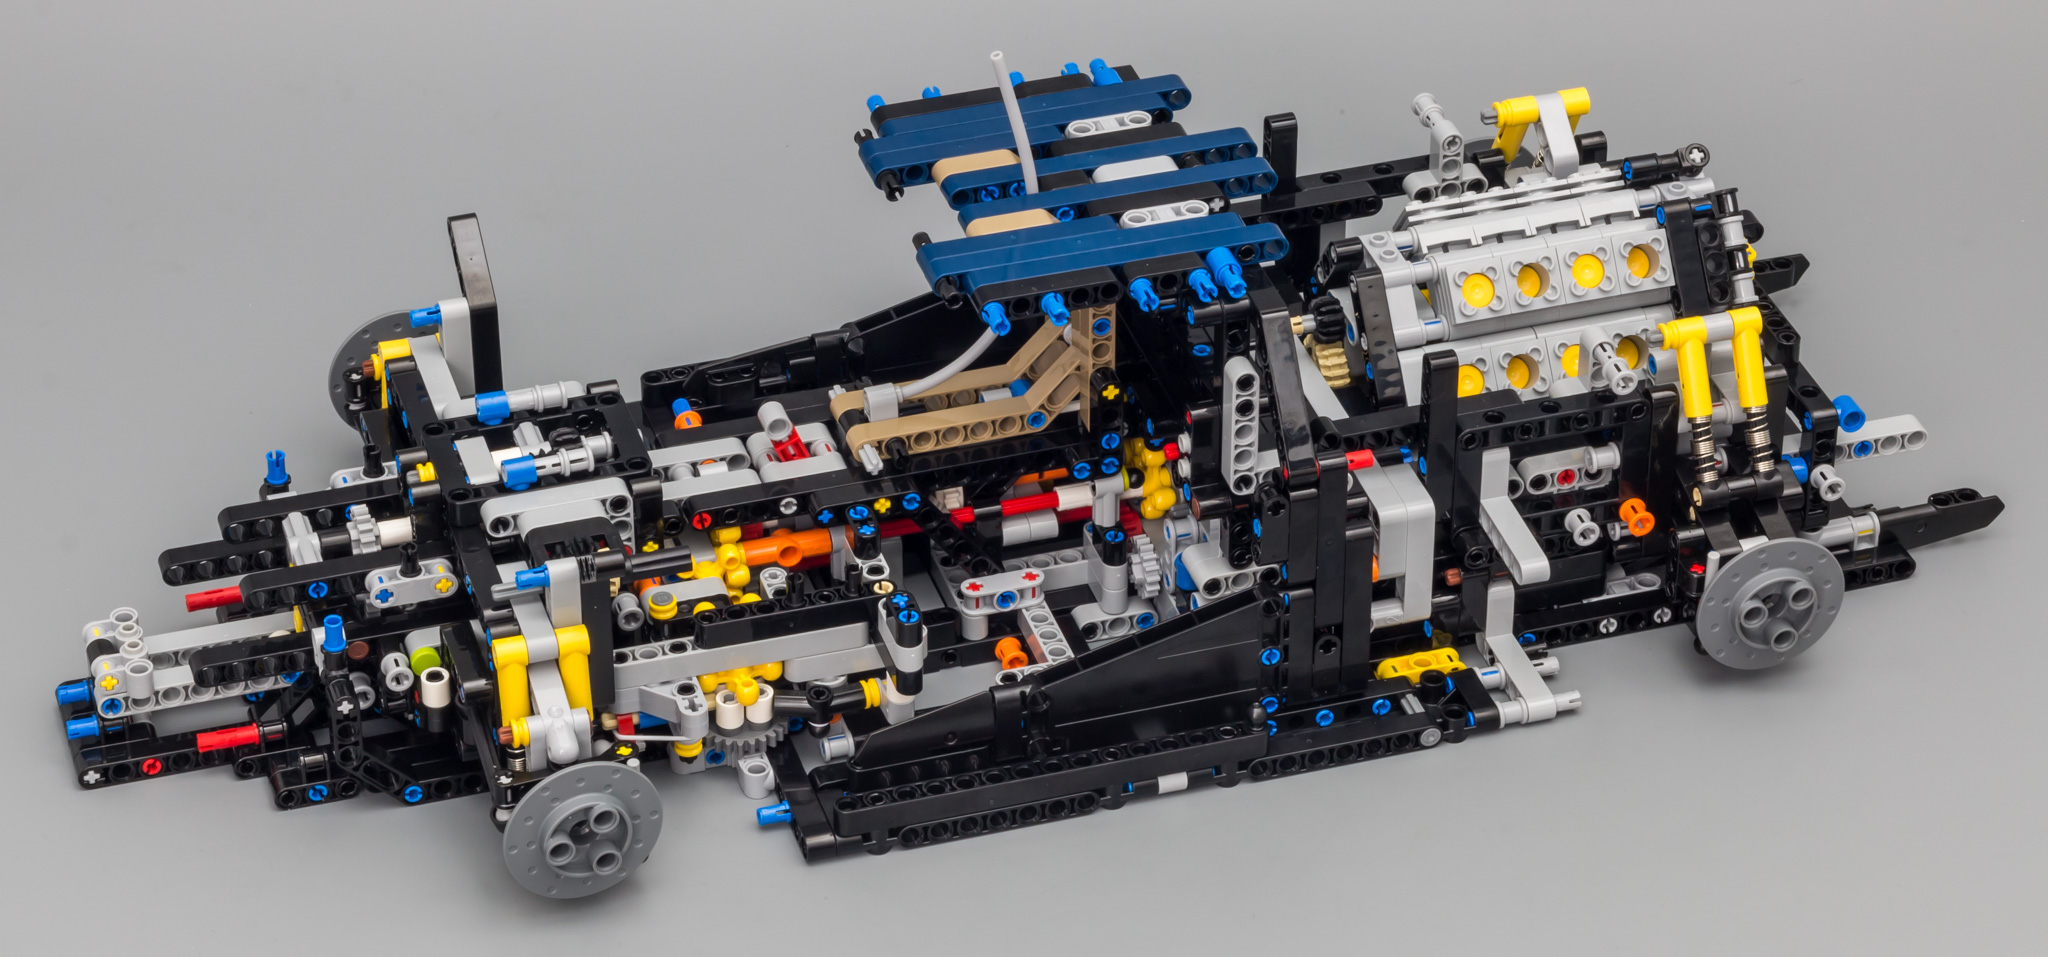
Let's mount the engine by attaching it to the chassis.

Again from a different angle.

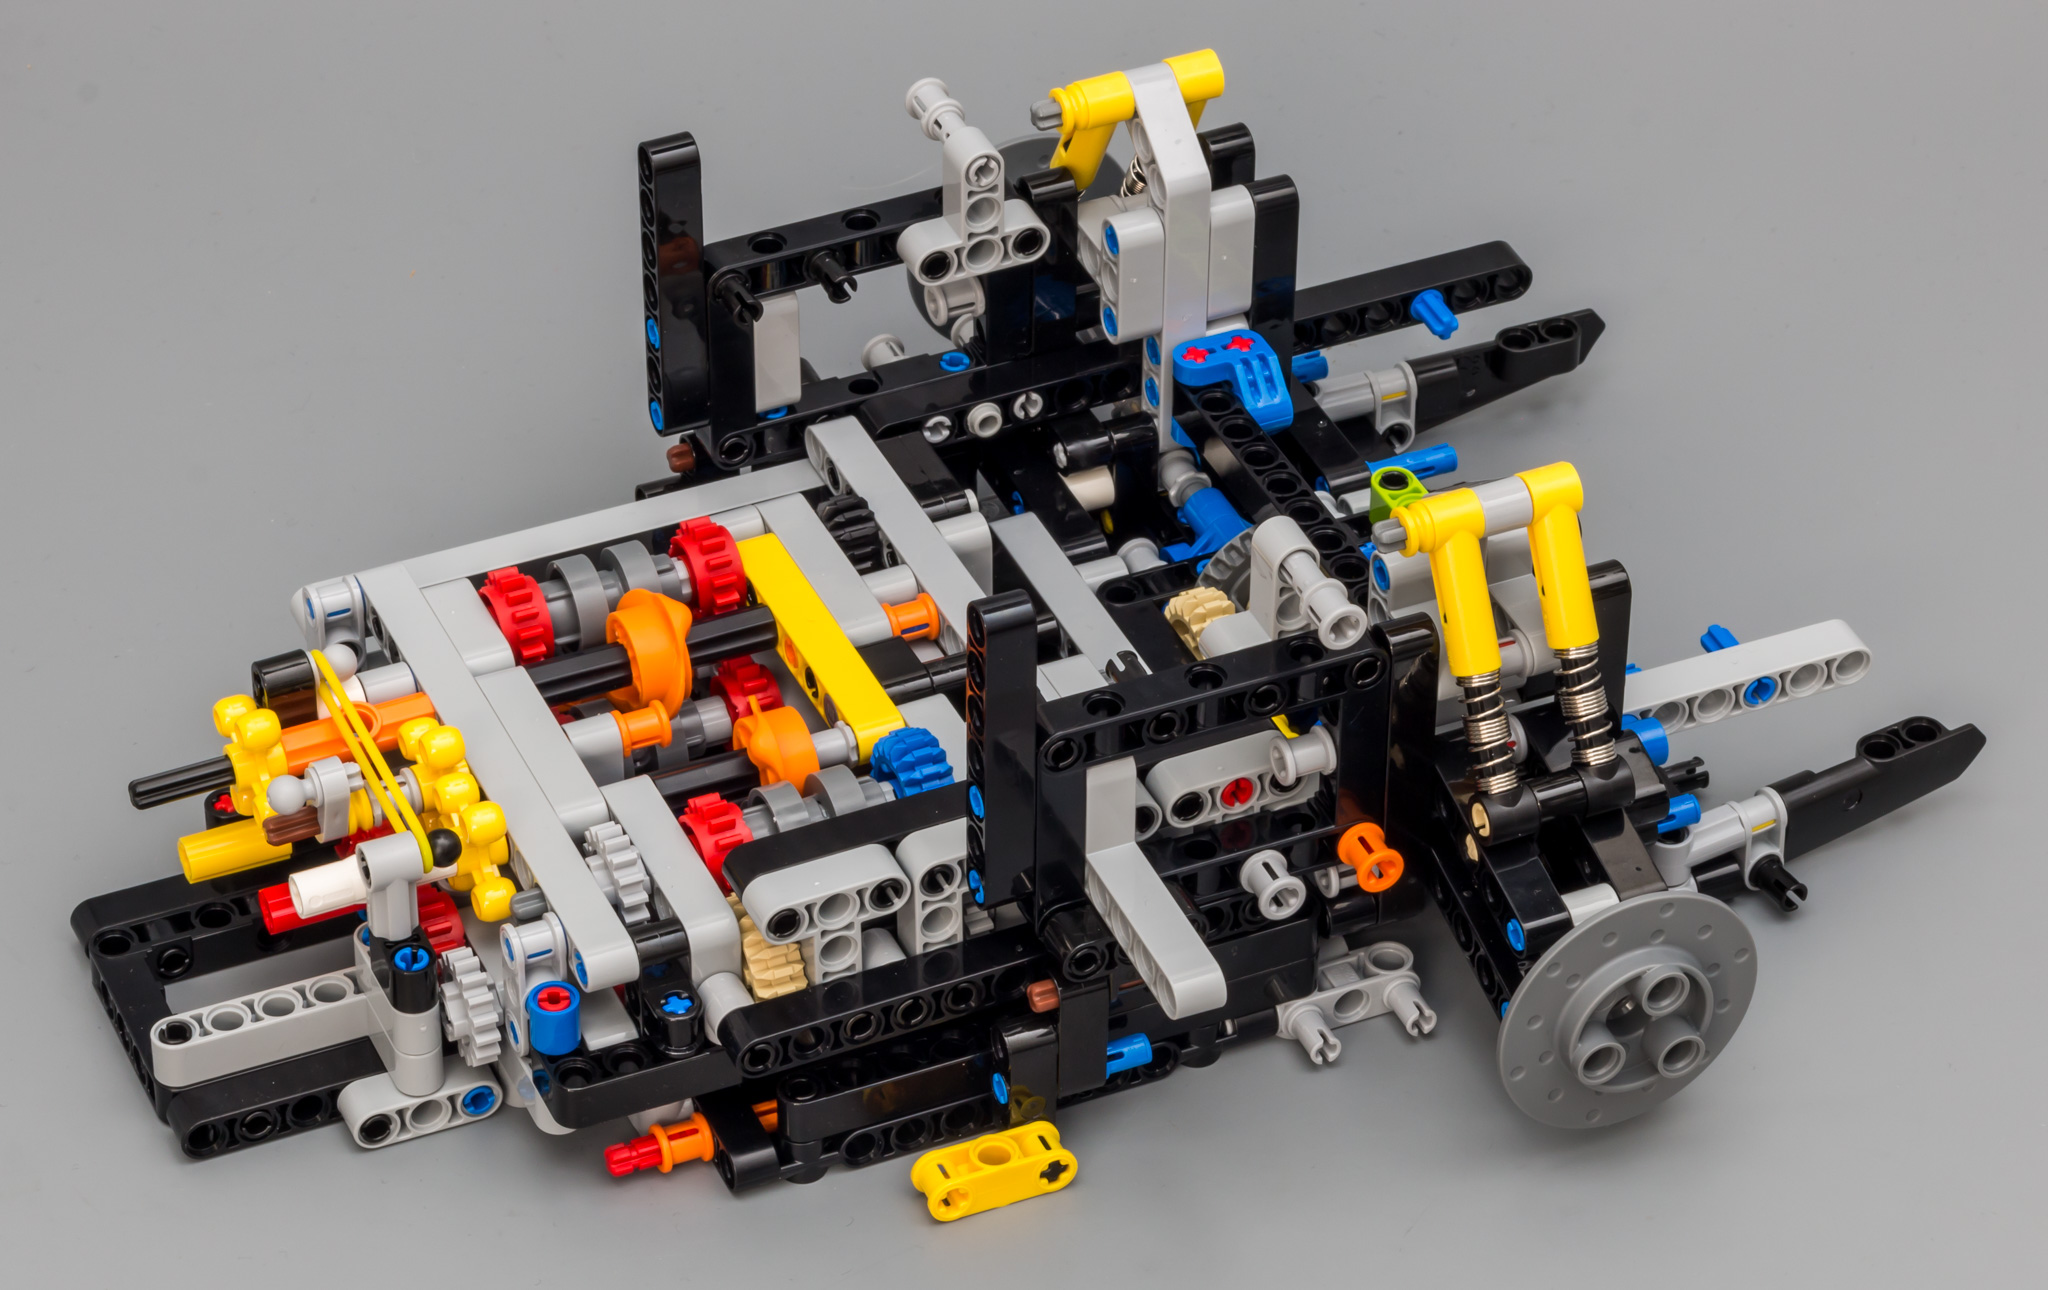
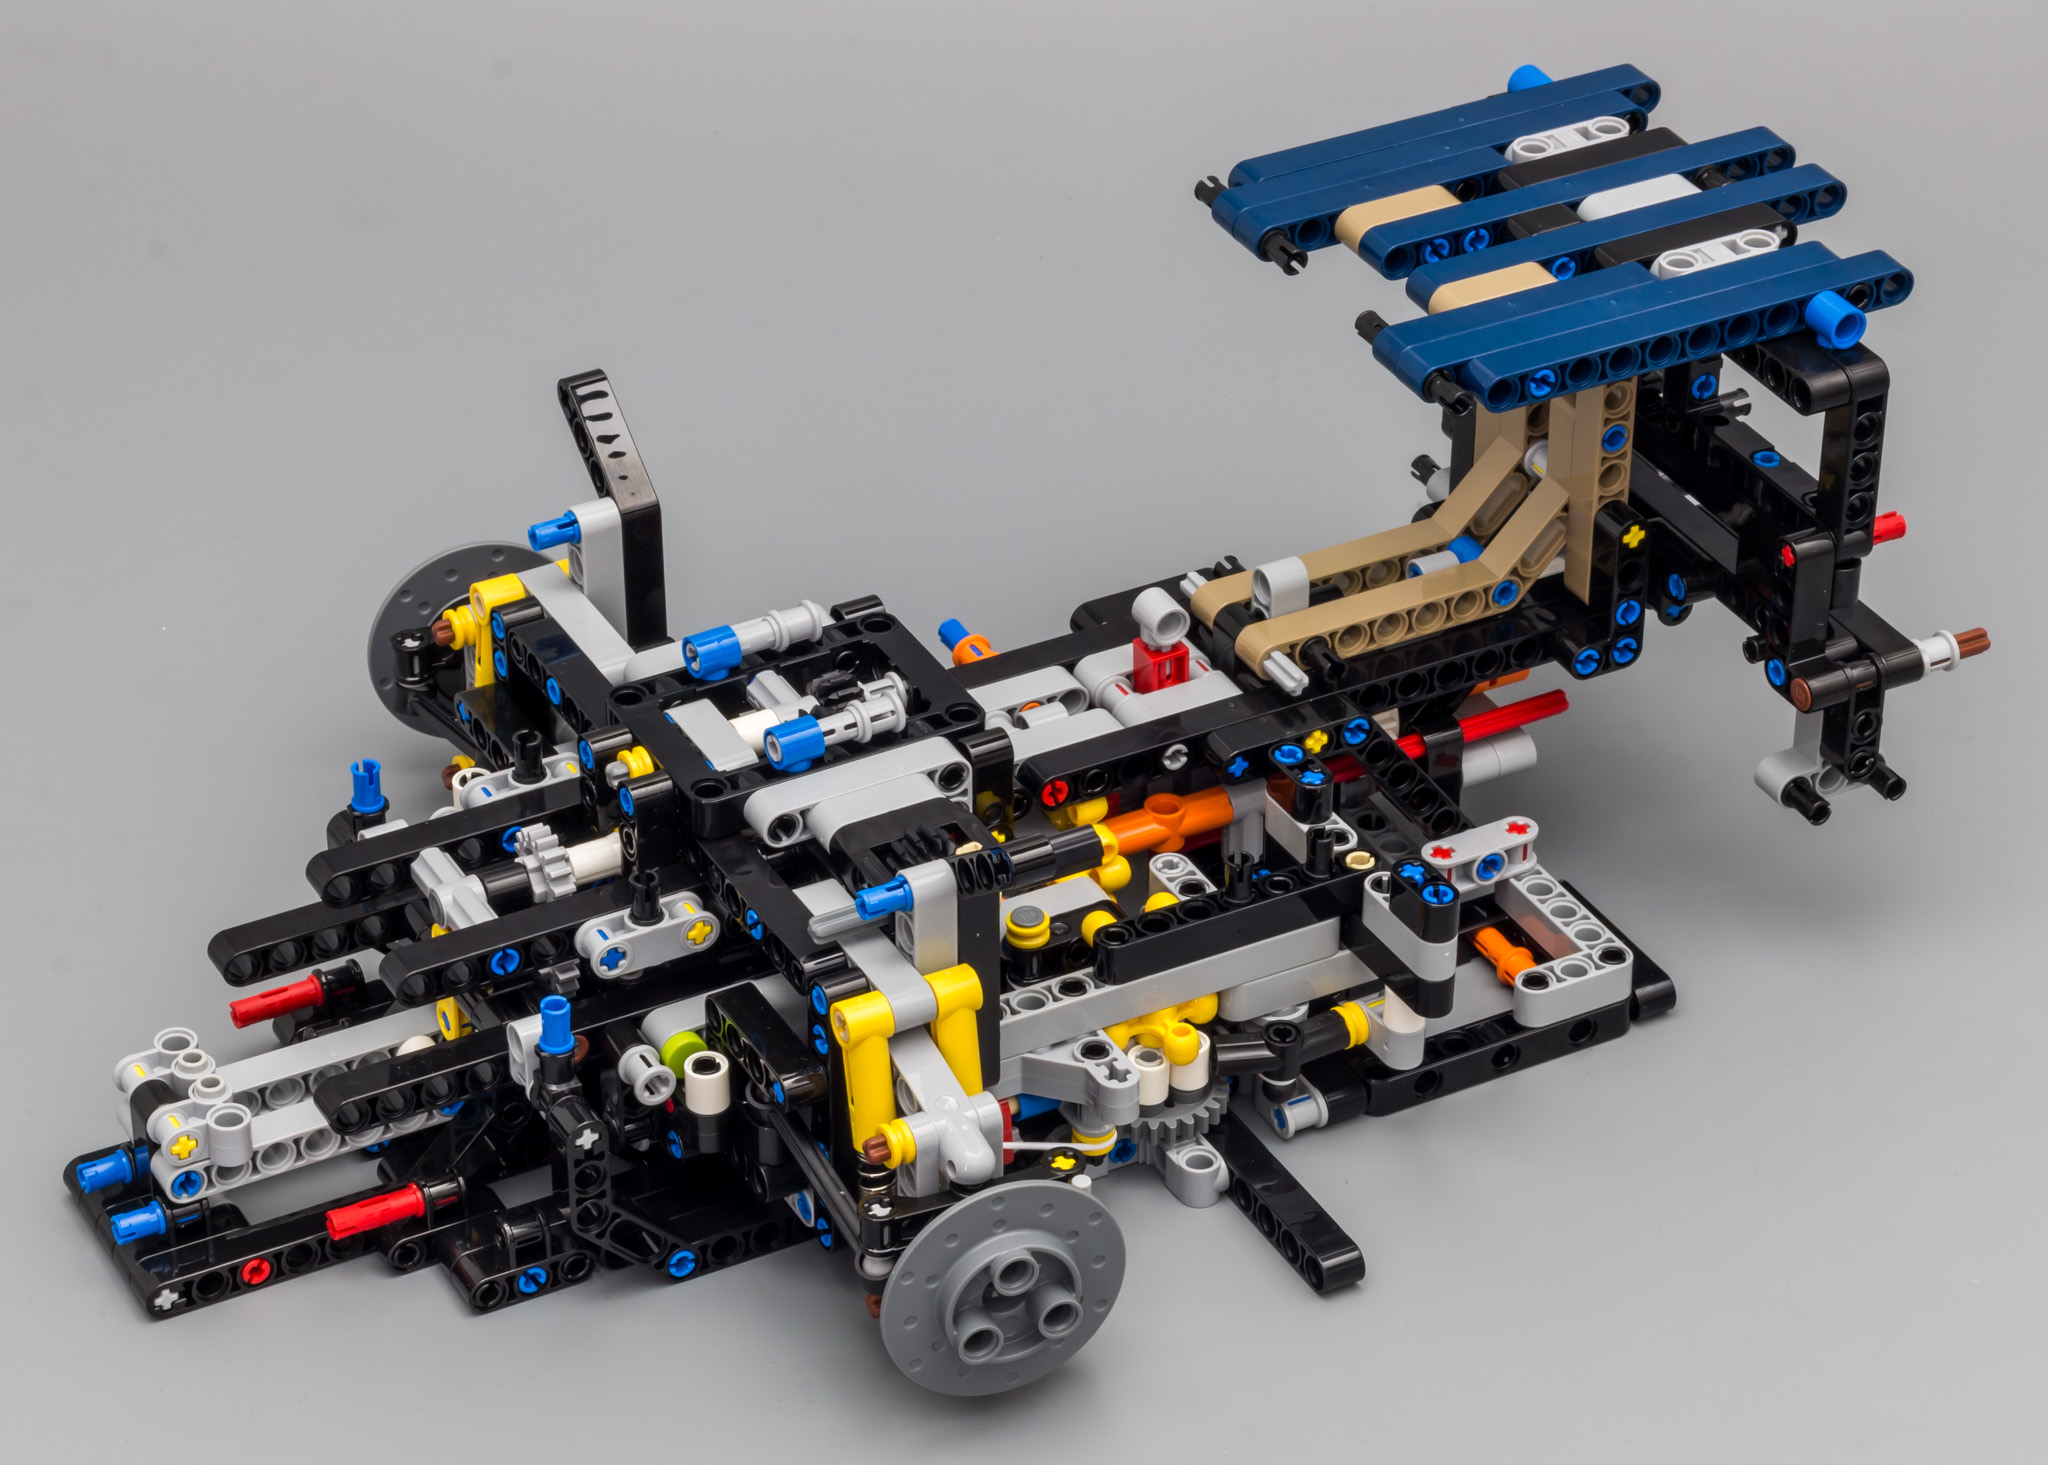
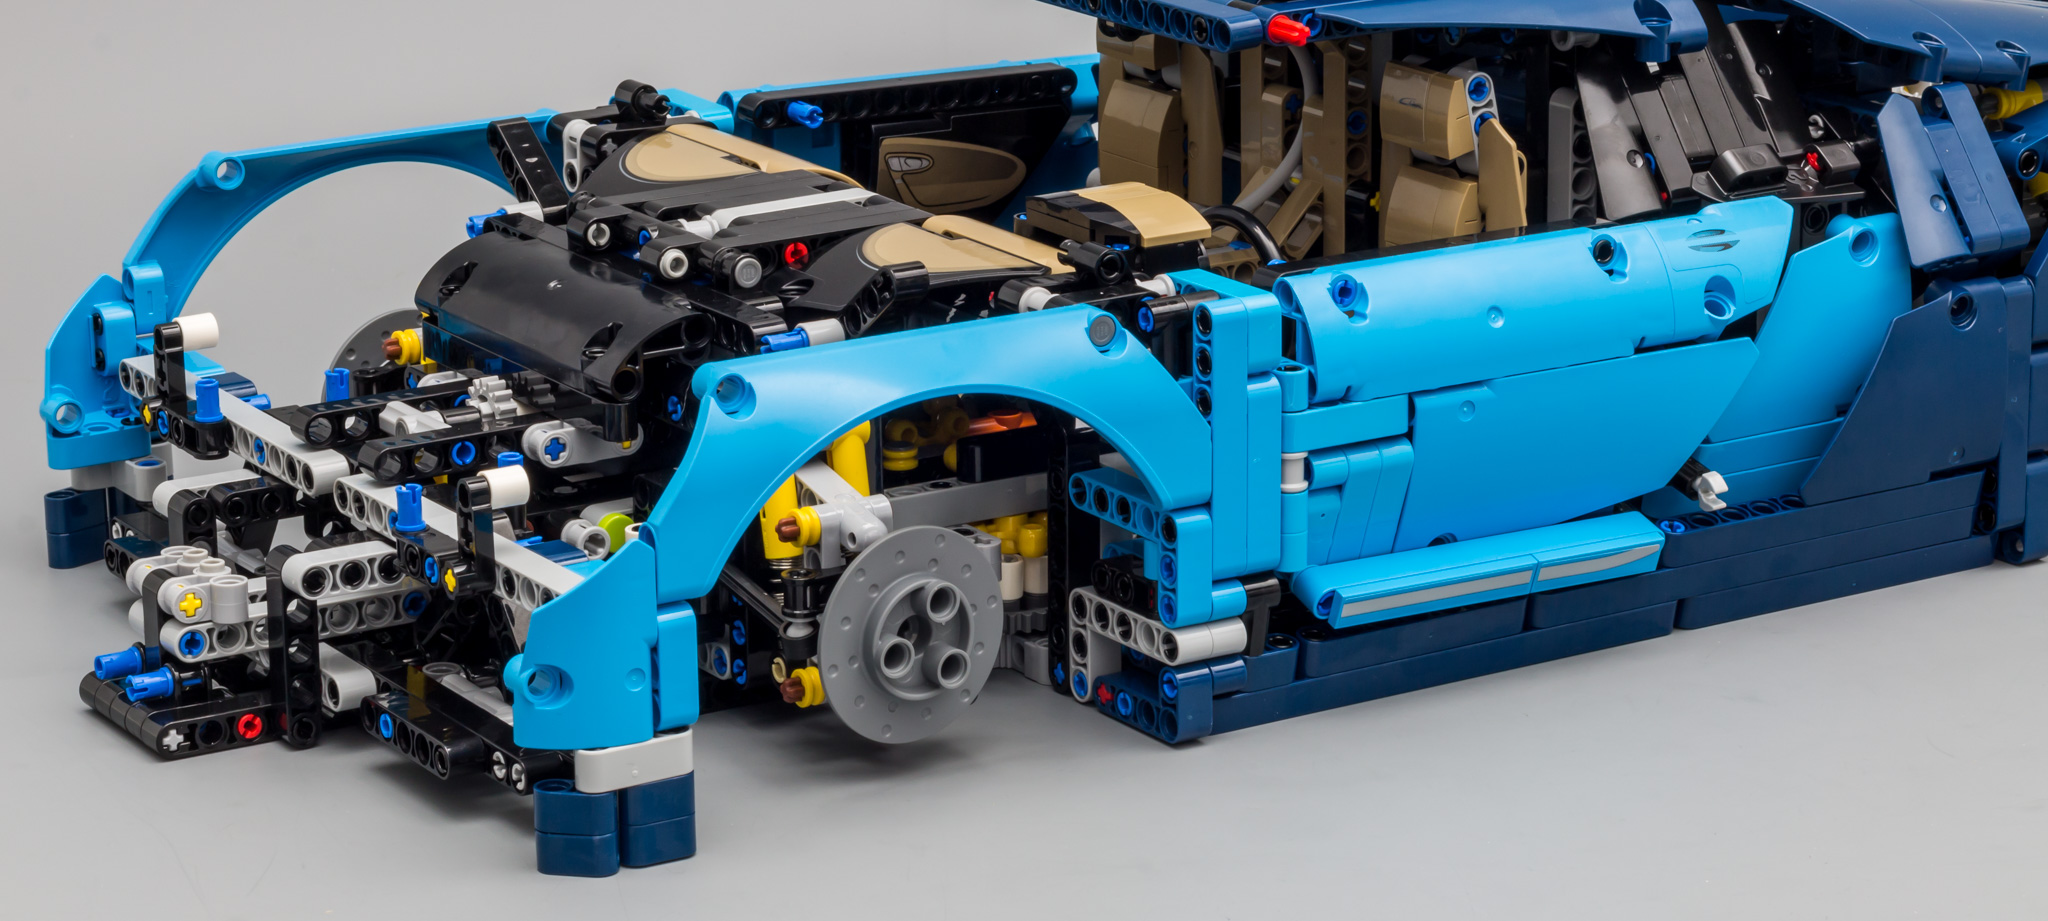
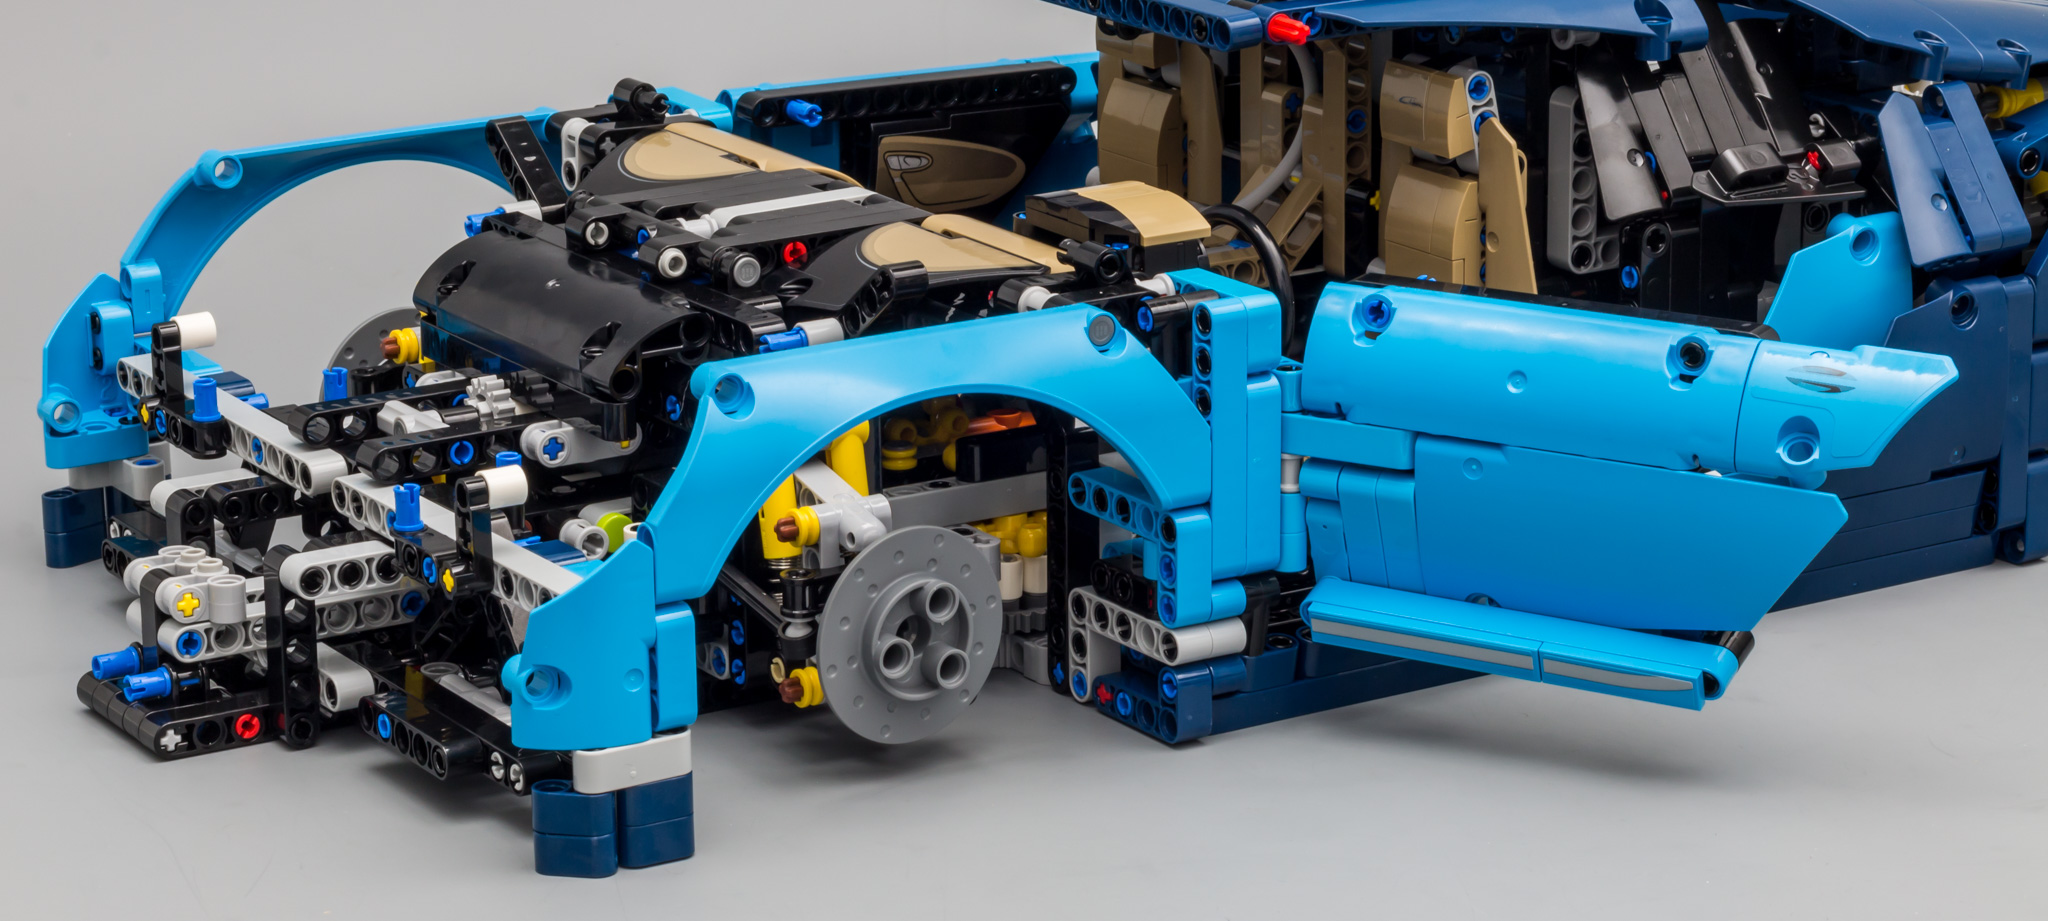
FRONT CHASSIS
The rear of the chassis is finished, gearbox is in place and the motor has been built. It's time to move on to the front of the car.
The front suspension also uses two springs on each side.
Again from a different angle.
This is what the front chassis looks like when the front suspension has been attached.

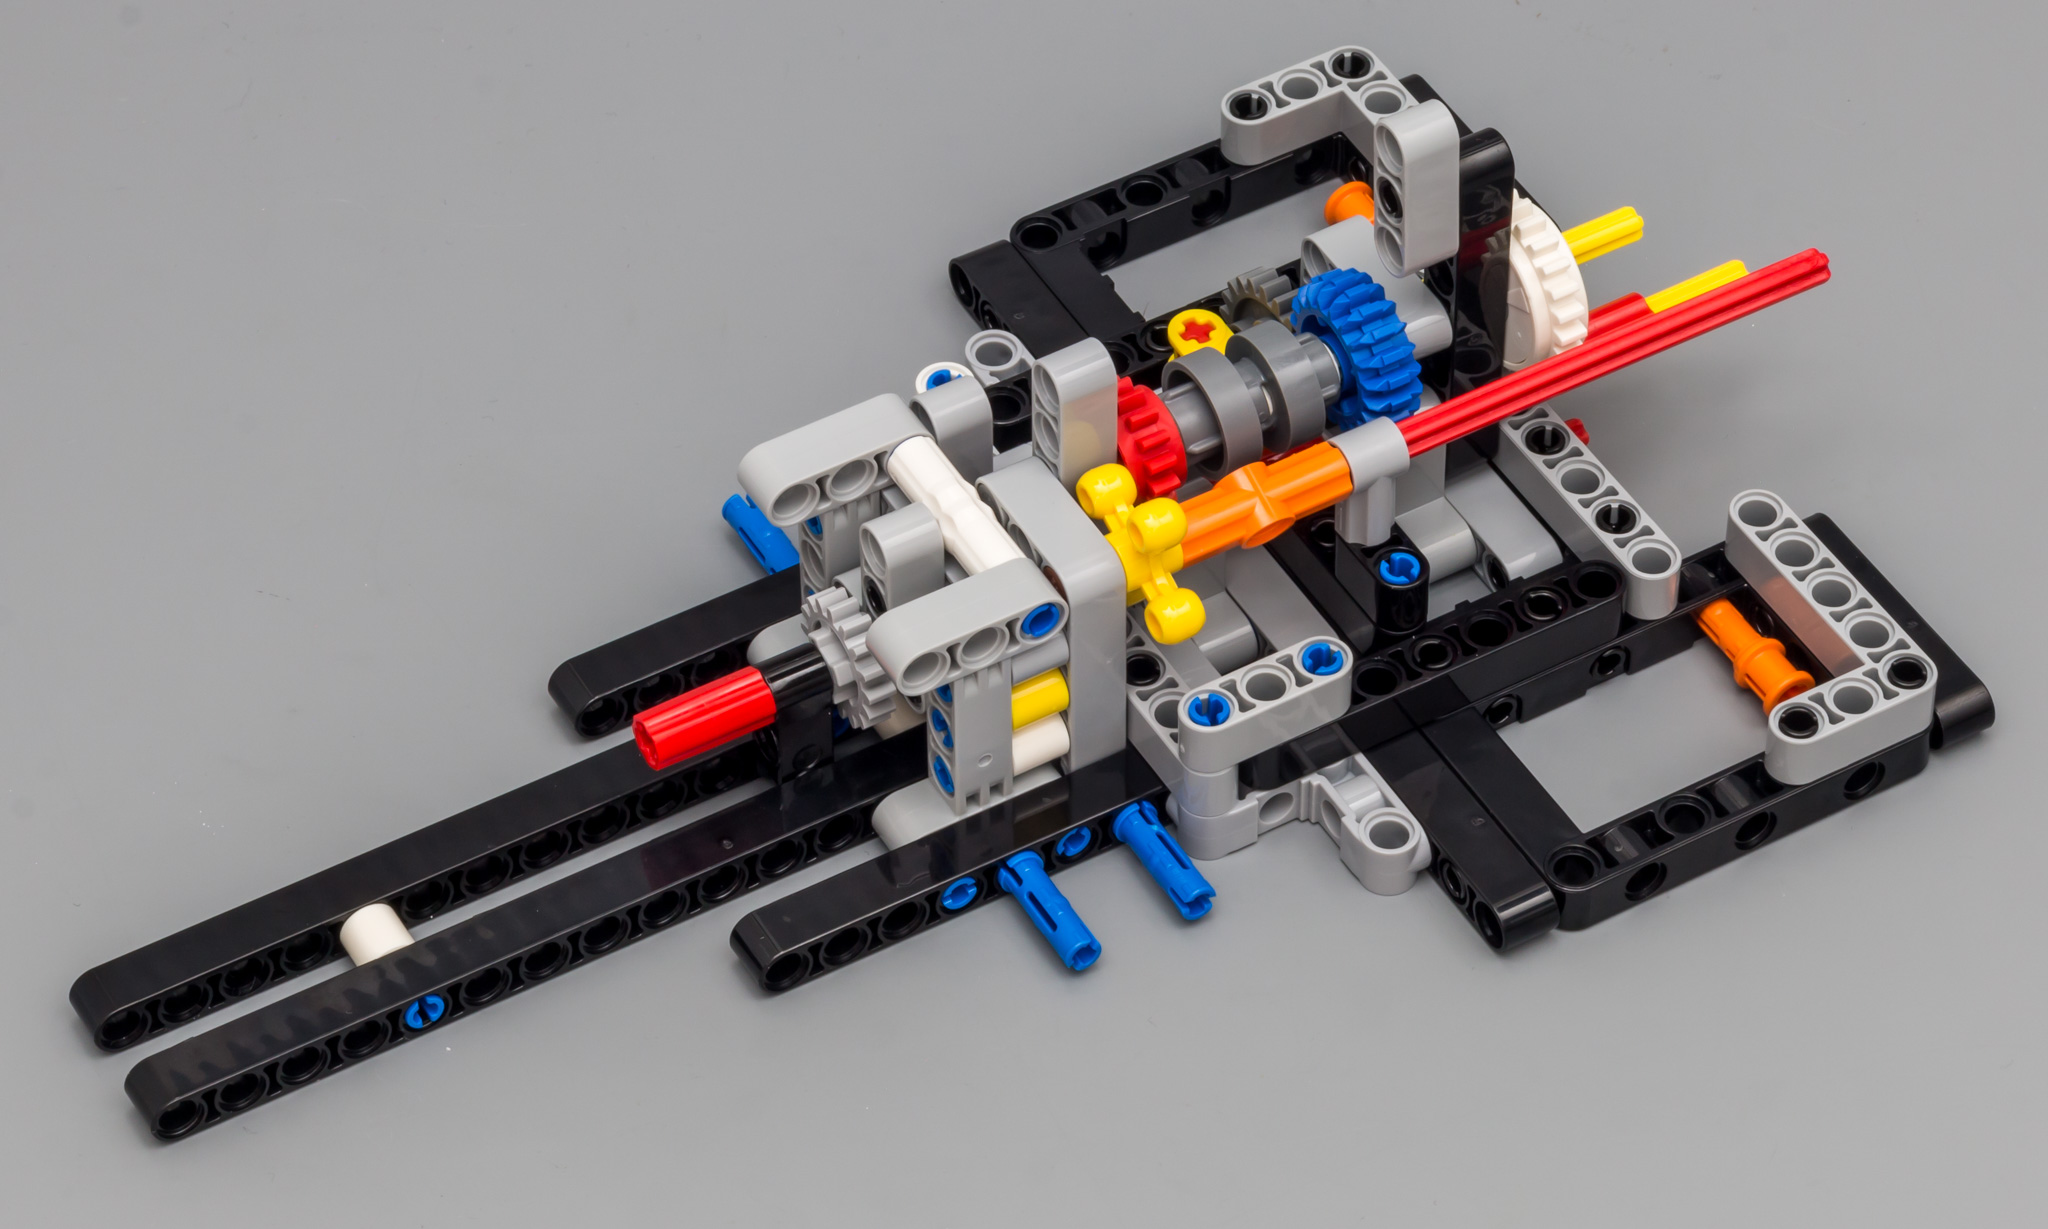
There is a single clutch gear in this model. It's in the center of the vehicle, near the mechanism for the gear shifter (Forward/Reverse). Since the Chiron doesn't have a center diff, this model doesn't have one either. In the real car, there's full control over the power sent to the front and rear axle. This is done electronically. Obviously, the LEGO model doesn't have this kind of advanced mechanisms. Therefore, a clutch gear is used to avoid straing on the drivetrain. One thing I noticed is that the clutch gear is not attached with a 5L axle with stop, but with a regular 5L axle. I wonder why?!

Next is the mechanism for the flappy paddles. It's a rather odd but ingenious system.
This pictures clearly shows the white 1L connectors, which makes this mechanism possible.
The video below demonstrates the gear shifter. It's not so stable yet, because it's not enforced by the chassis.
https://www.youtube.com/watch?v=-wUnRHnYGBU
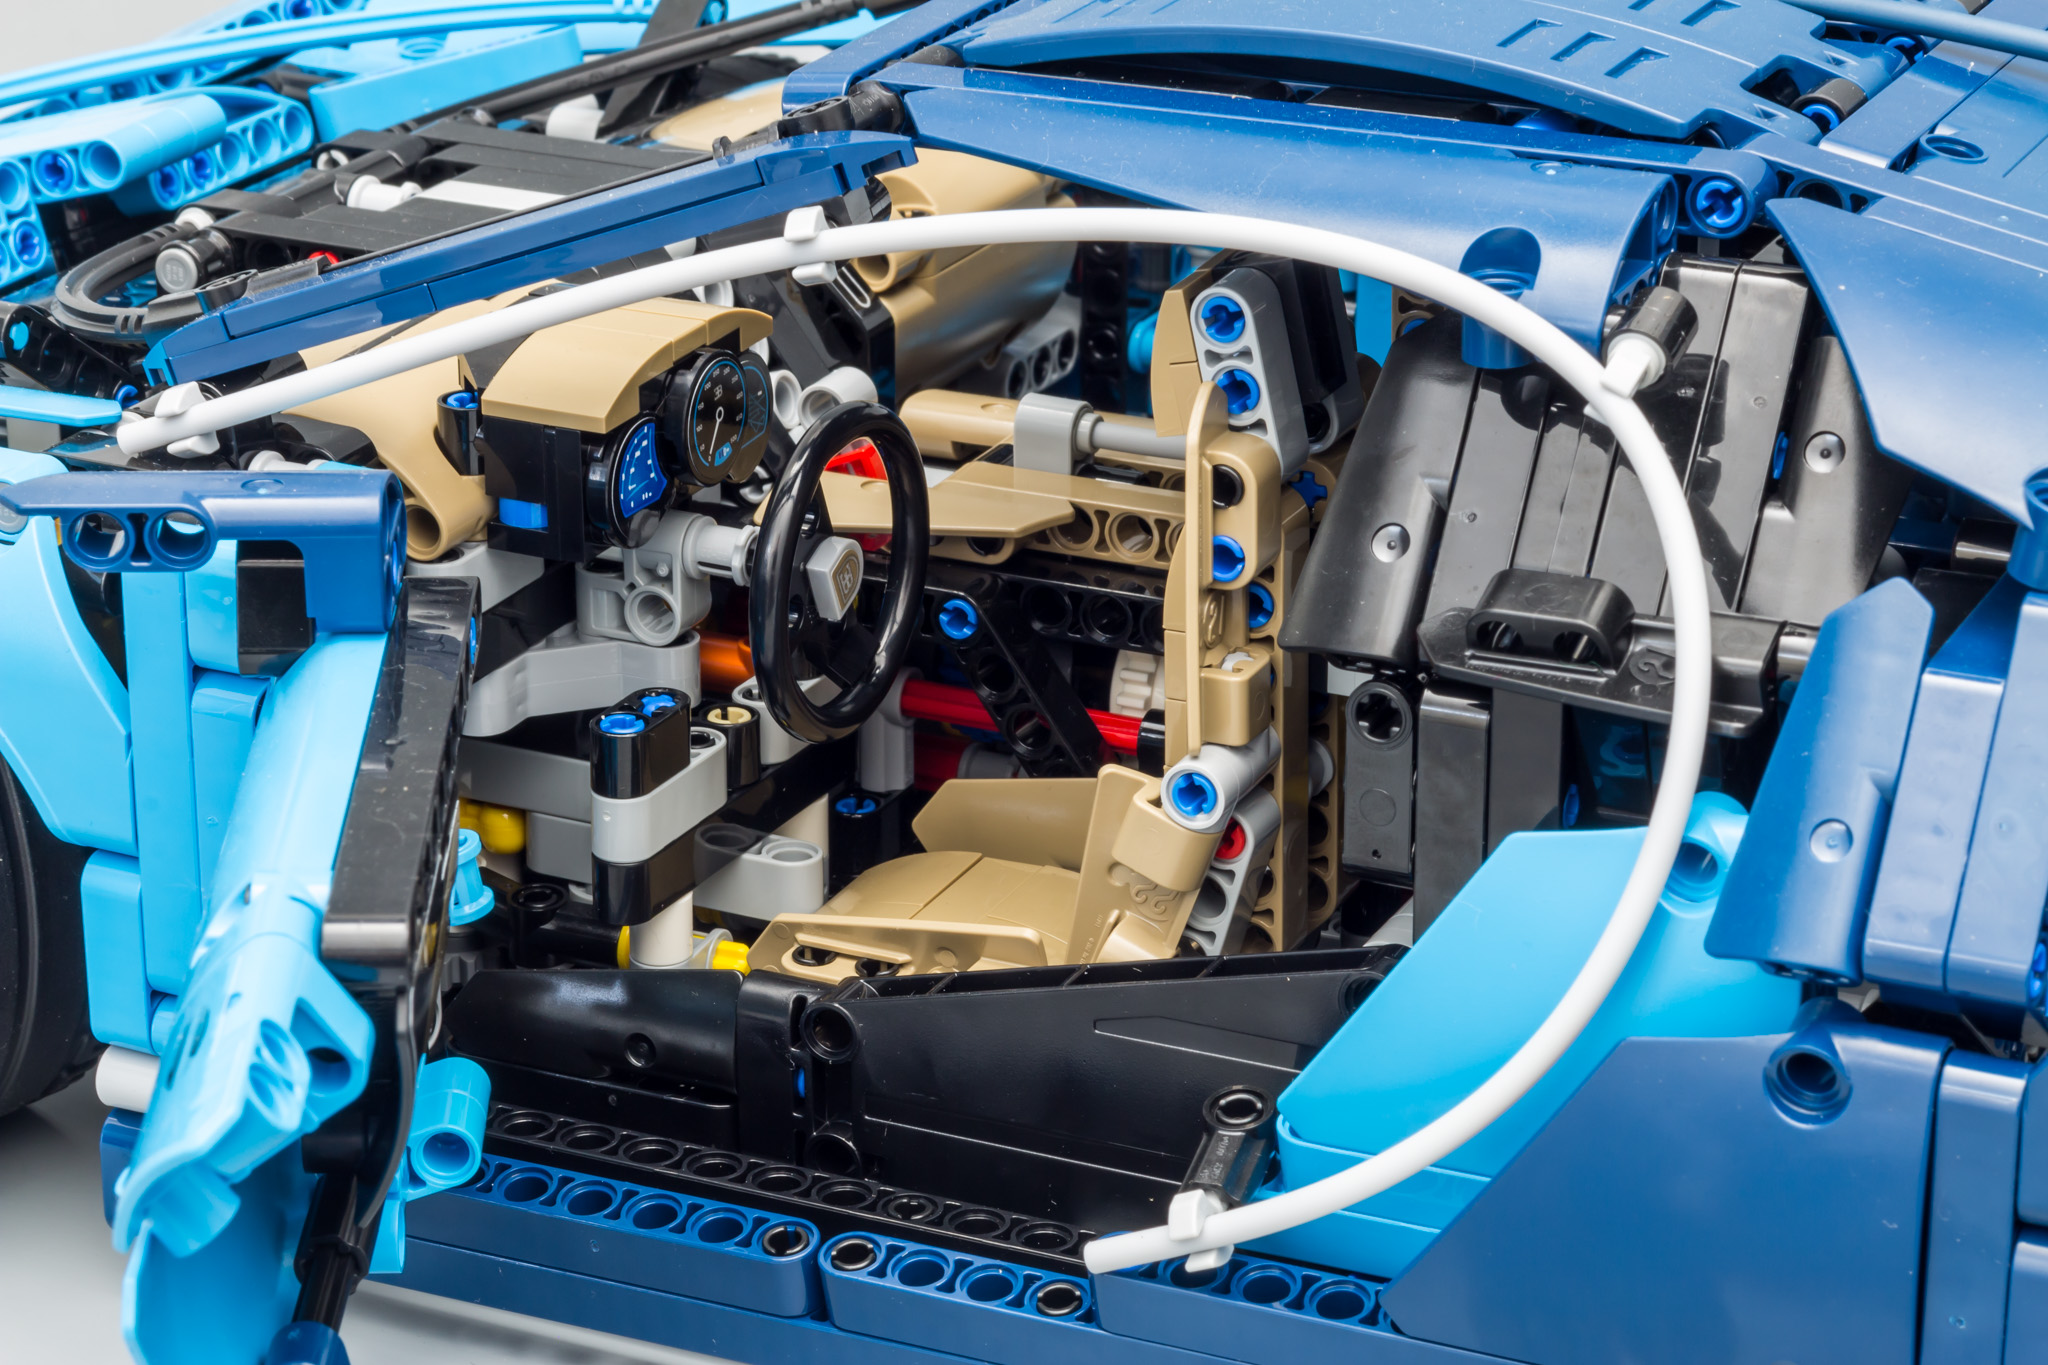
The paddles in the Porsche were attached to the steering wheel. However, the elastic bands were placed in a position where they limited the operability of the paddles. The Chiron uses a different mechanism, where the paddles are positioned in front of the driver's seat, under the steering wheel.

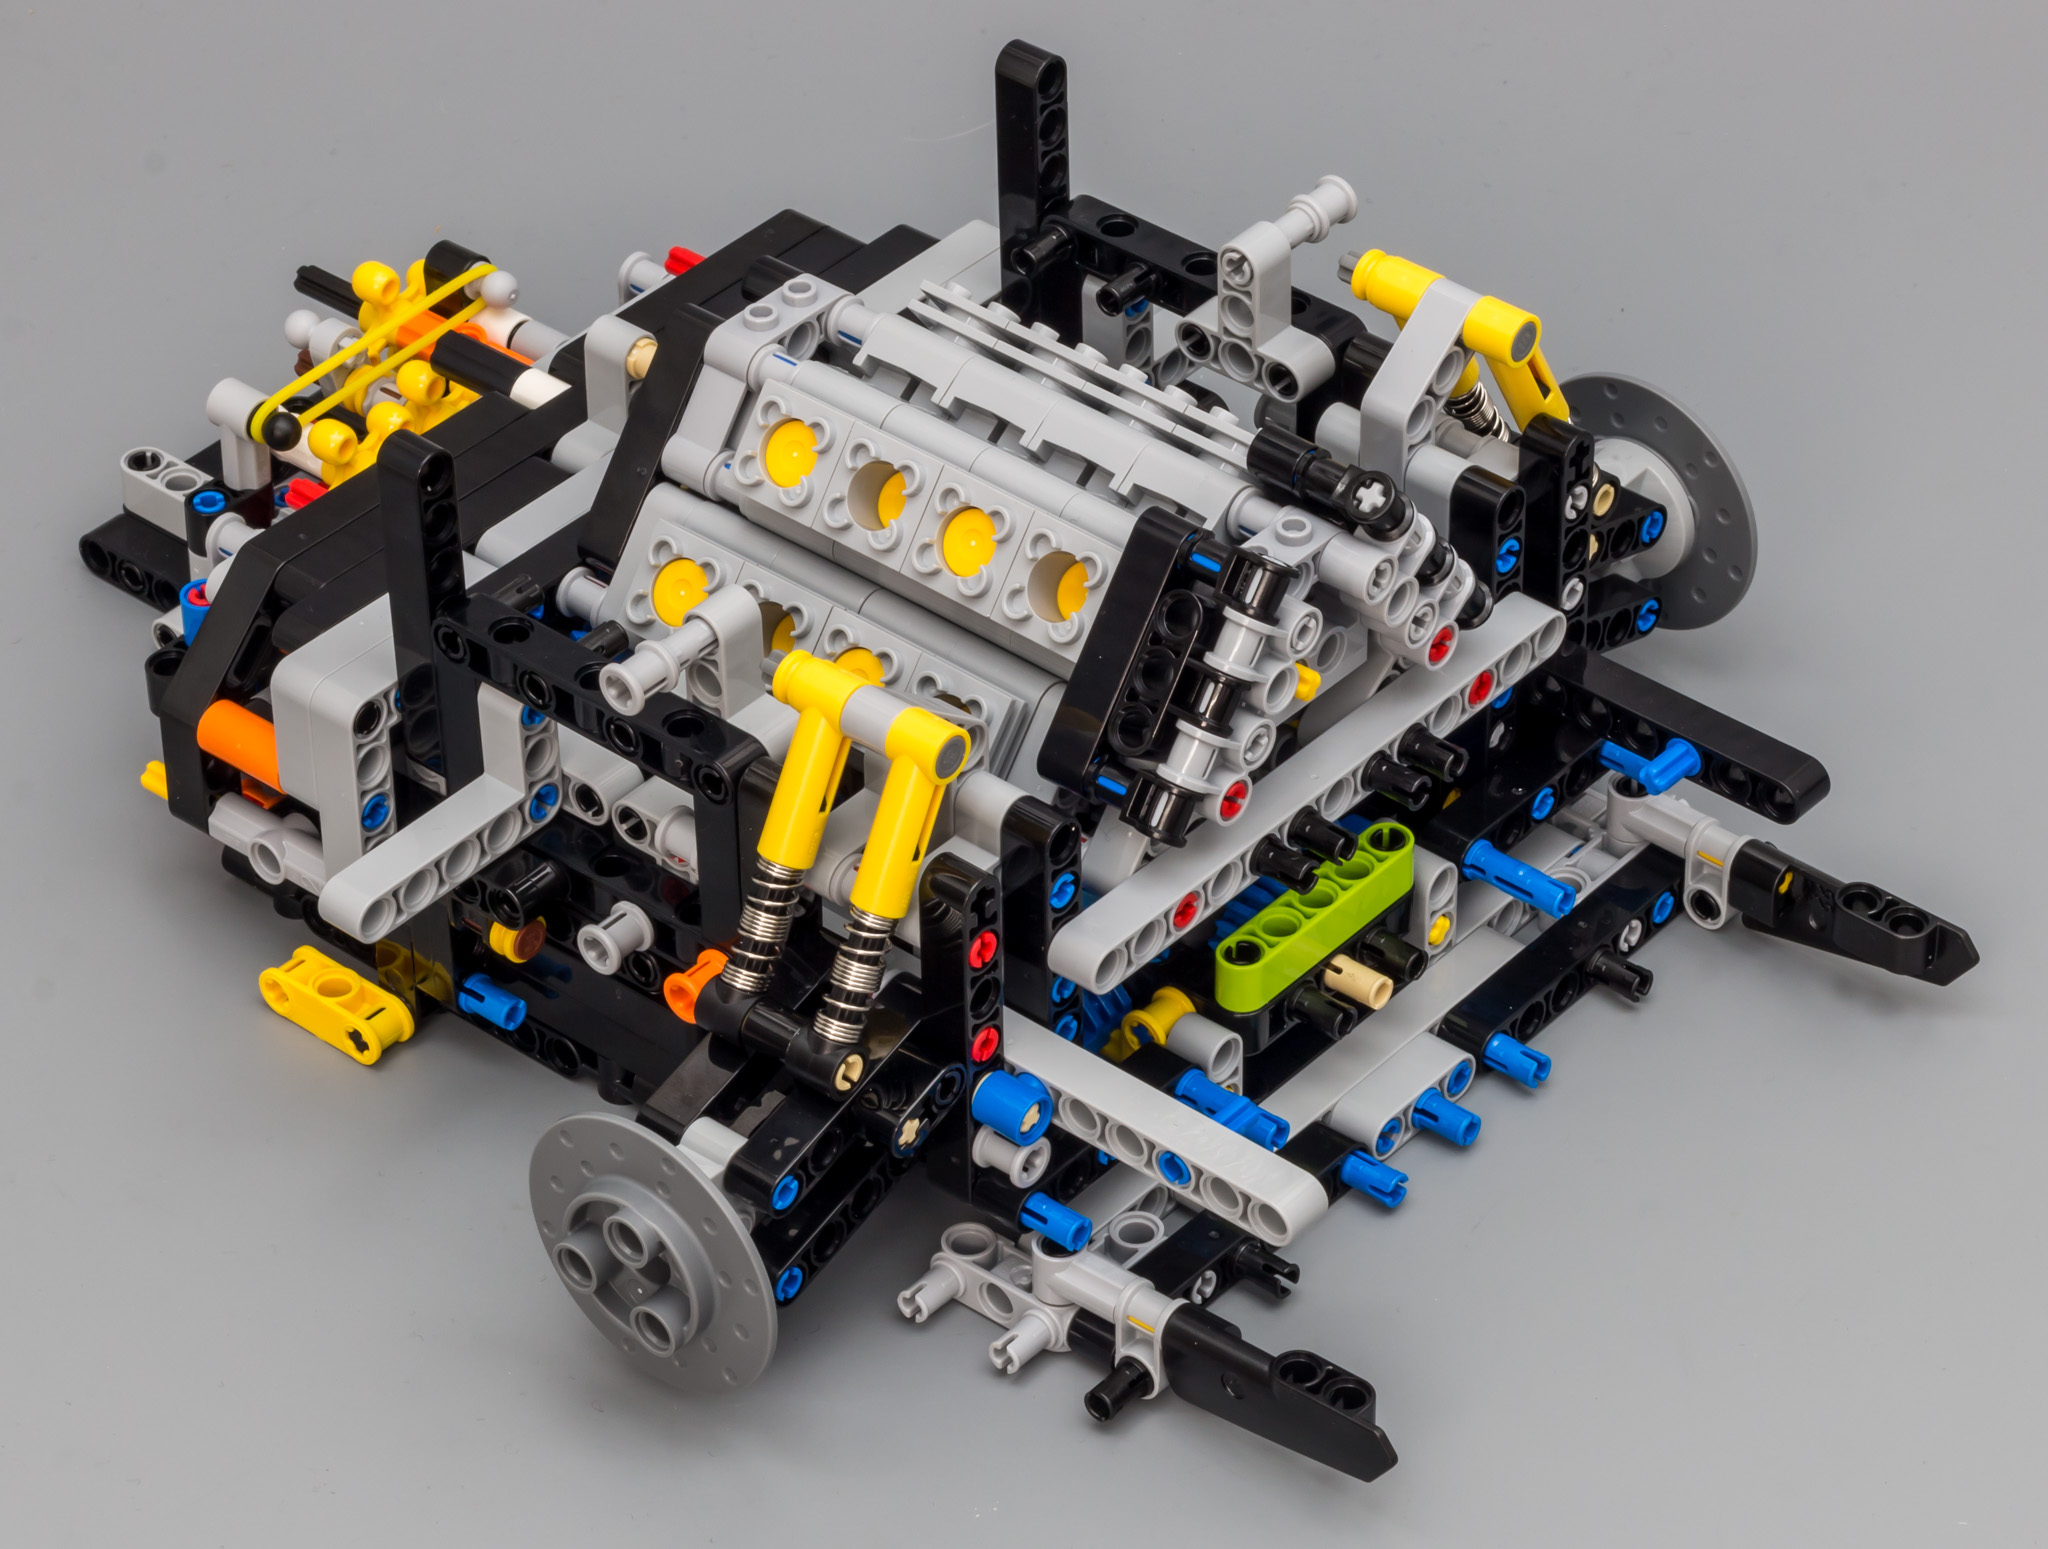
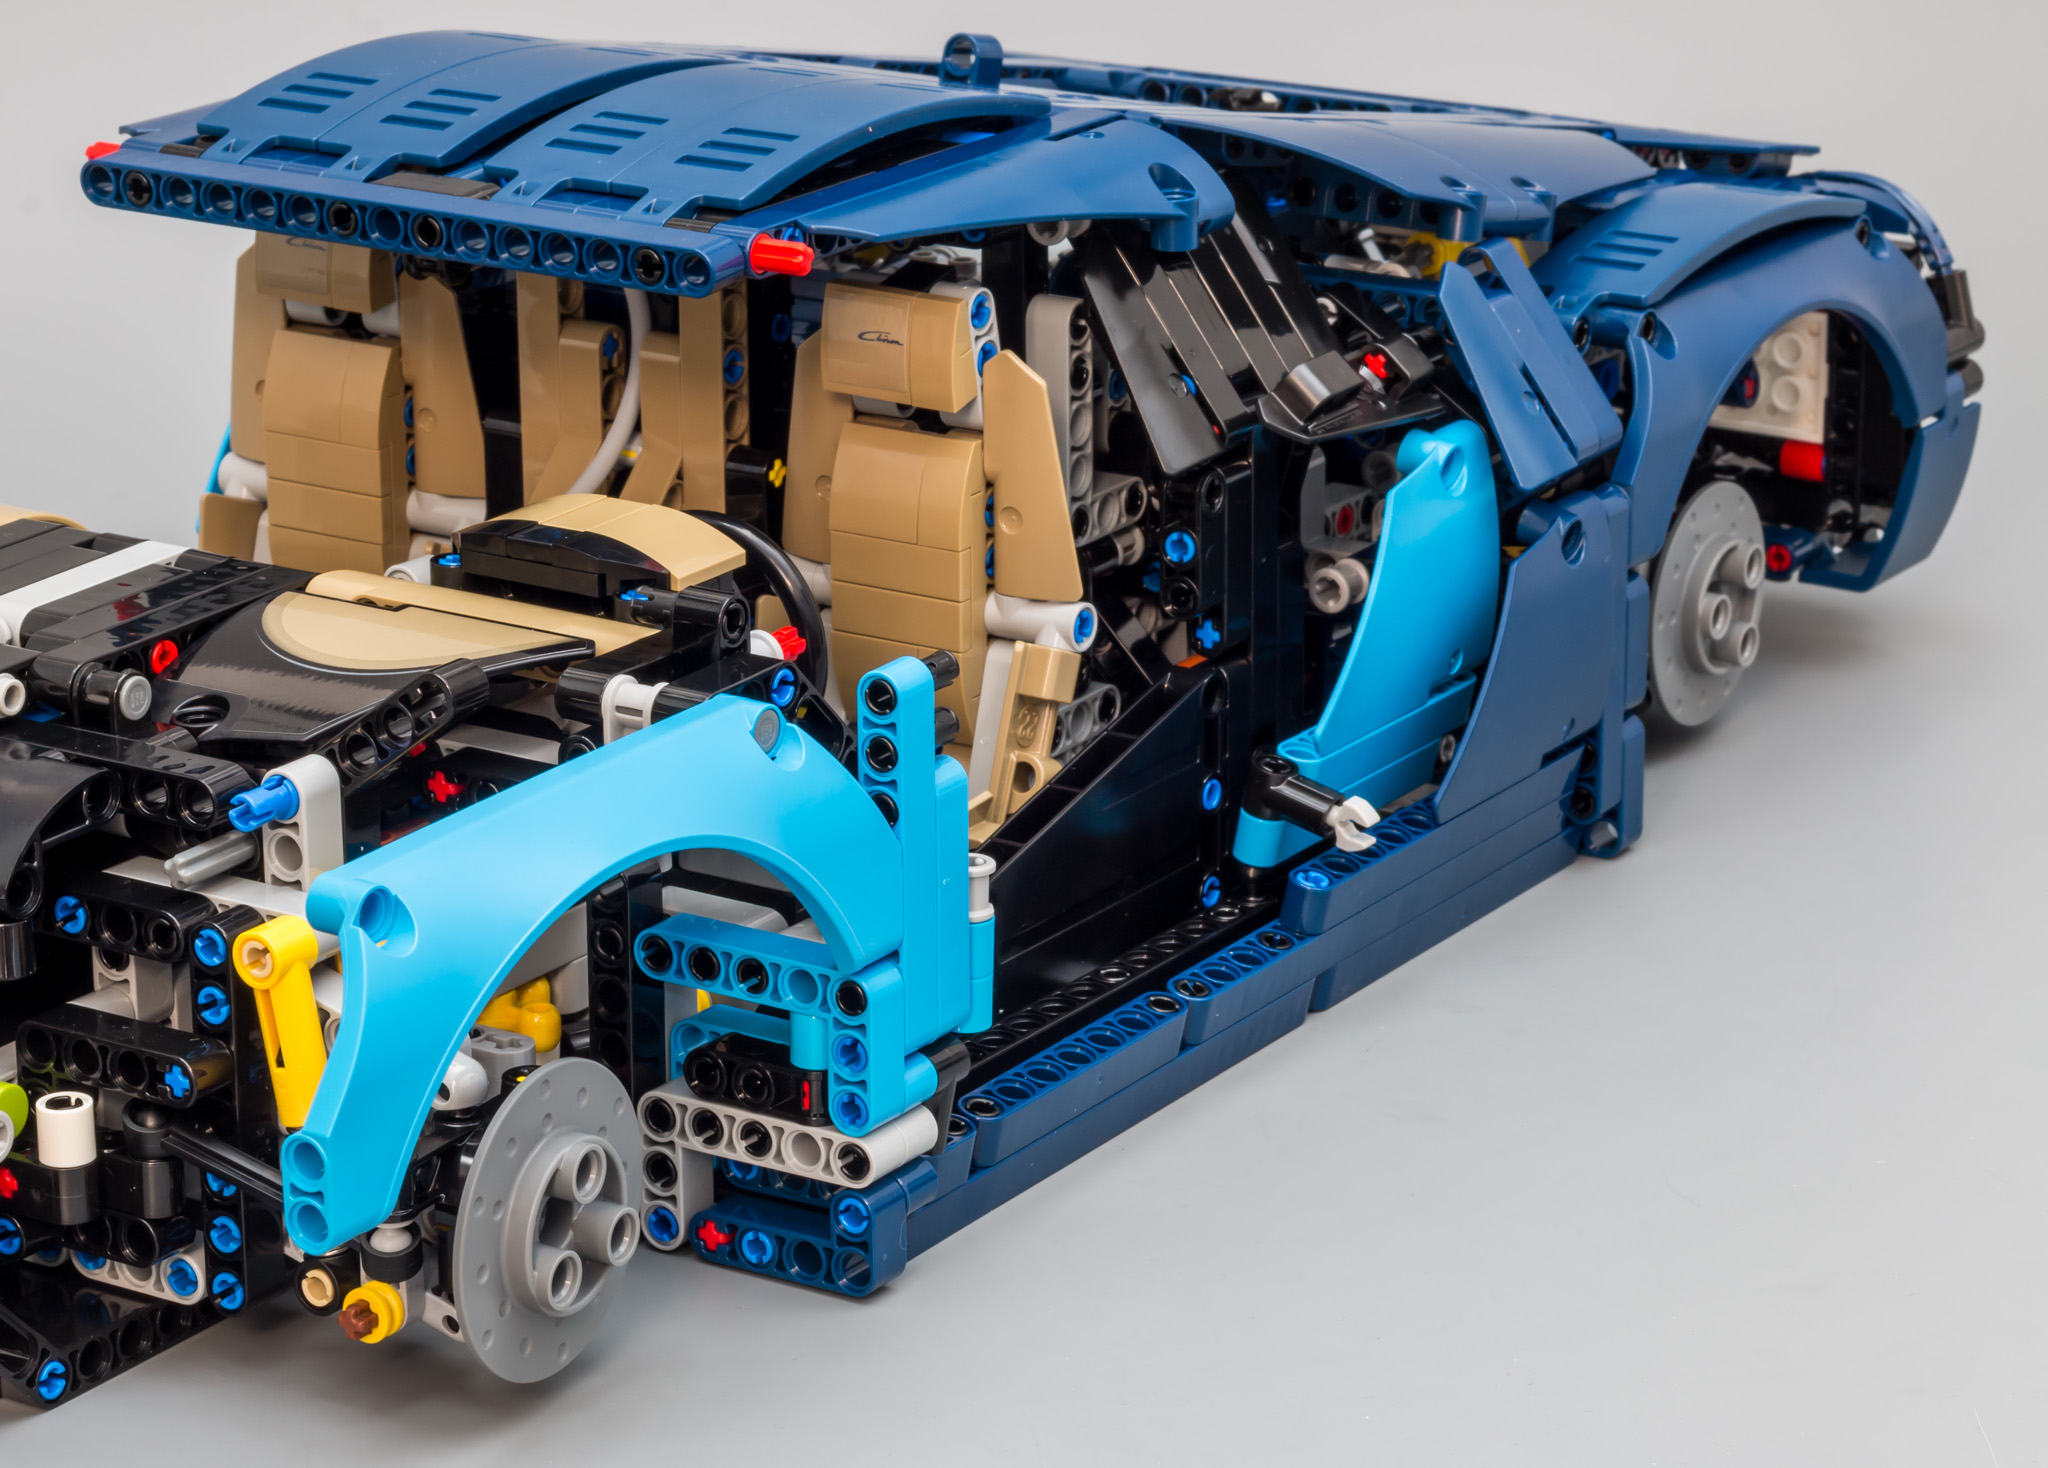
The front of the chassis right before the marriage. You can already see some of the tan interior and the dark blue exterior.
Here's a video demonstrating the gear shifter and steering.
https://www.youtube.com/watch?v=x-tlZIlPCsU
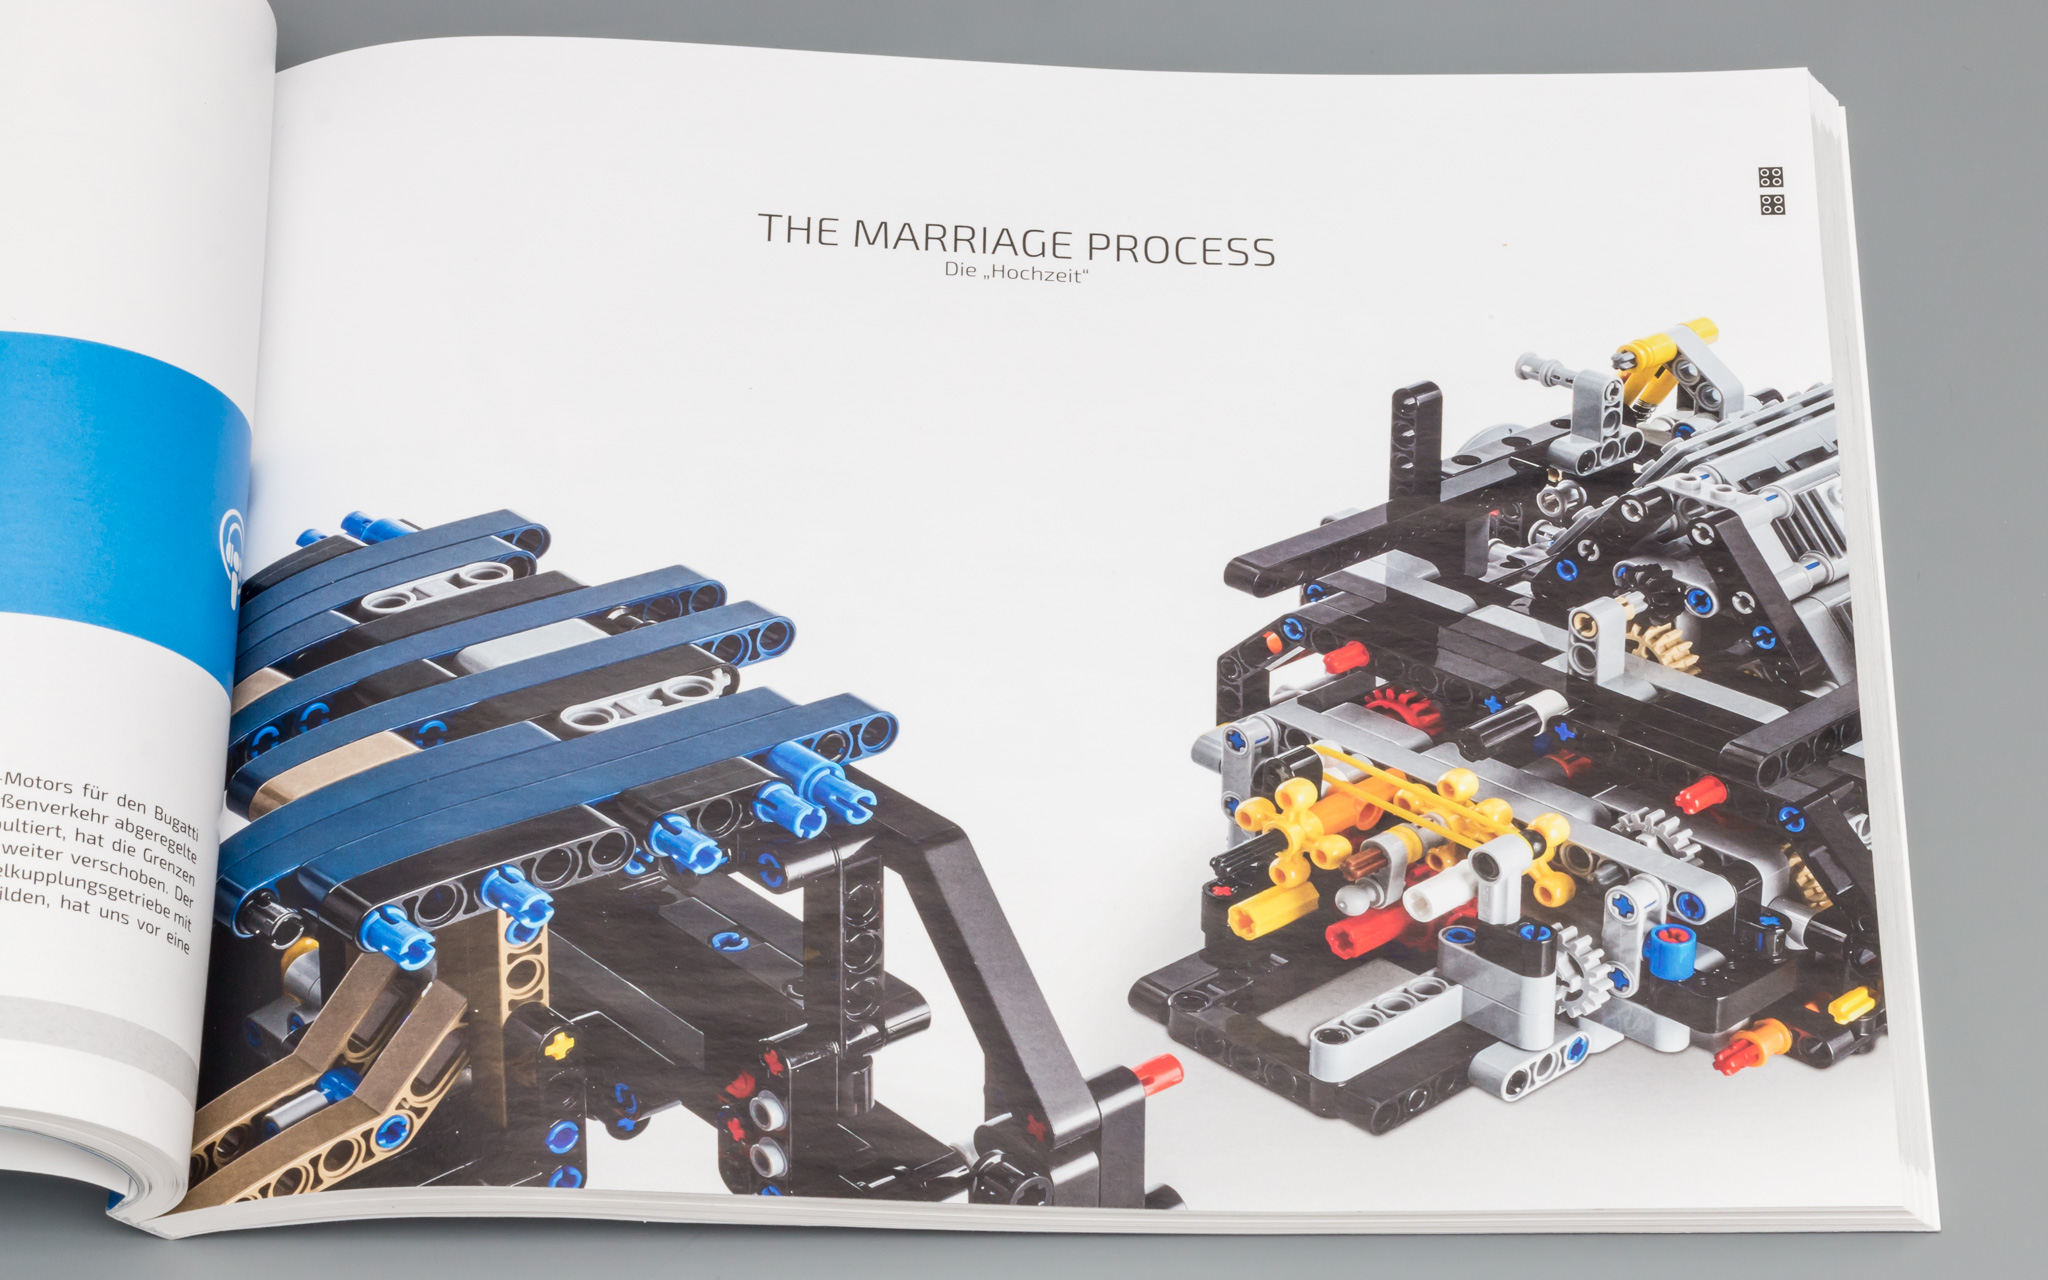
THE MARRIAGE
It's time for the marriage of the rear and front of the chassis.

This is the result of the marriage. It's actually starting to look like a proper supercar. At this point I tested the gear shifting sequence. Rumor has it that there once was a supercar with incorrect gear shifting sequence, so I was pleased that I could clearly see (and feel) that the sequence was correct :wink:
This car has a proper 8 + R gearbox, which means that it has 8 forward gears and just a single reserve. Some of us expected the have 8 reverse gears as well, but TLG did a proper job getting the gearbox right. One minor gripe is that the real Chiron only has 7 forward gears, but that's something I can live with.
From this point it's mostly exterior work on the body.

The spoiler neatly aligns with the rest of the bodywork.
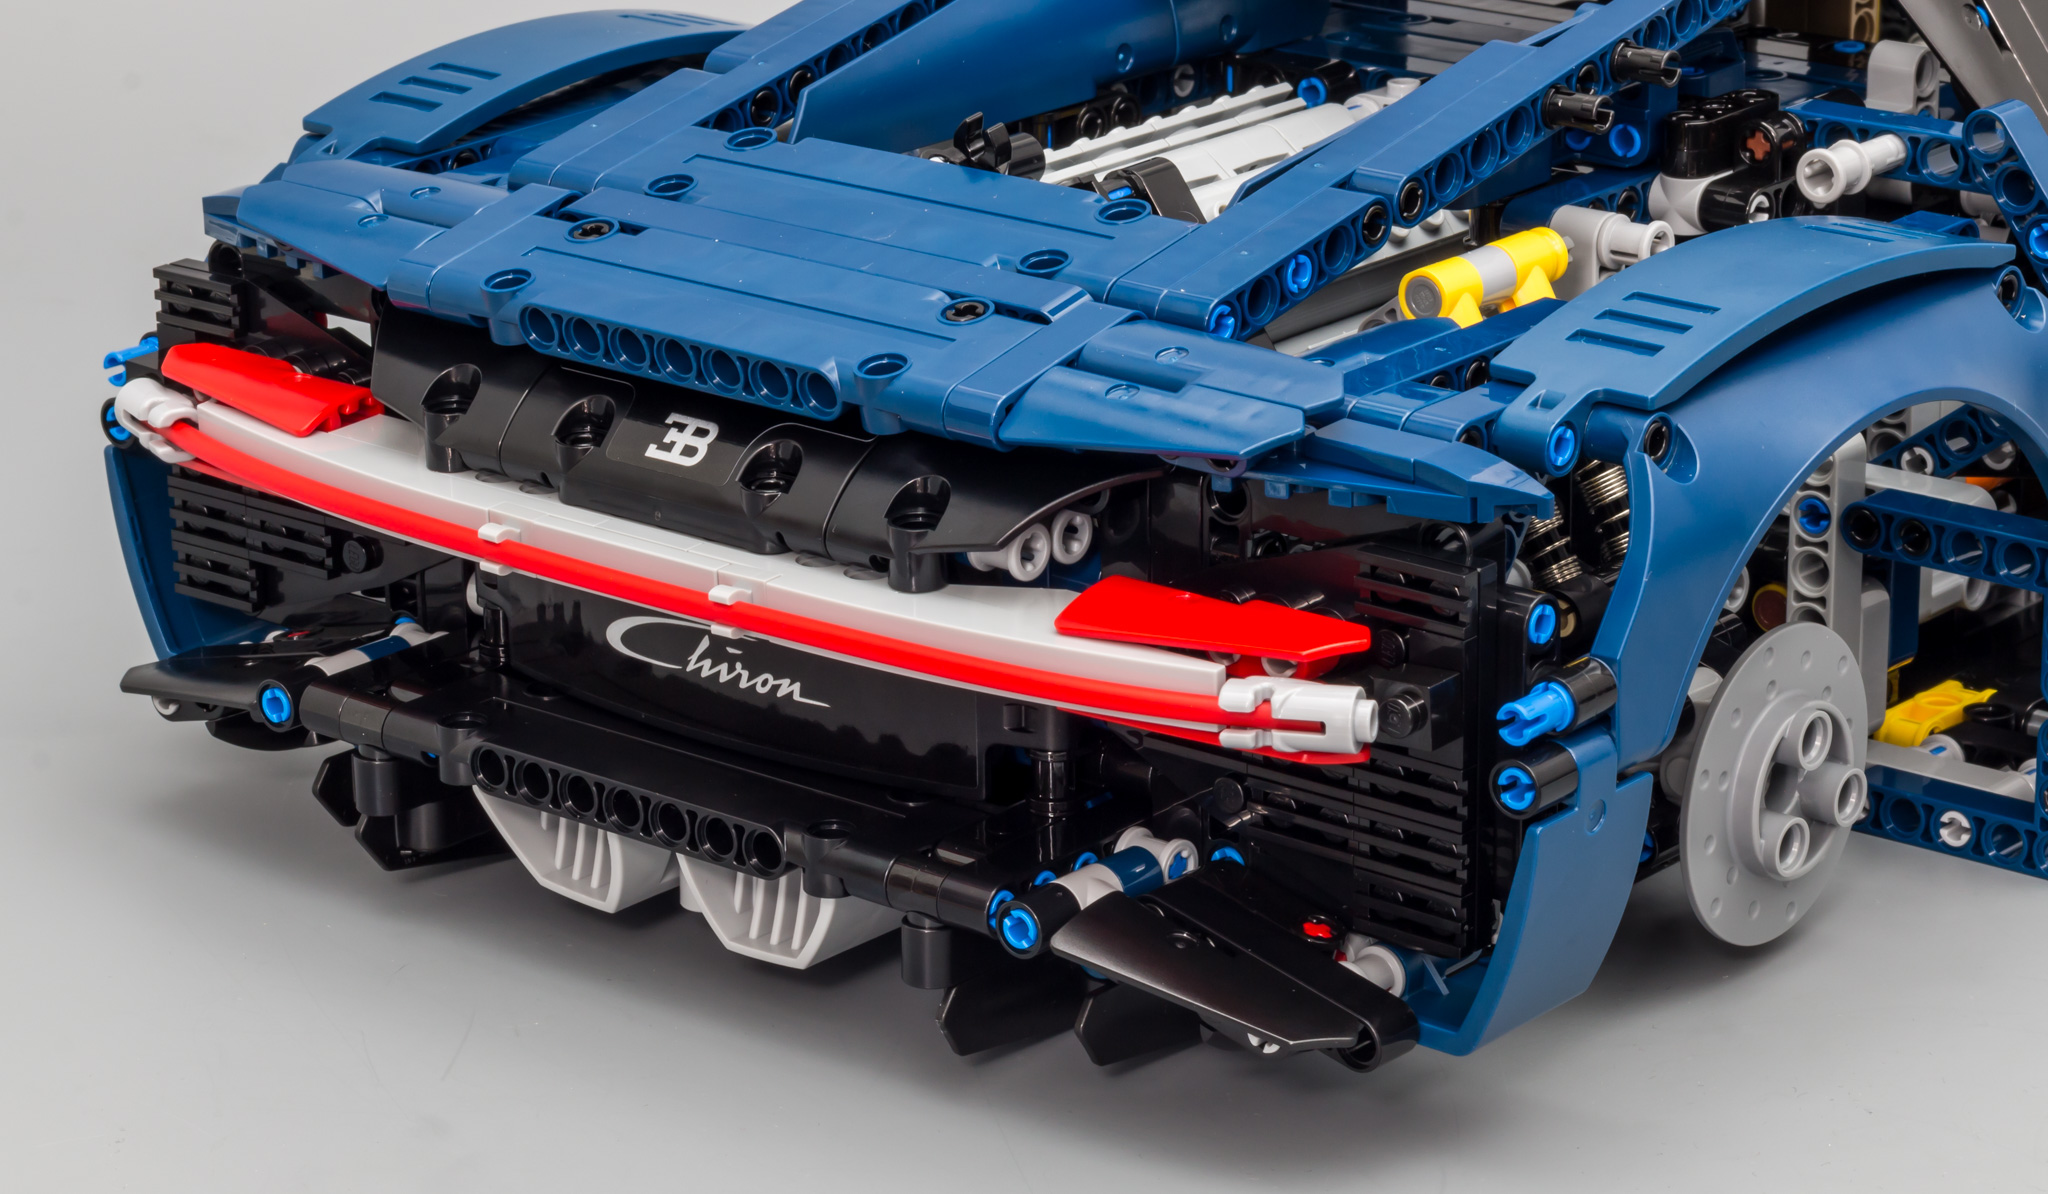
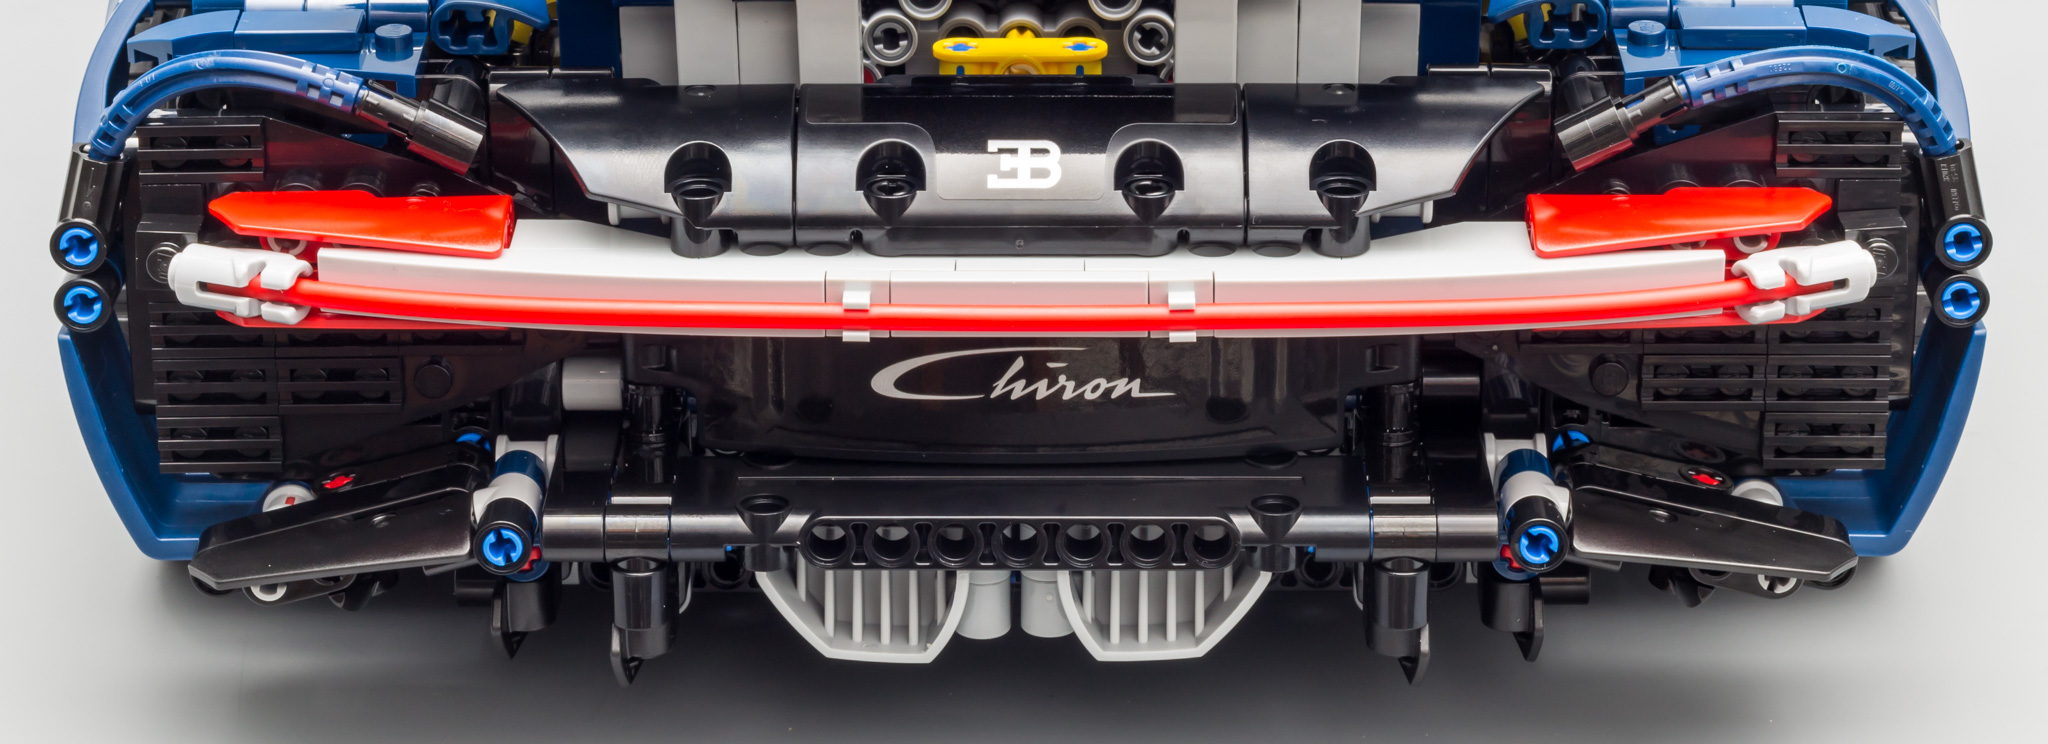
The rear of the car is so f.... sexy. I absolutely love how this is designed. And actually, I really like the bright red, instead of a trans-clear variant. This color makes it really stand out. Allegedly, the reason for not doing it in trans-clear, is that the material of the flex axles (and panels) is not suitable for trans-clear colors.
The tan upholstery is partially made up of system bricks. I like the way the chairs worked out, but I probably would have added some more system bricks to avoid the gap in the seats.
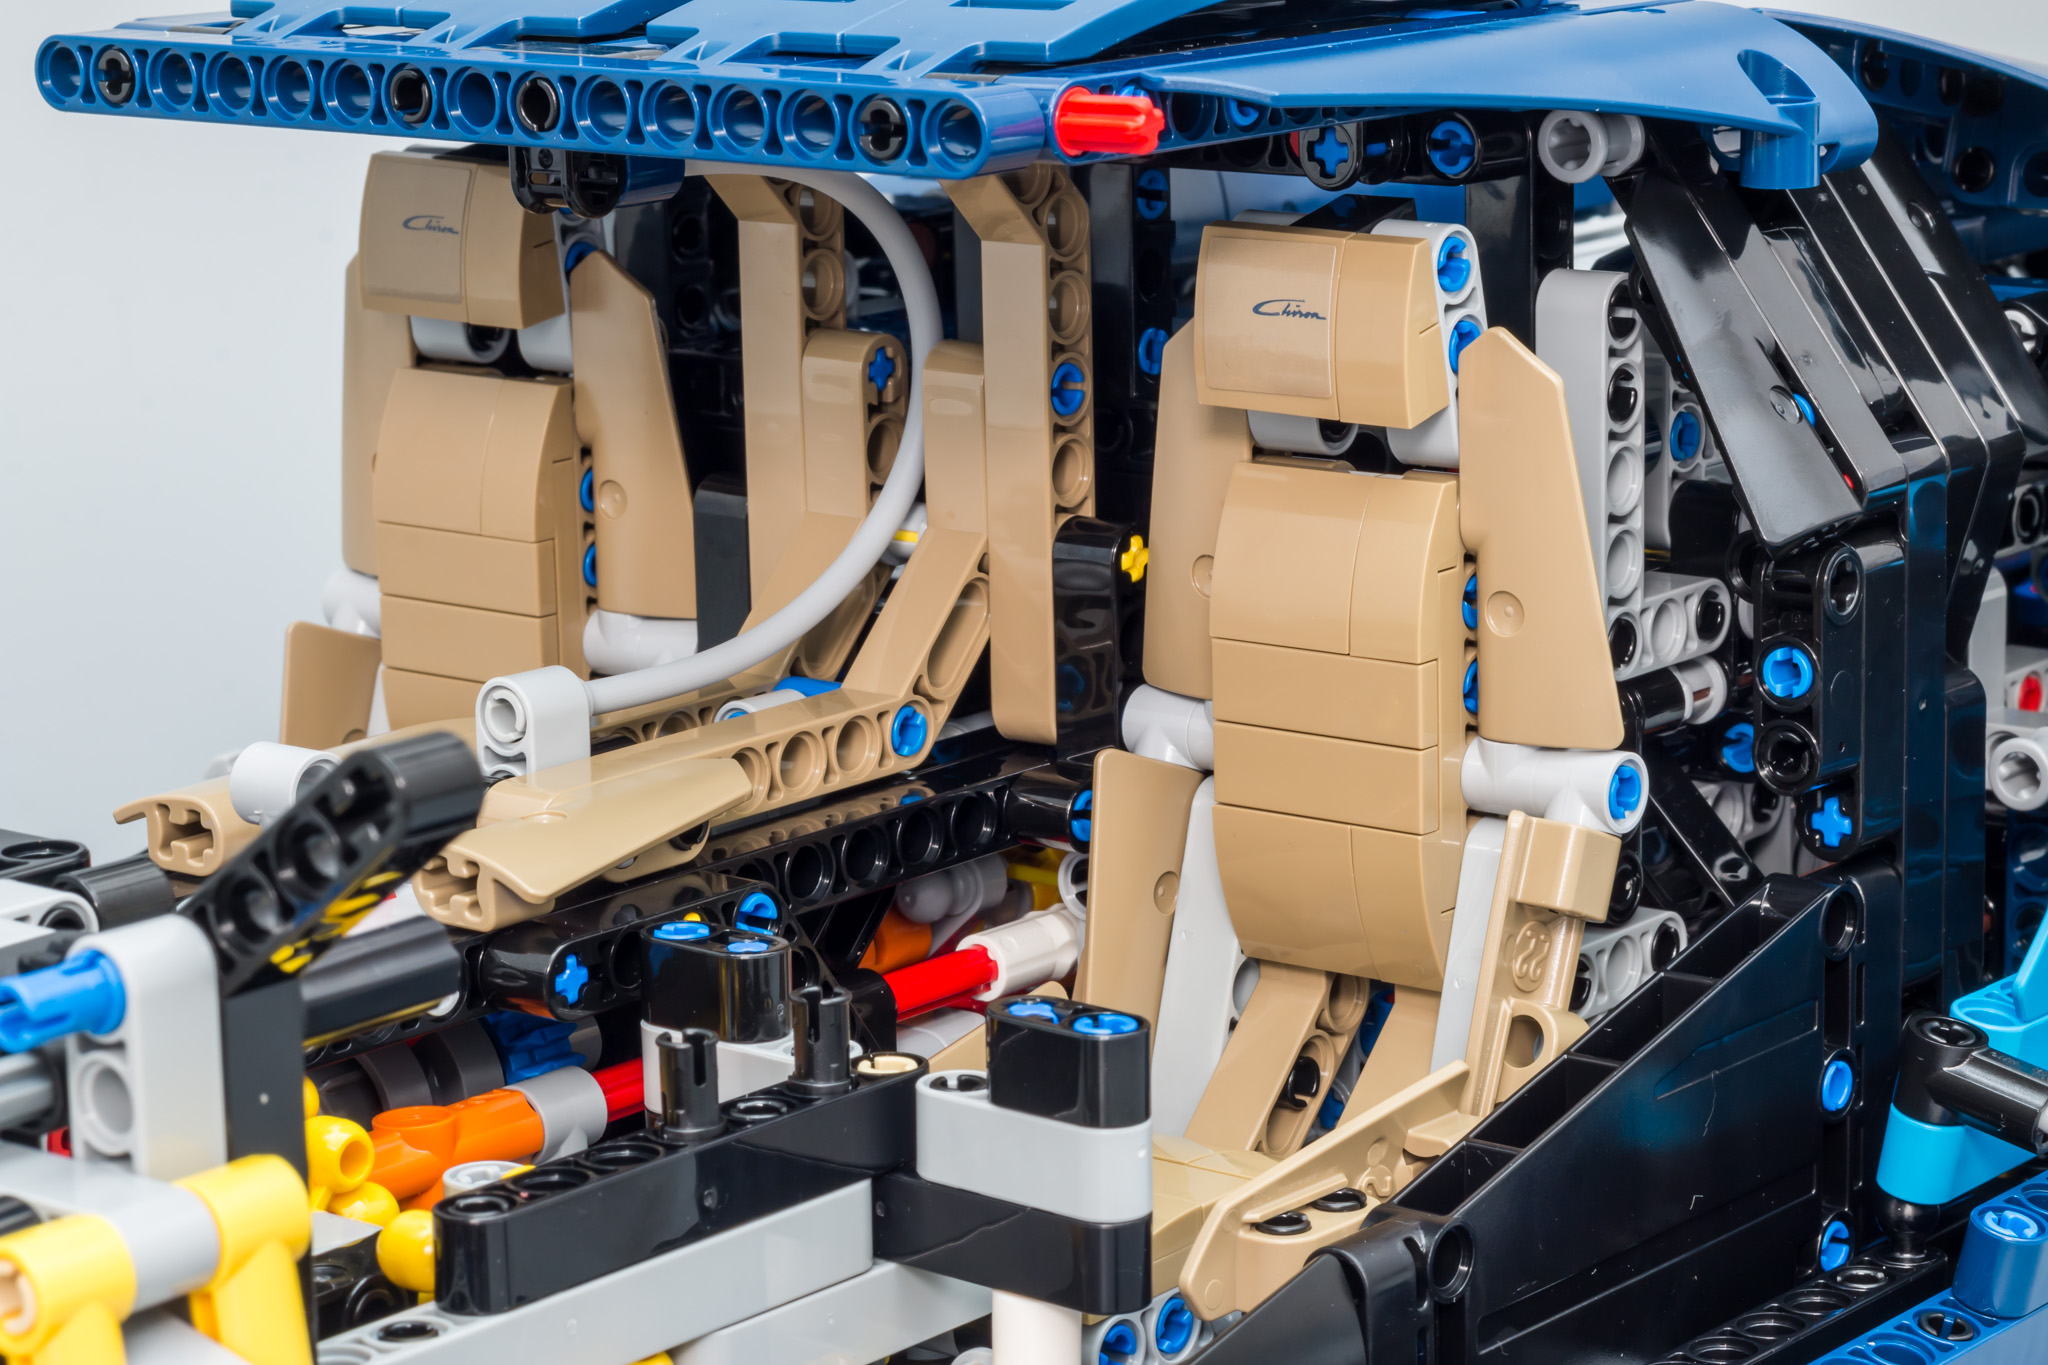
Here you can clearly see the gap I am referring to.

After the interior we continue with the duo-tone exterior. When I first heard that the car would be blue-on-blue I was a bit disappointed. I was actually hoping for black-and-blue. I figured TLG would use regular blue, but I didn't think of dark blue. Admittedly, I was immediately convinced when I saw the dark azure and dark blue combination. And let's face it, duo tone blue is a trademark of Bugatti, so it makes a lot of sense to use these colors.
The doors are added to the vehicle. They do feel a bit flimsy and there's no door lock. They look nice, but using the stickers on the tiles instead of flex axles and the flimsyness leaves room for improvement. Bit of a cop out if you ask me.
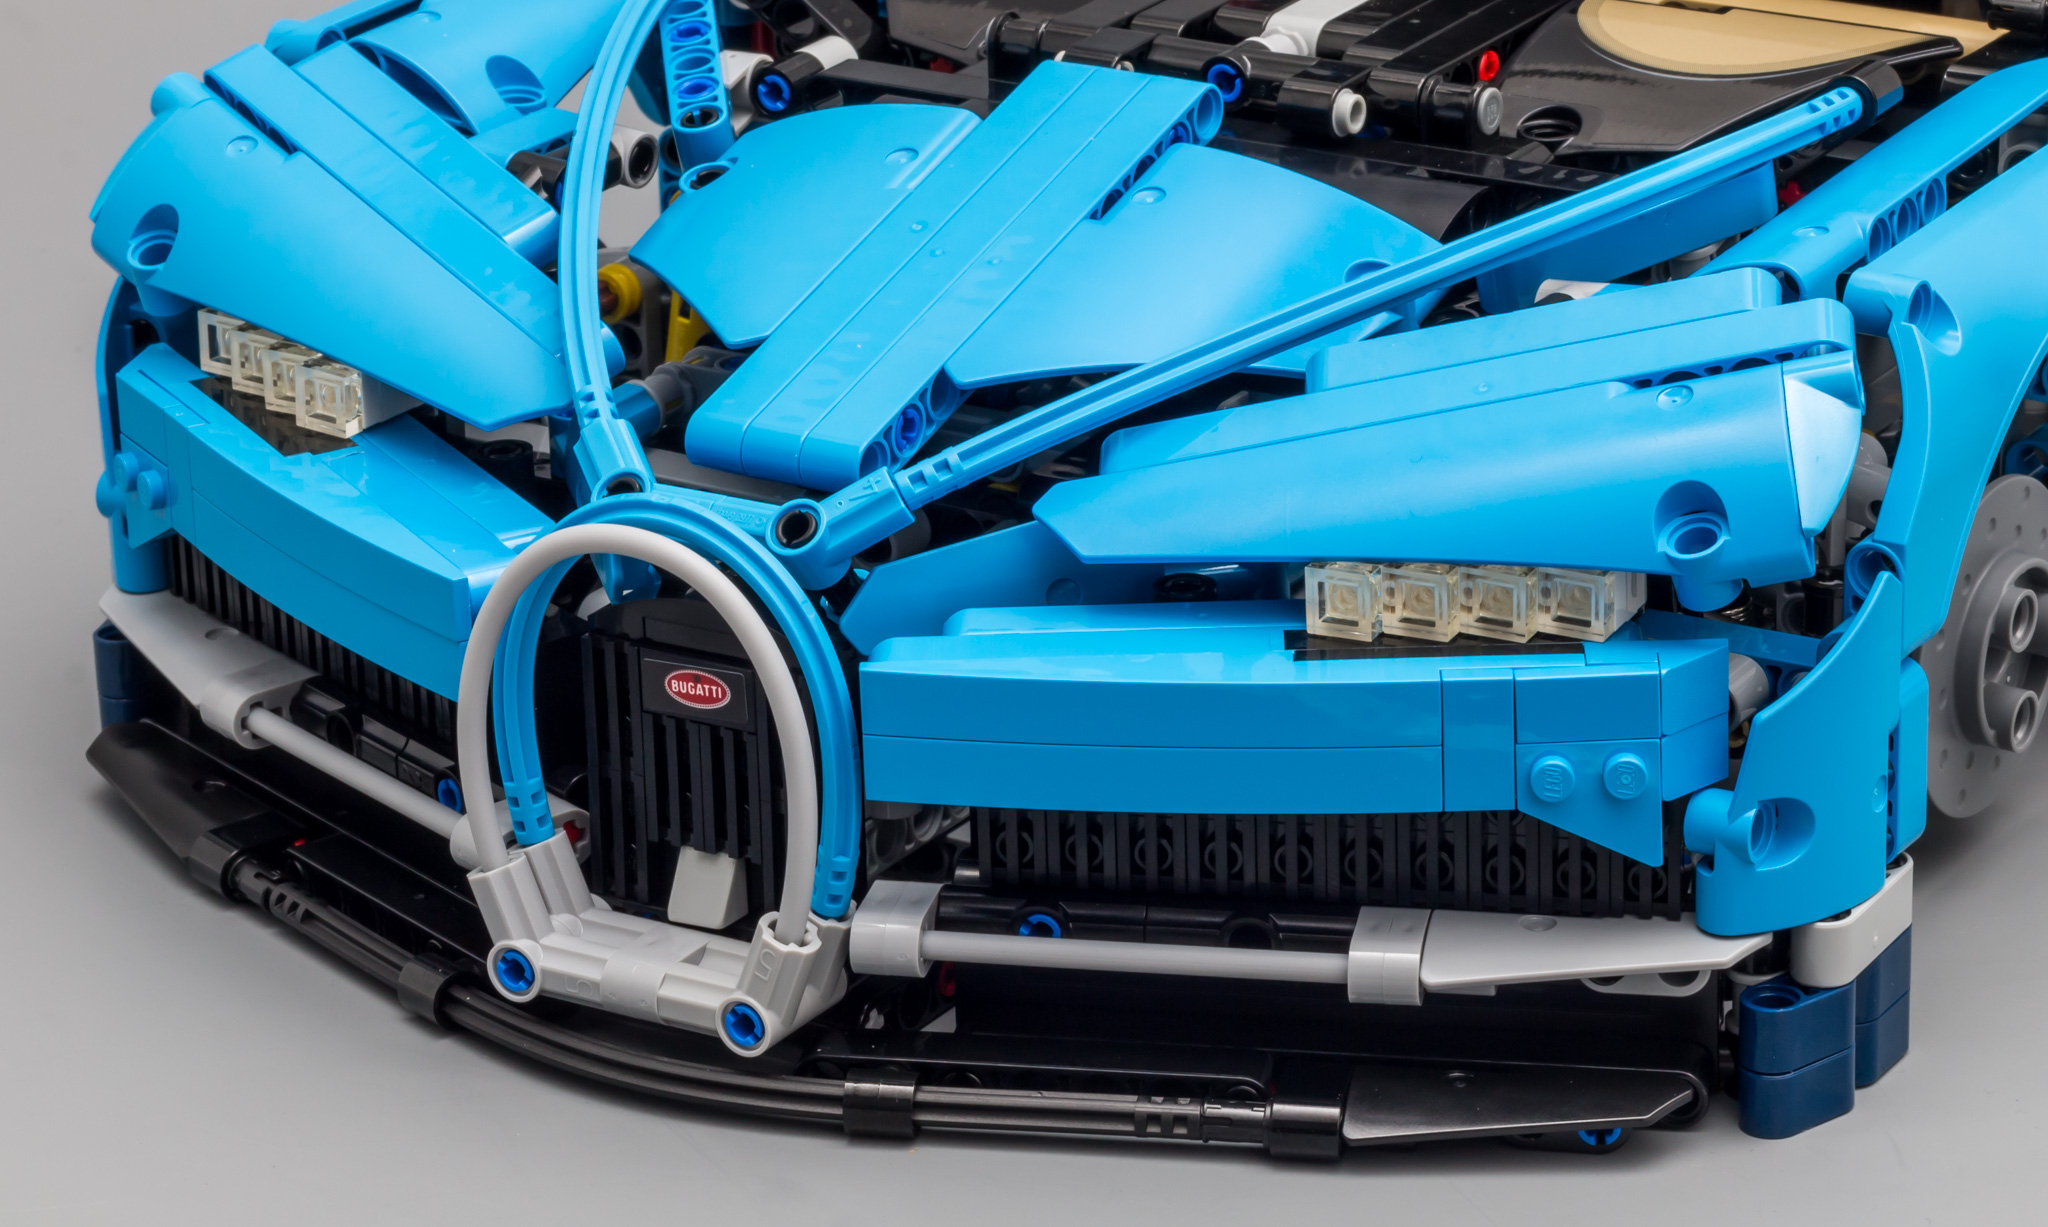
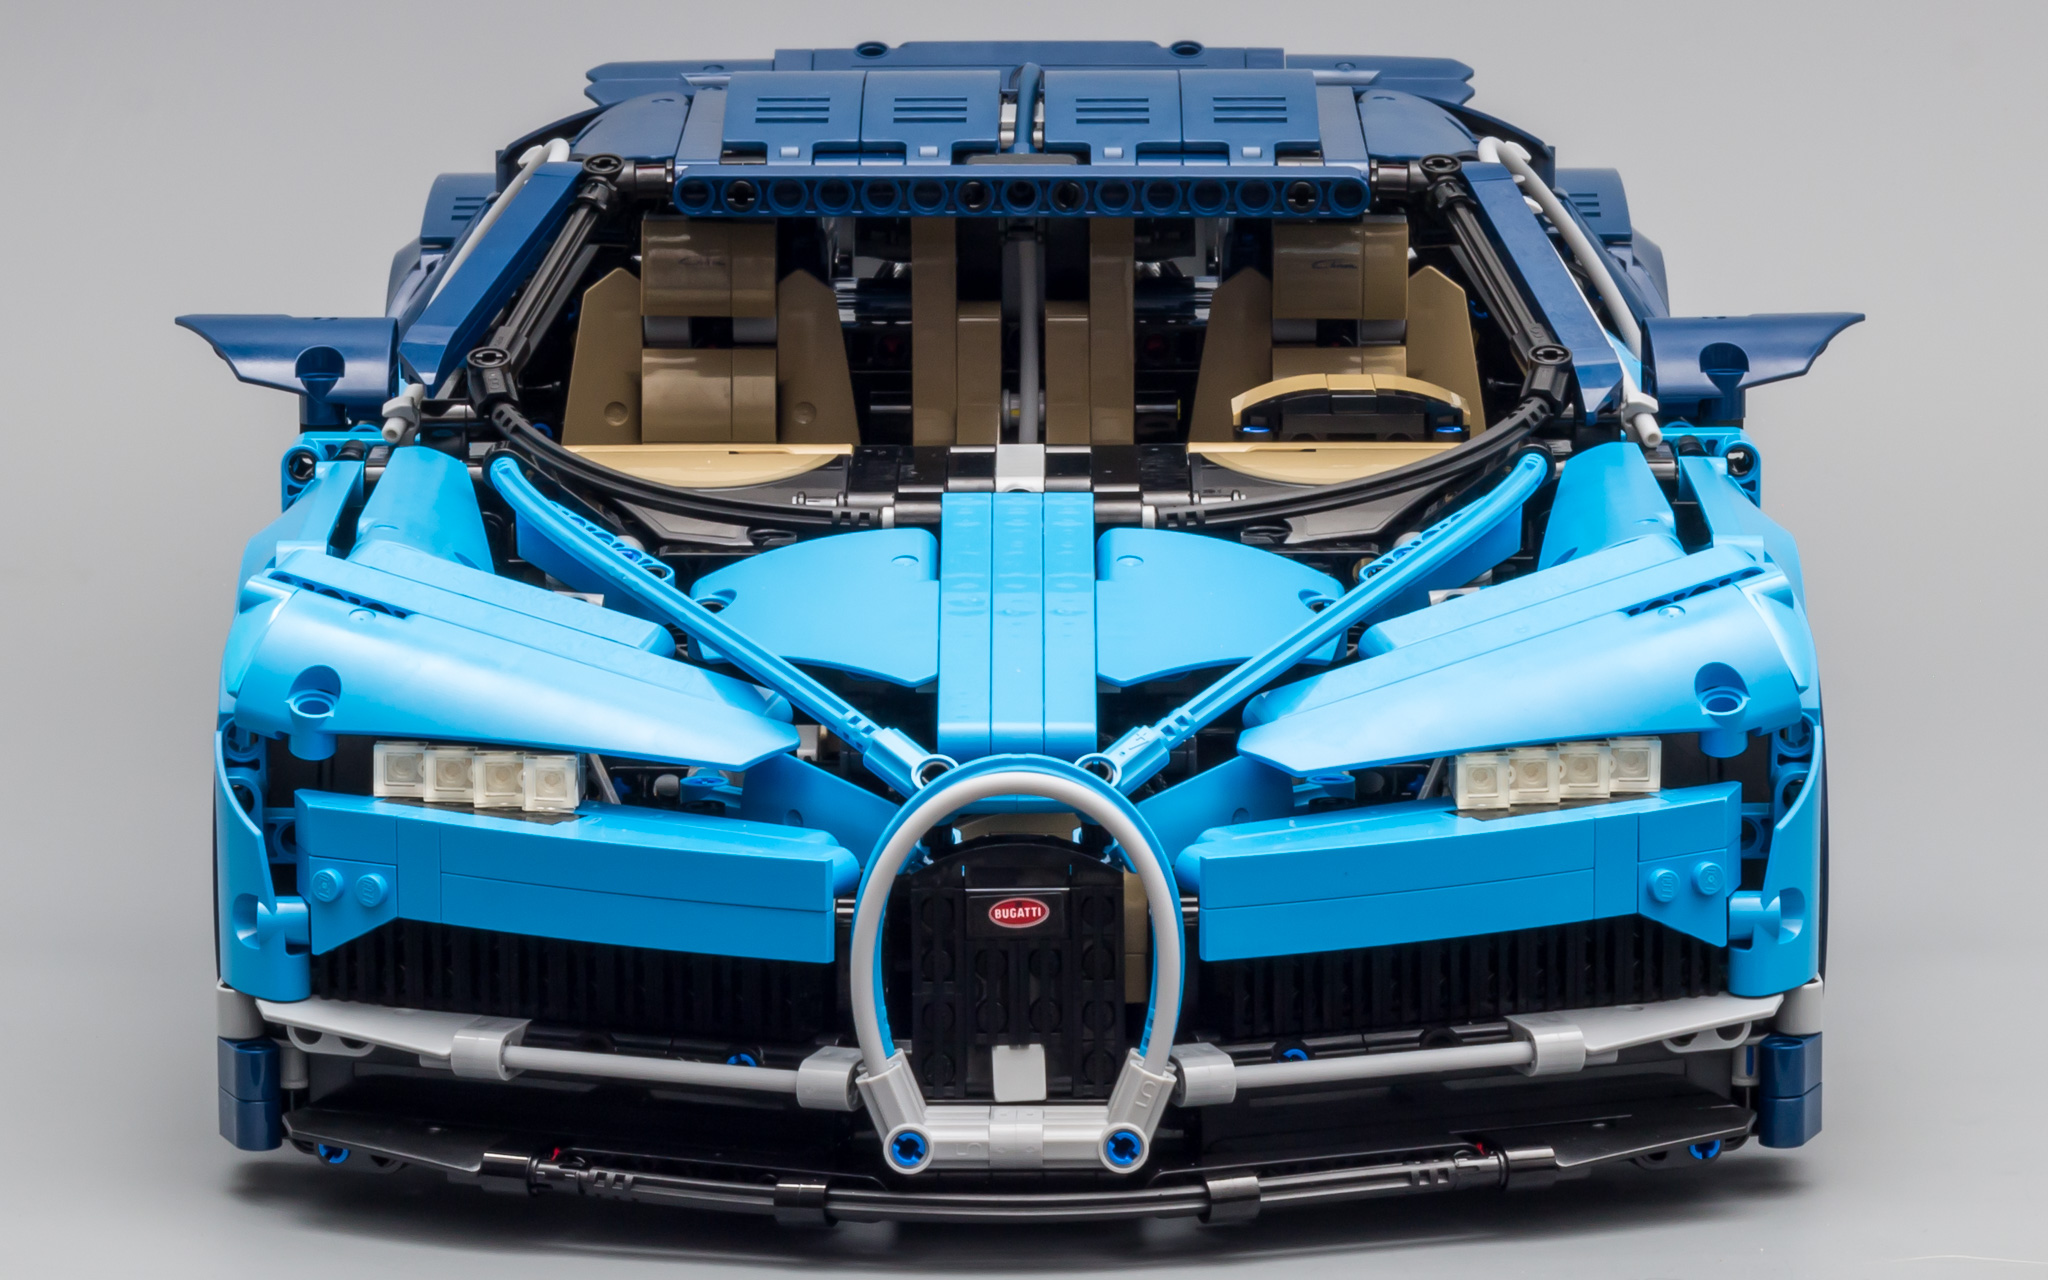
When the first picture was leaked, it only showed the front of the car. It immediately generated lots of negative comments. Since I had already seen the back (and the rest) of the car, I was convinced that it wasn't so bad as many claimed. And when I look at the picture below, I still think the front worked out nicely. What I especially like are the angles in the bodywork. We have seen some Chiron MOCs, but they are mostly square cars with flex axles. This car has lots of exotic angles, replicating its real world counterpart. I'm not saying it's perfect, but I absolutely like how it worked out. And I don't mind the gaps in the bodywork. After all, it's not a Creator Expert car, but Technic.
And last but definitely not least....the rims! If the car isn't good looking already, these rims take the cake. Absolutely stunning!
Of course we need some rubber to transfer the power to the road!

All in all I really enjoyed the build. I liked it better than the Porsche. Partially due to non-rushed building, but also because the gearbox, engine and other key elements are more fun to build.
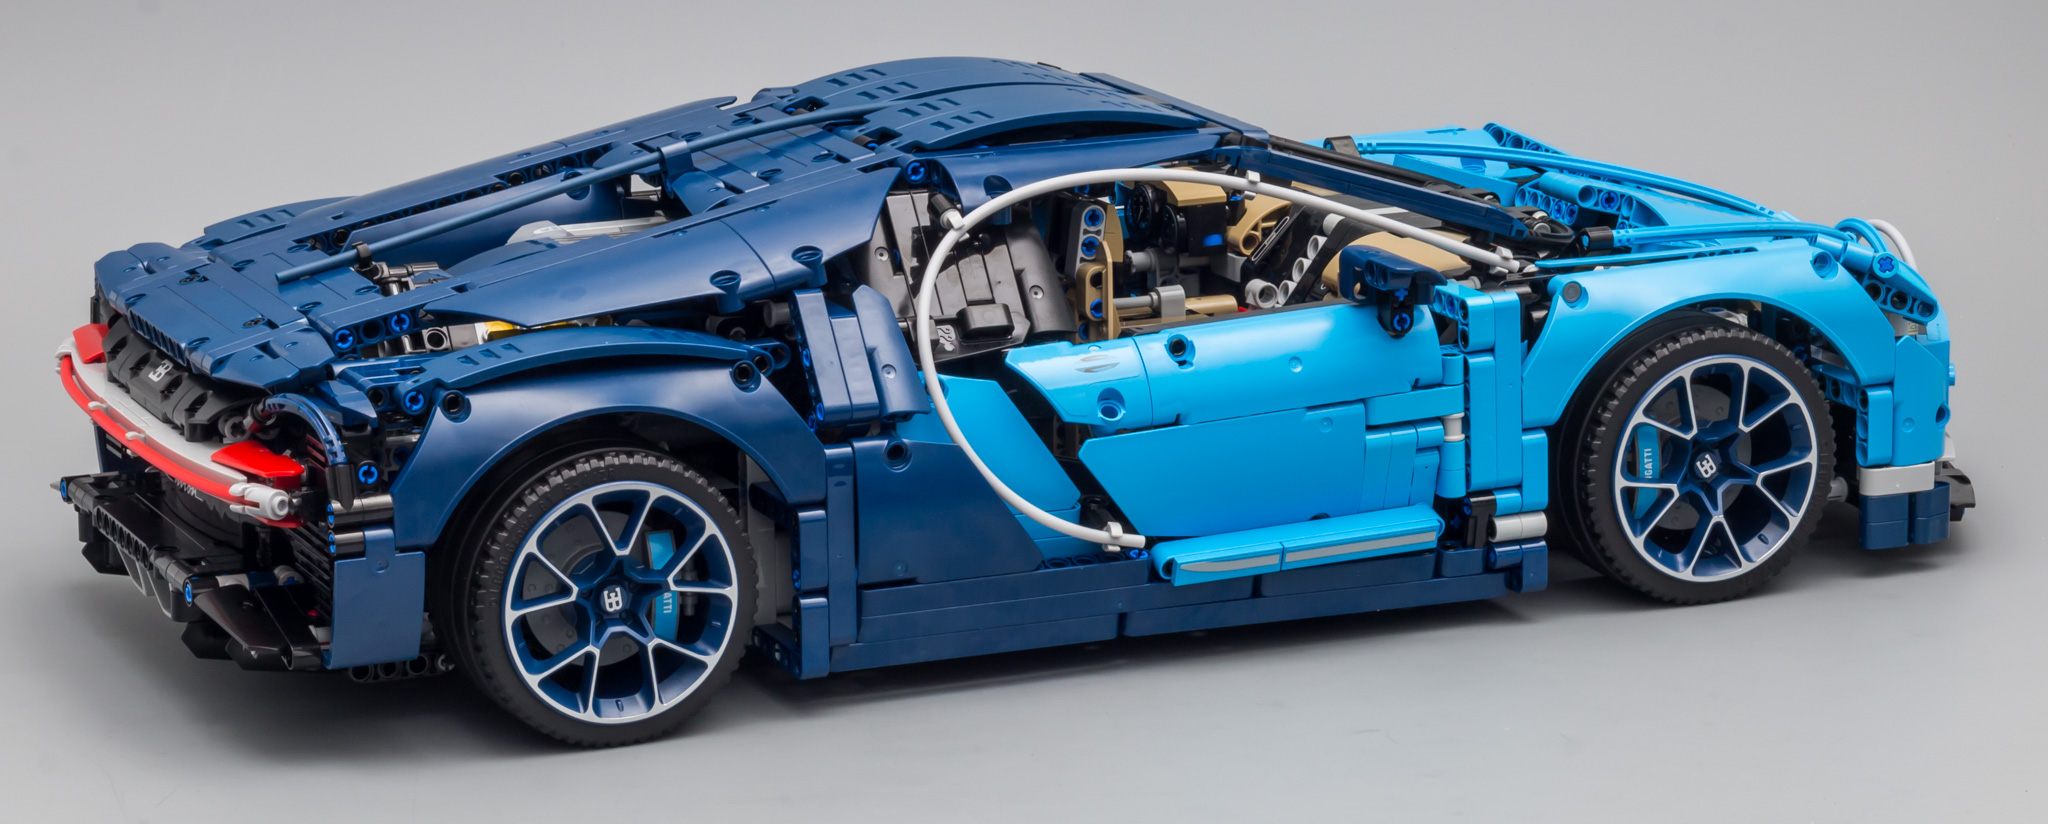
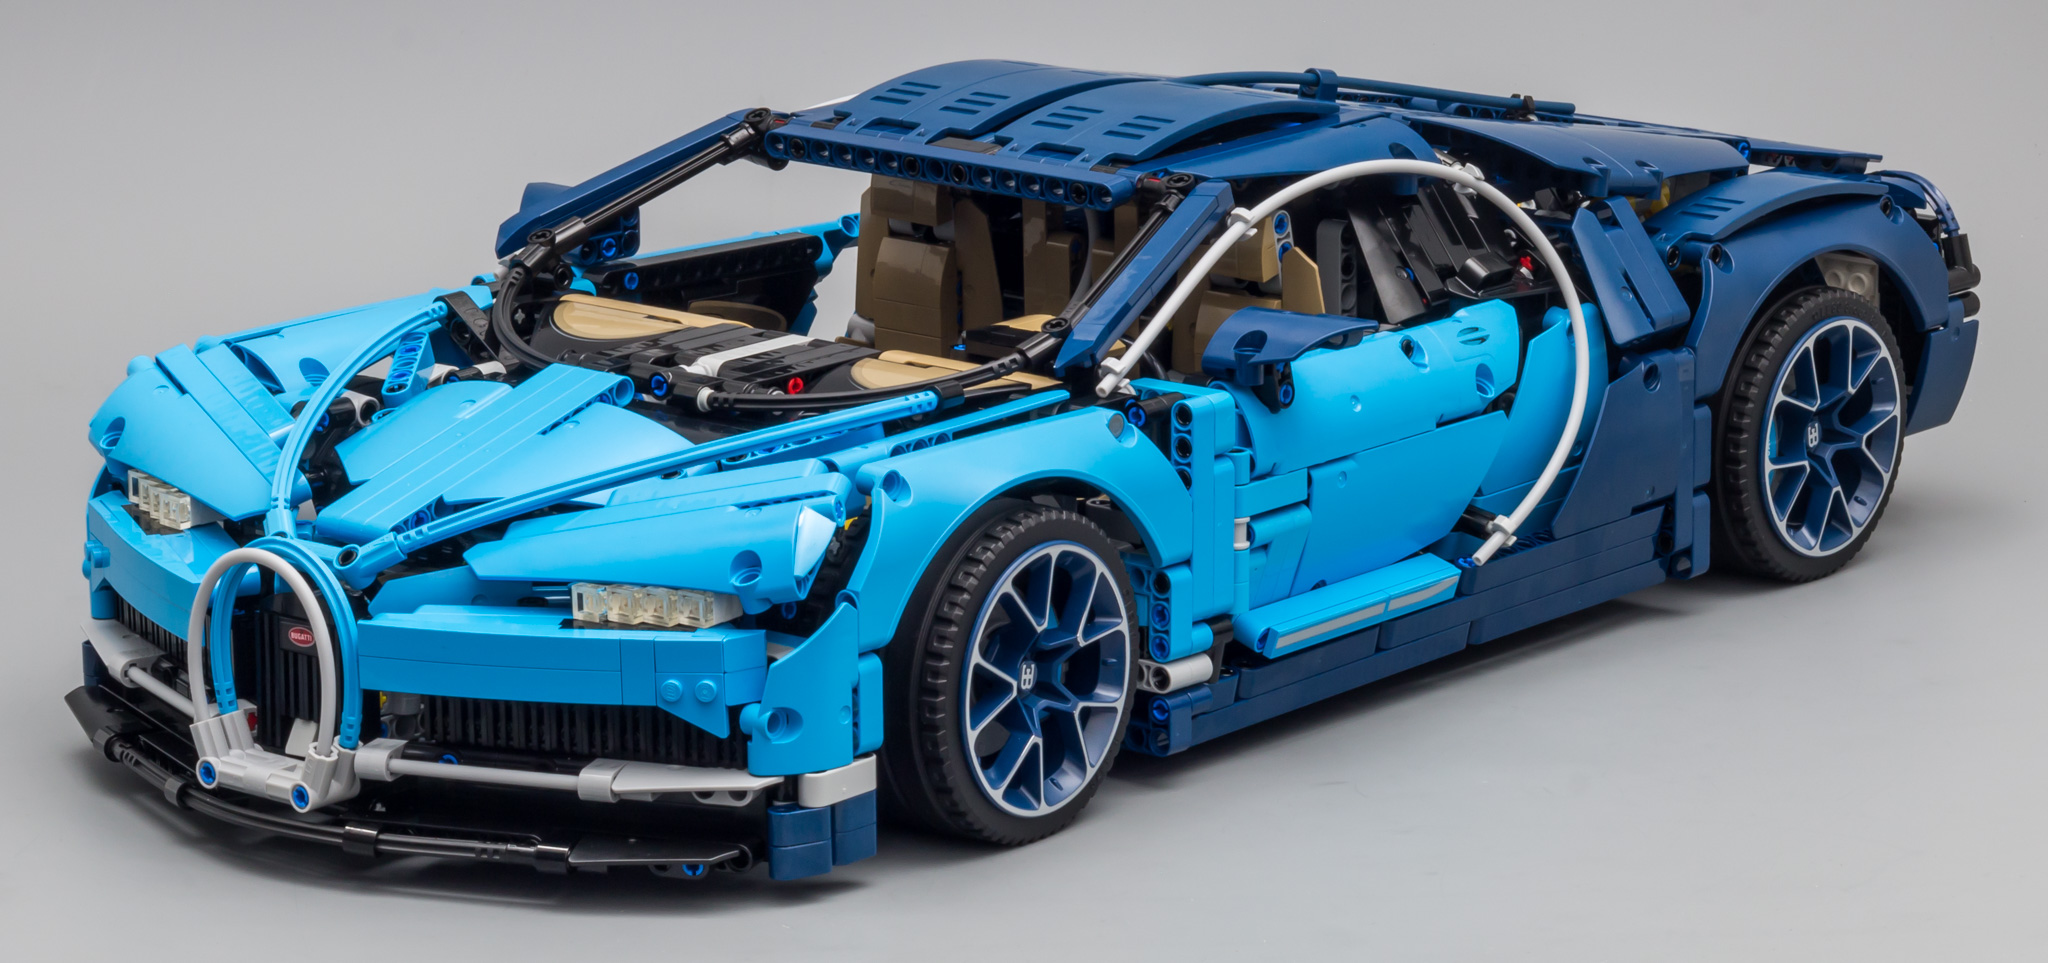
COMPLETED MODEL
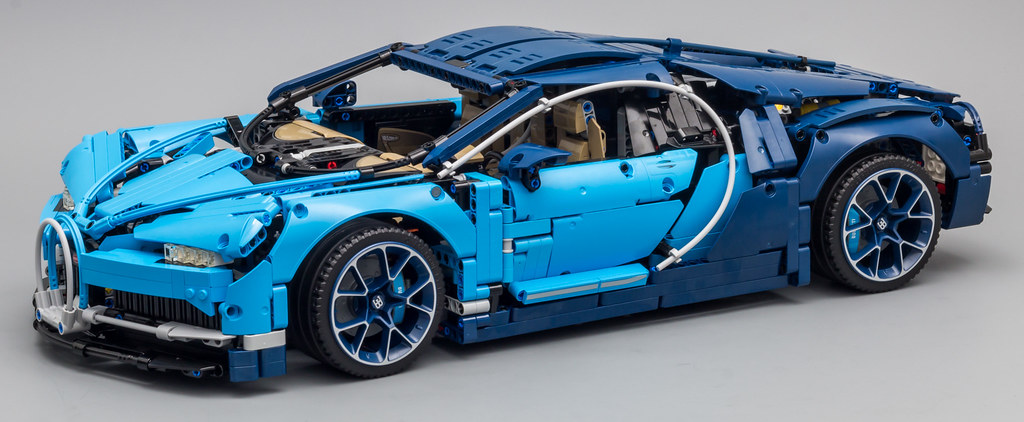
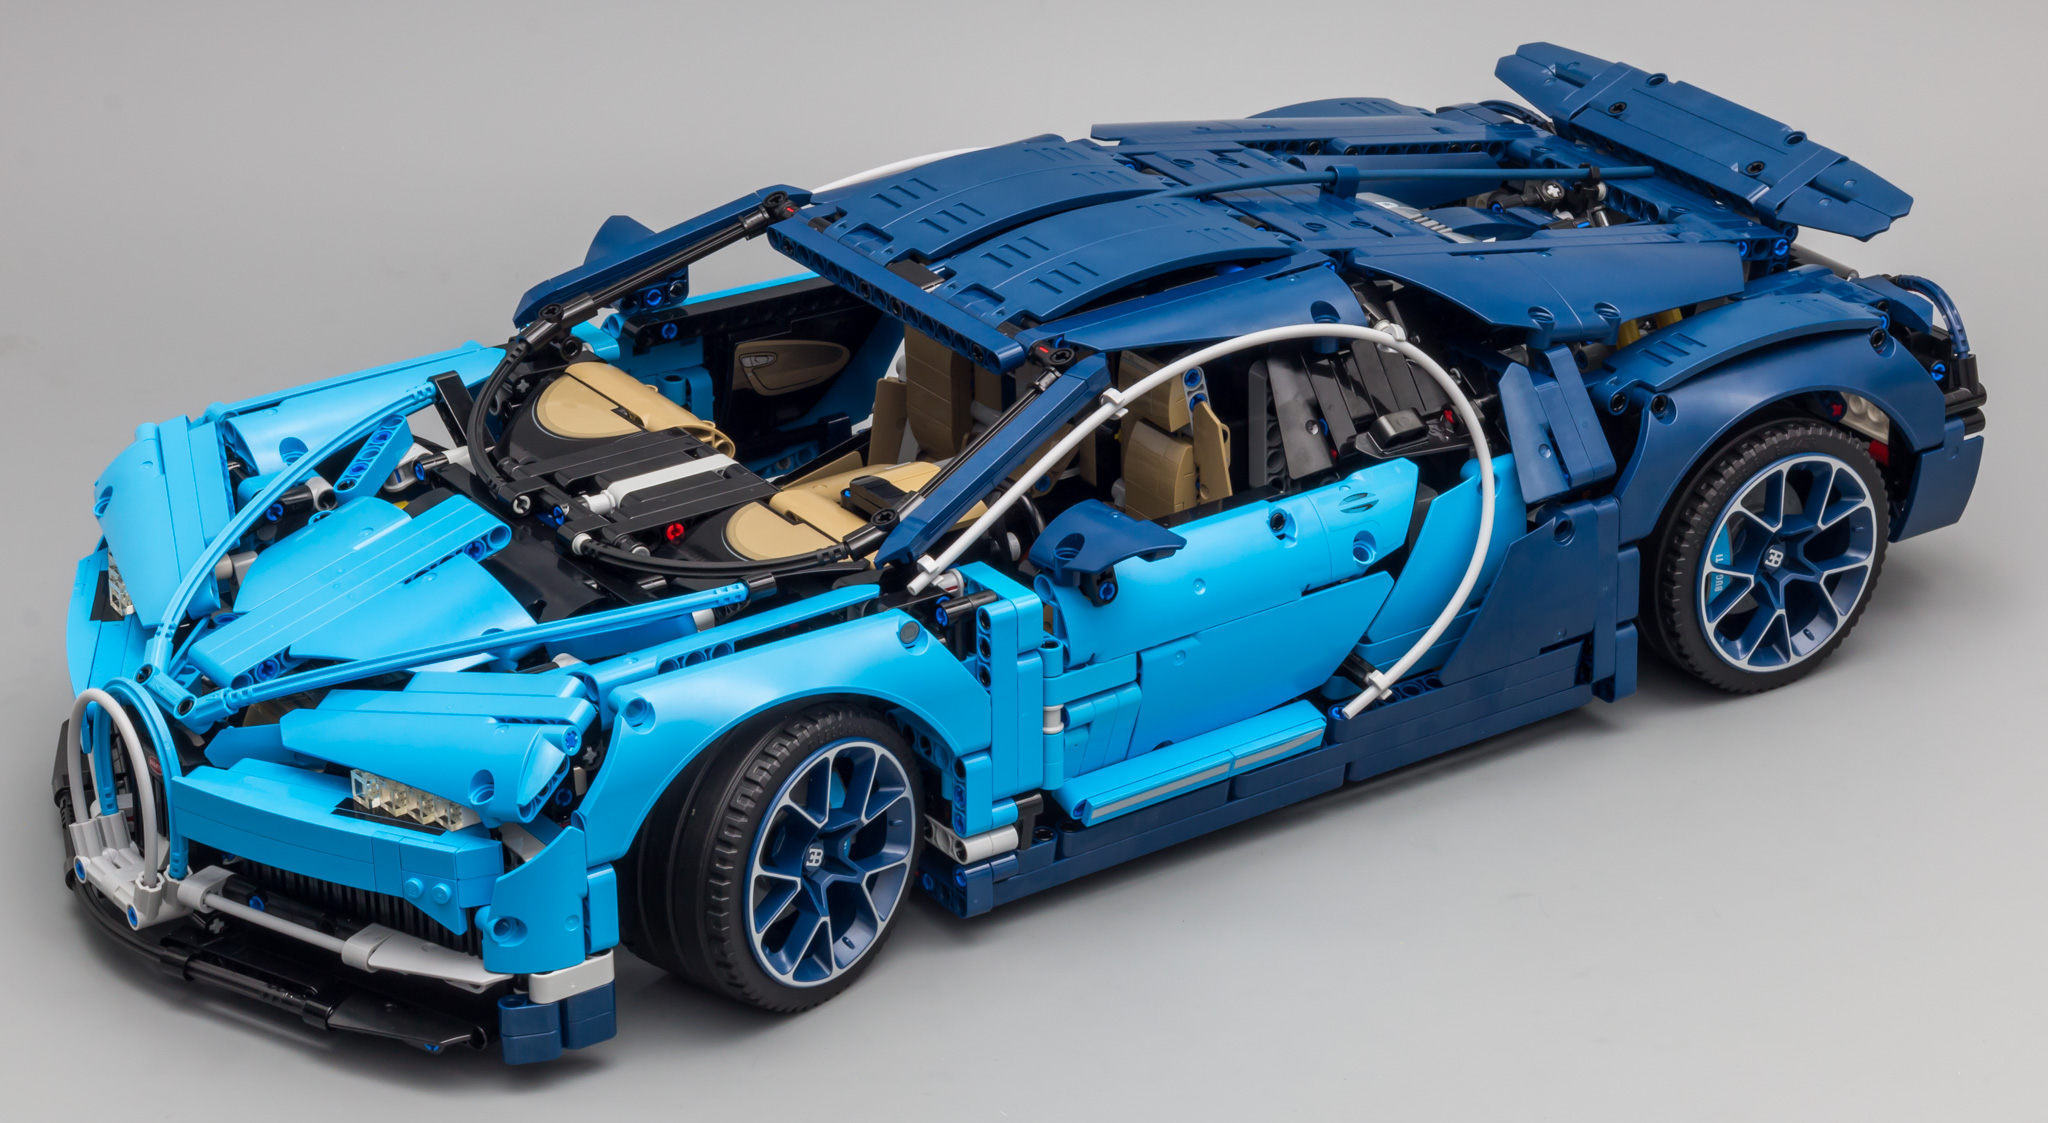
Low and behold, a LEGO Technic Bugatti Chiron!

Looking at the real car, you can see that the lighter blue resembles regular Technic blue more than dark azure. However, I am very happy that TLG still chose to go with dark azure. It results in a higher contrast between the two colors, it's better for dark azure part availability and it's just a better color blue :laugh:

The spoiler isn't fully extended in this picture. It's halfway between neutral (folded) and extended.
On the left you can see the lead designer of the Bugatti. Oh wait, that's not entirely correct :wink: For those of you not familiar with the history of Eurobricks; this is Kim Thompson (@KimT), former (technically he is still a member) Eurobricks member and he is member of the Community Engagement team at TLG. He is our contact for most of the activities.
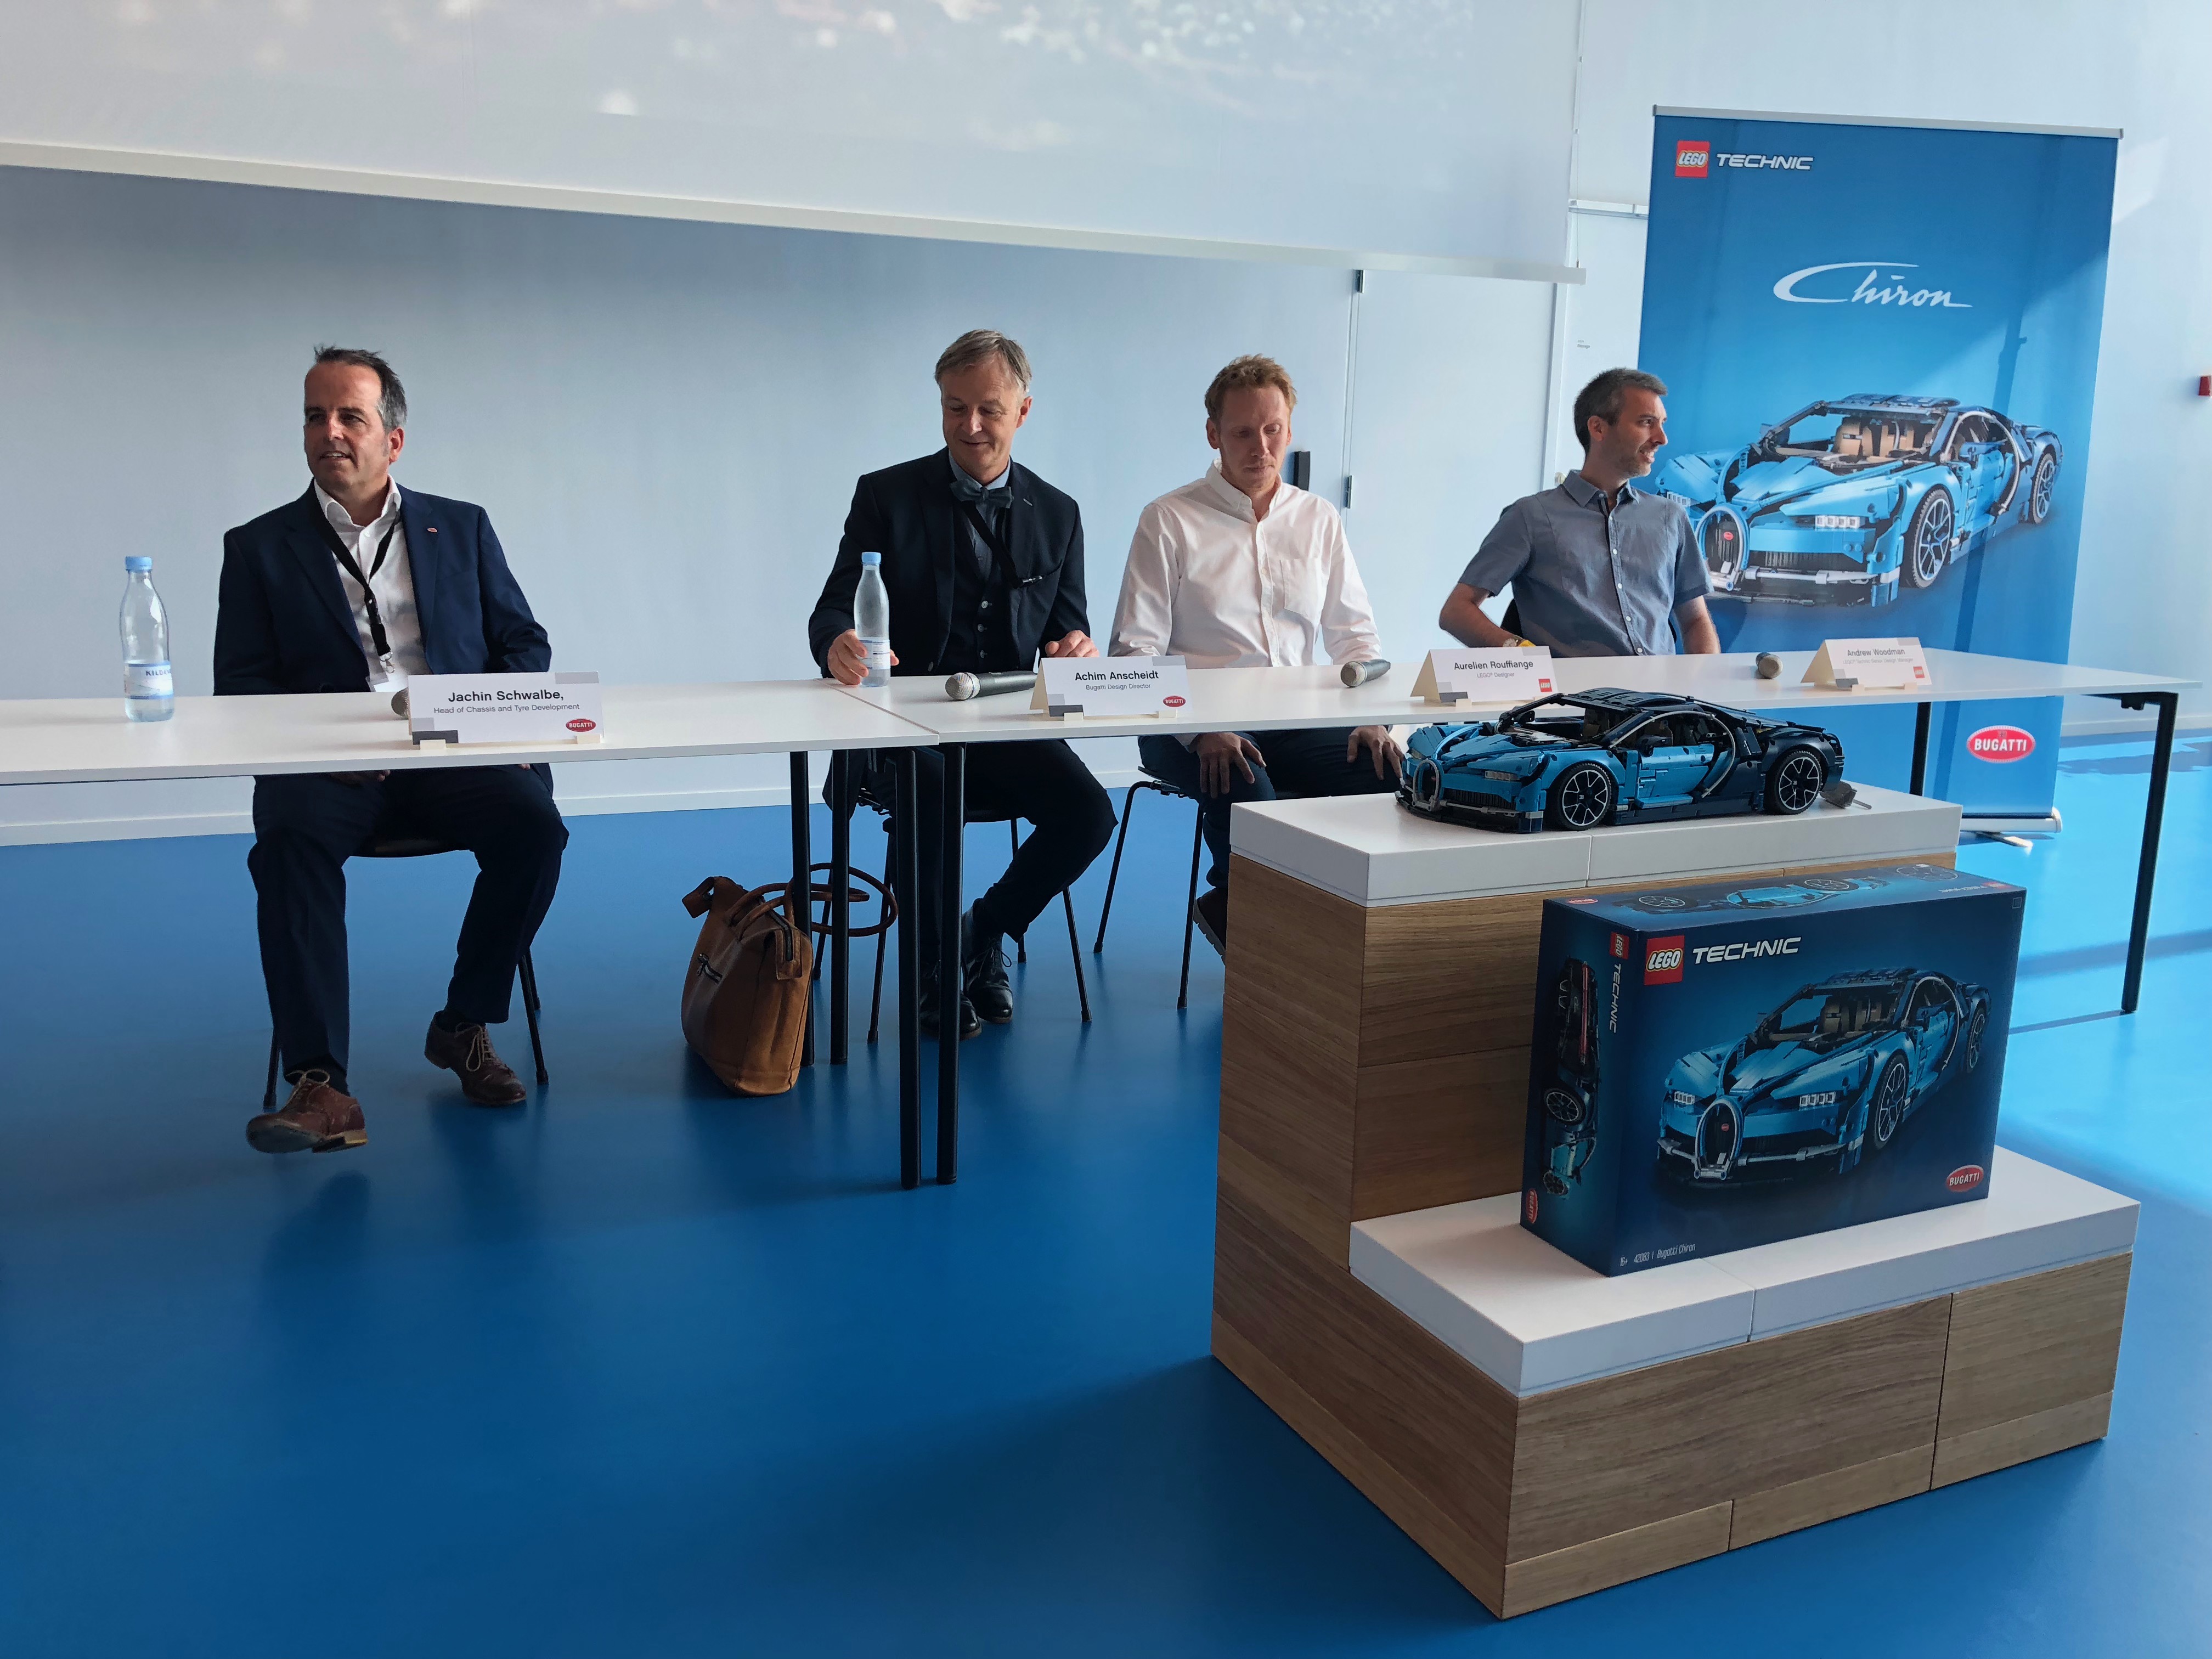
The right picture shows the actual designers, from left to right:
- Jachin Schwalbe - Bugatti Head of Chassis and Tire Development
- Achim Anscheidt - Bugatti Design Director
- Aurelien Rouffiange - TLG Designer
- Andrew Woodman - TLG Senior Design Manager
Here you can clearly see the different angles, which definitely must have been challenging for Aurelien.
Almost as good looking as the LEGO version hehe.

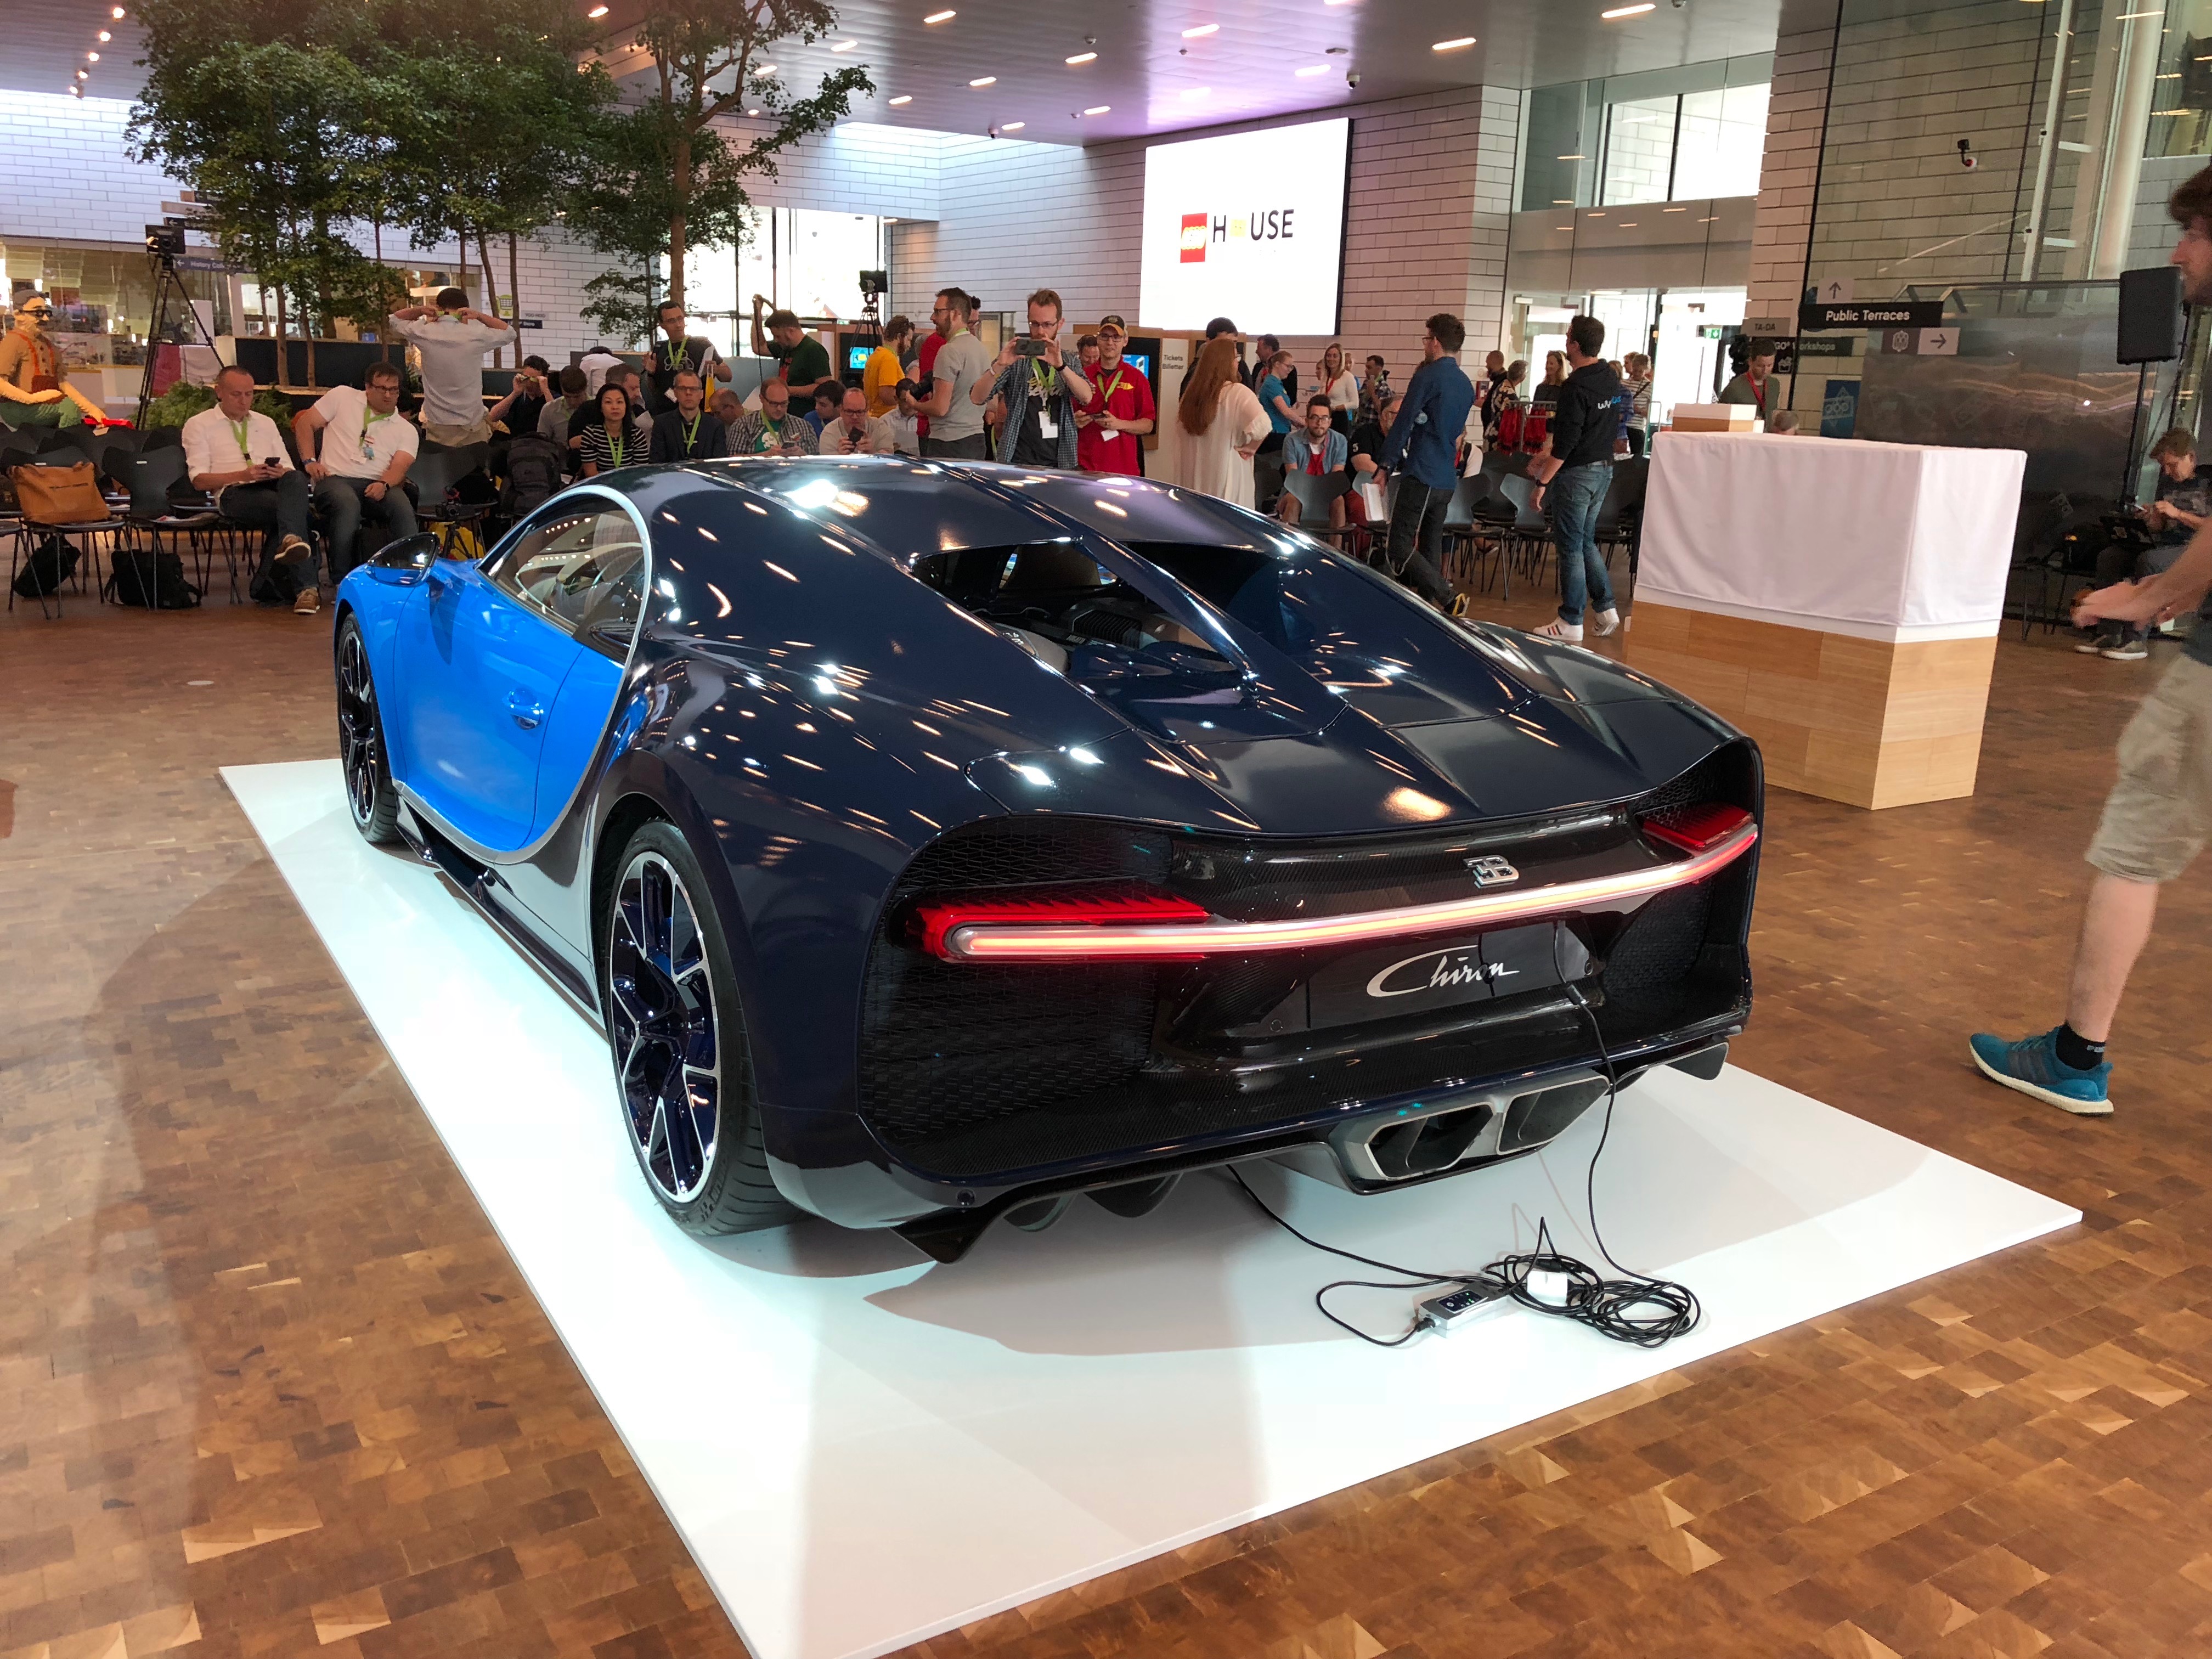
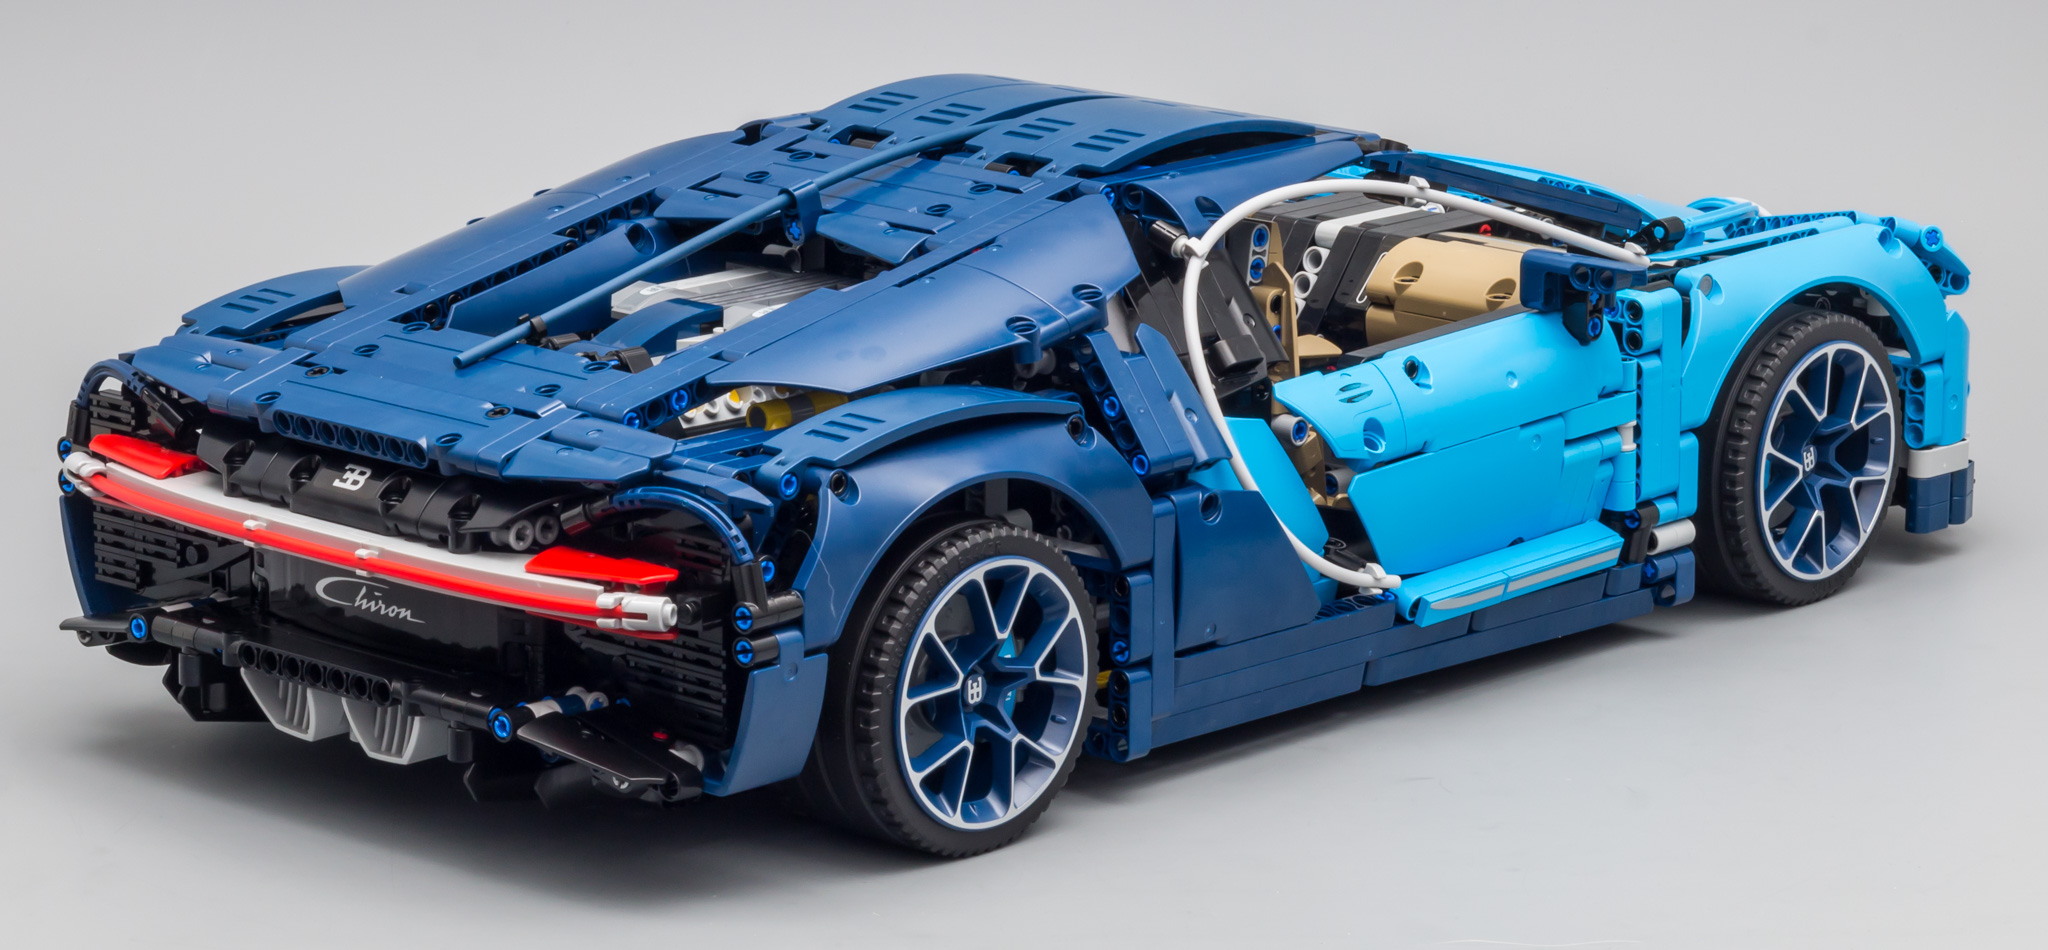
As I said before, the rear of the car looks absolutely stunning.
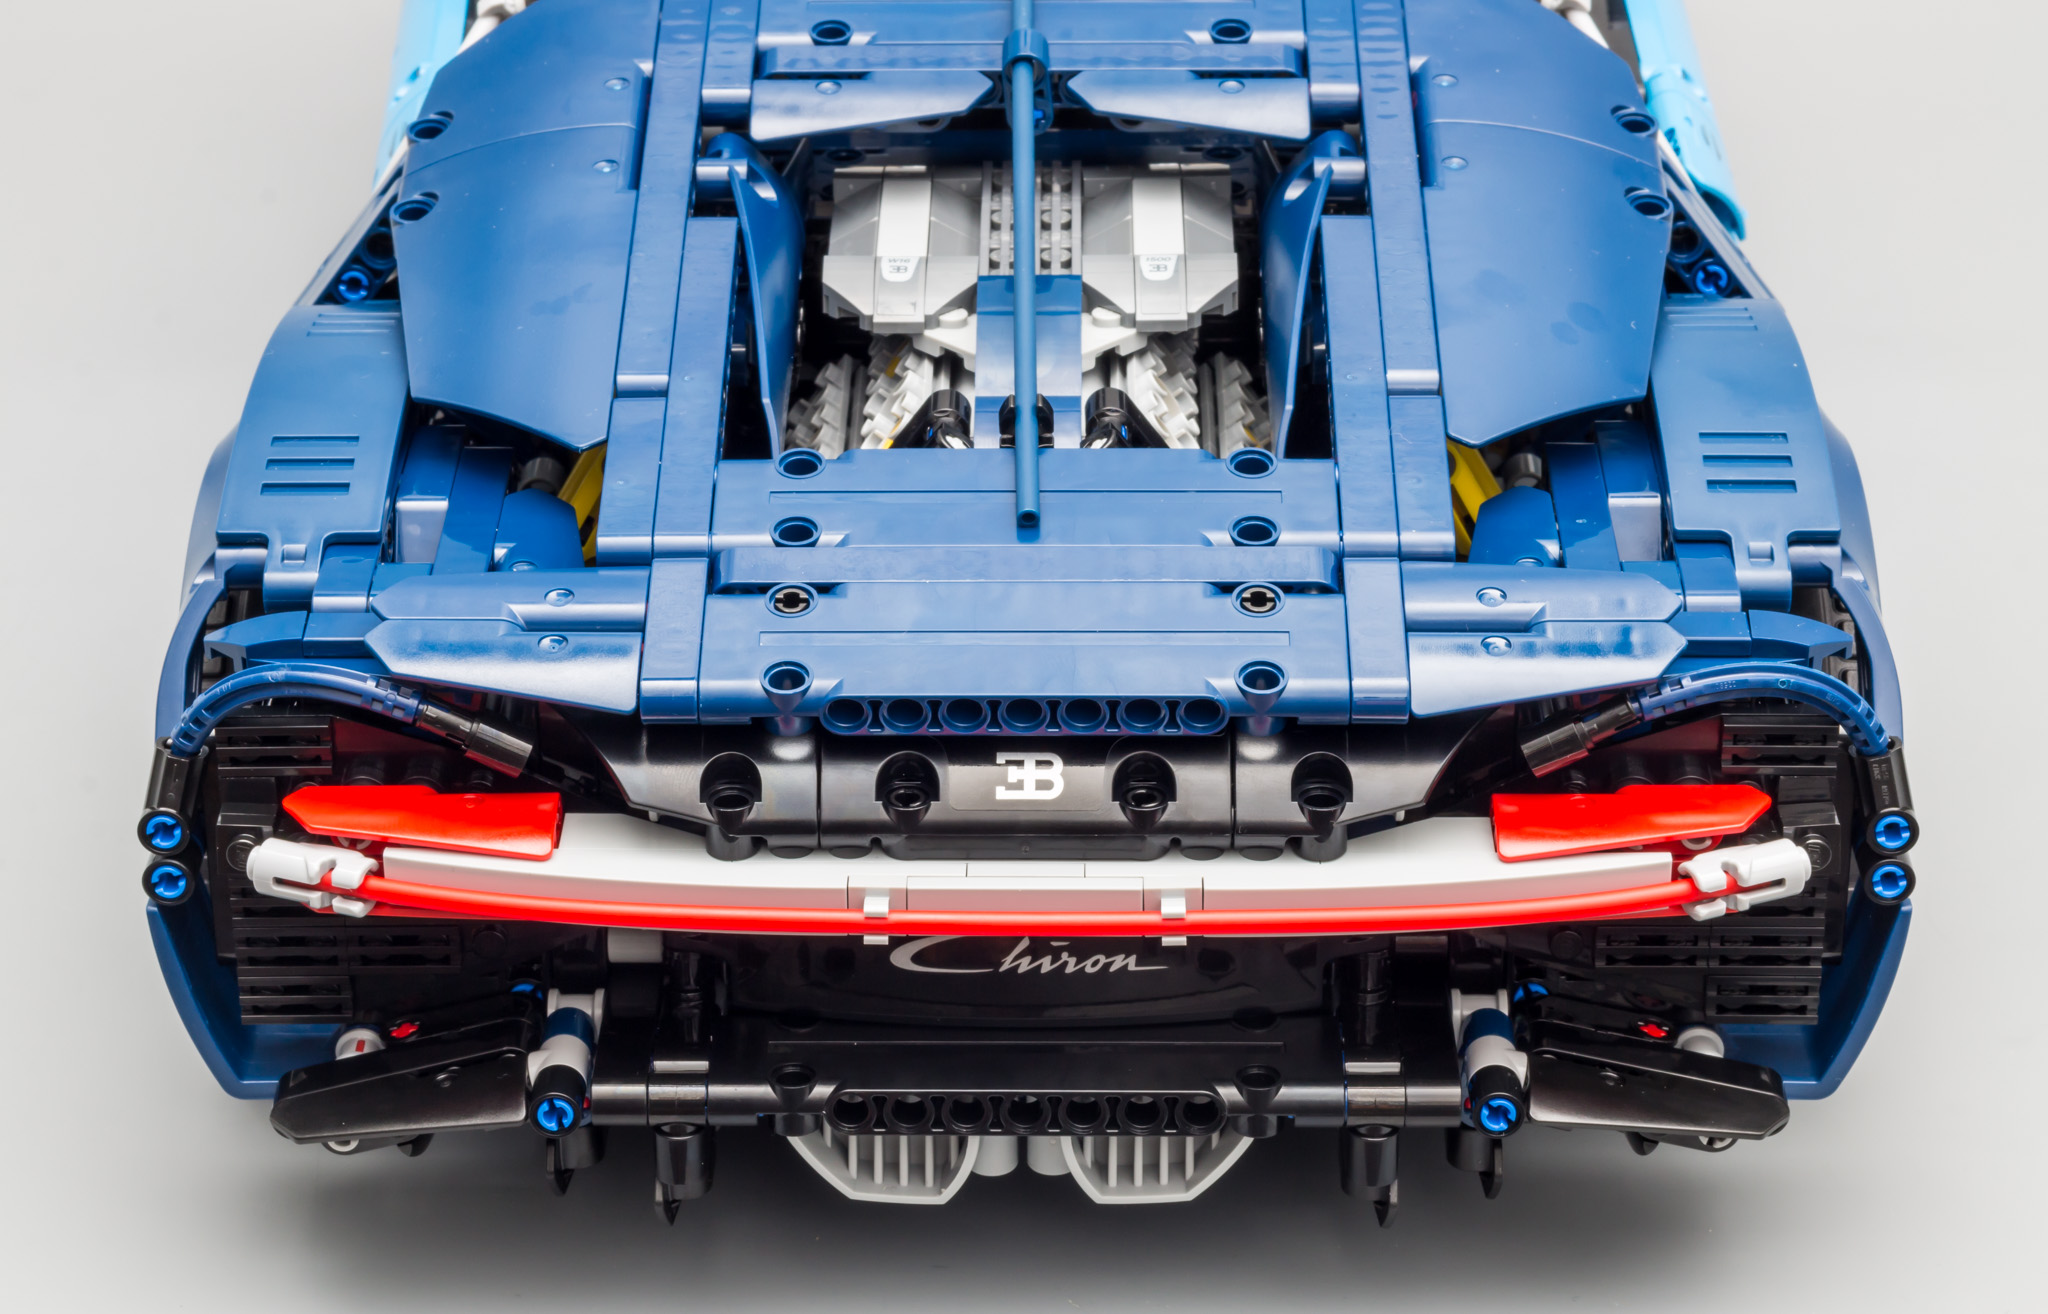
I can't get enough of this view.
Usually the front of the car gives it its distinct look, and the rear...is just the rear. This car has a very distinct rear as well.
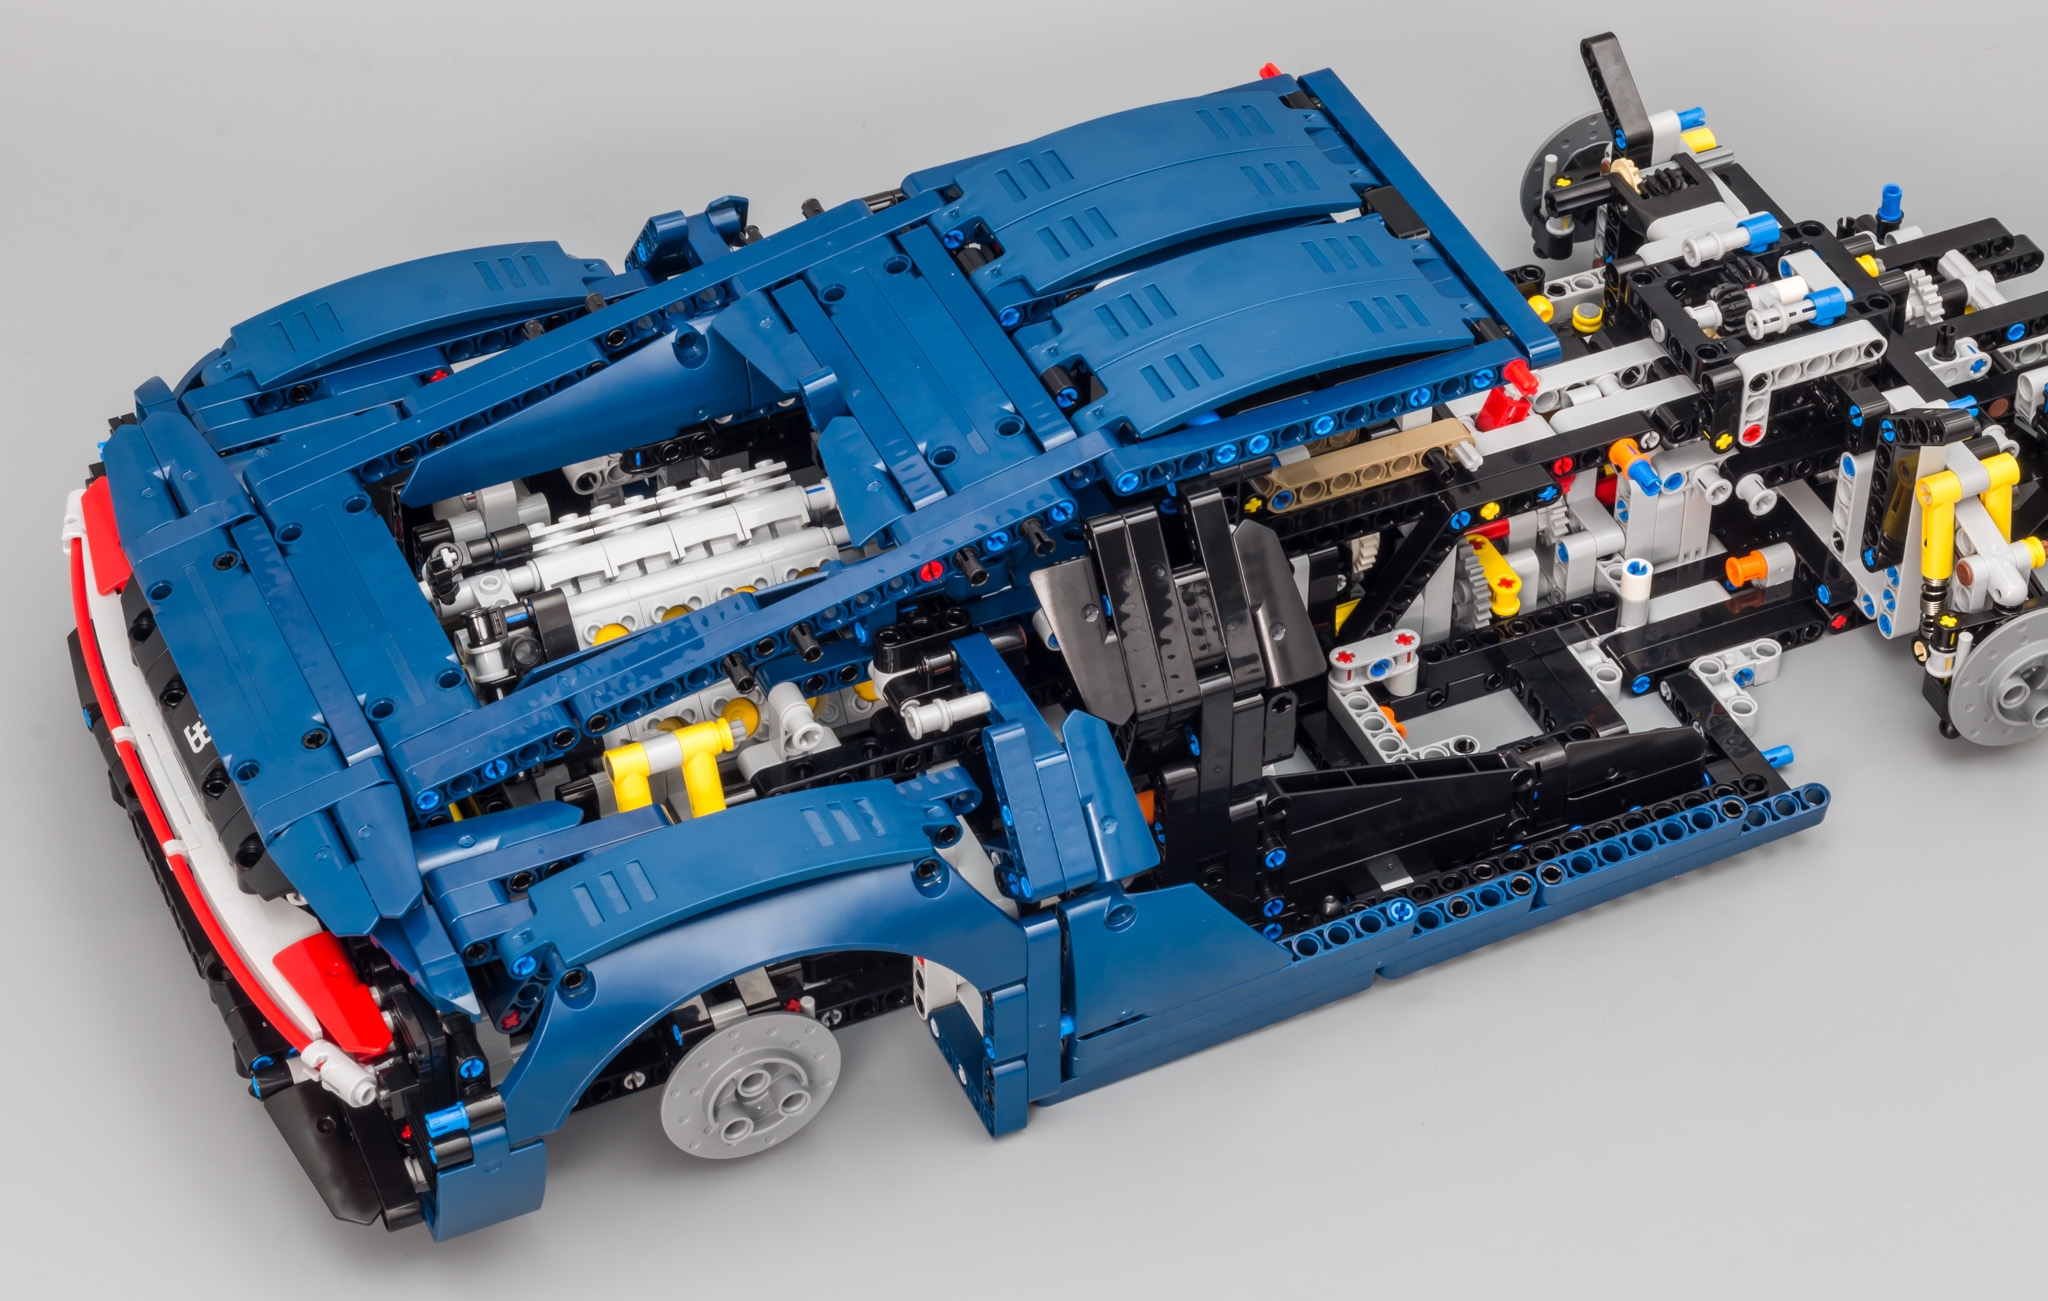
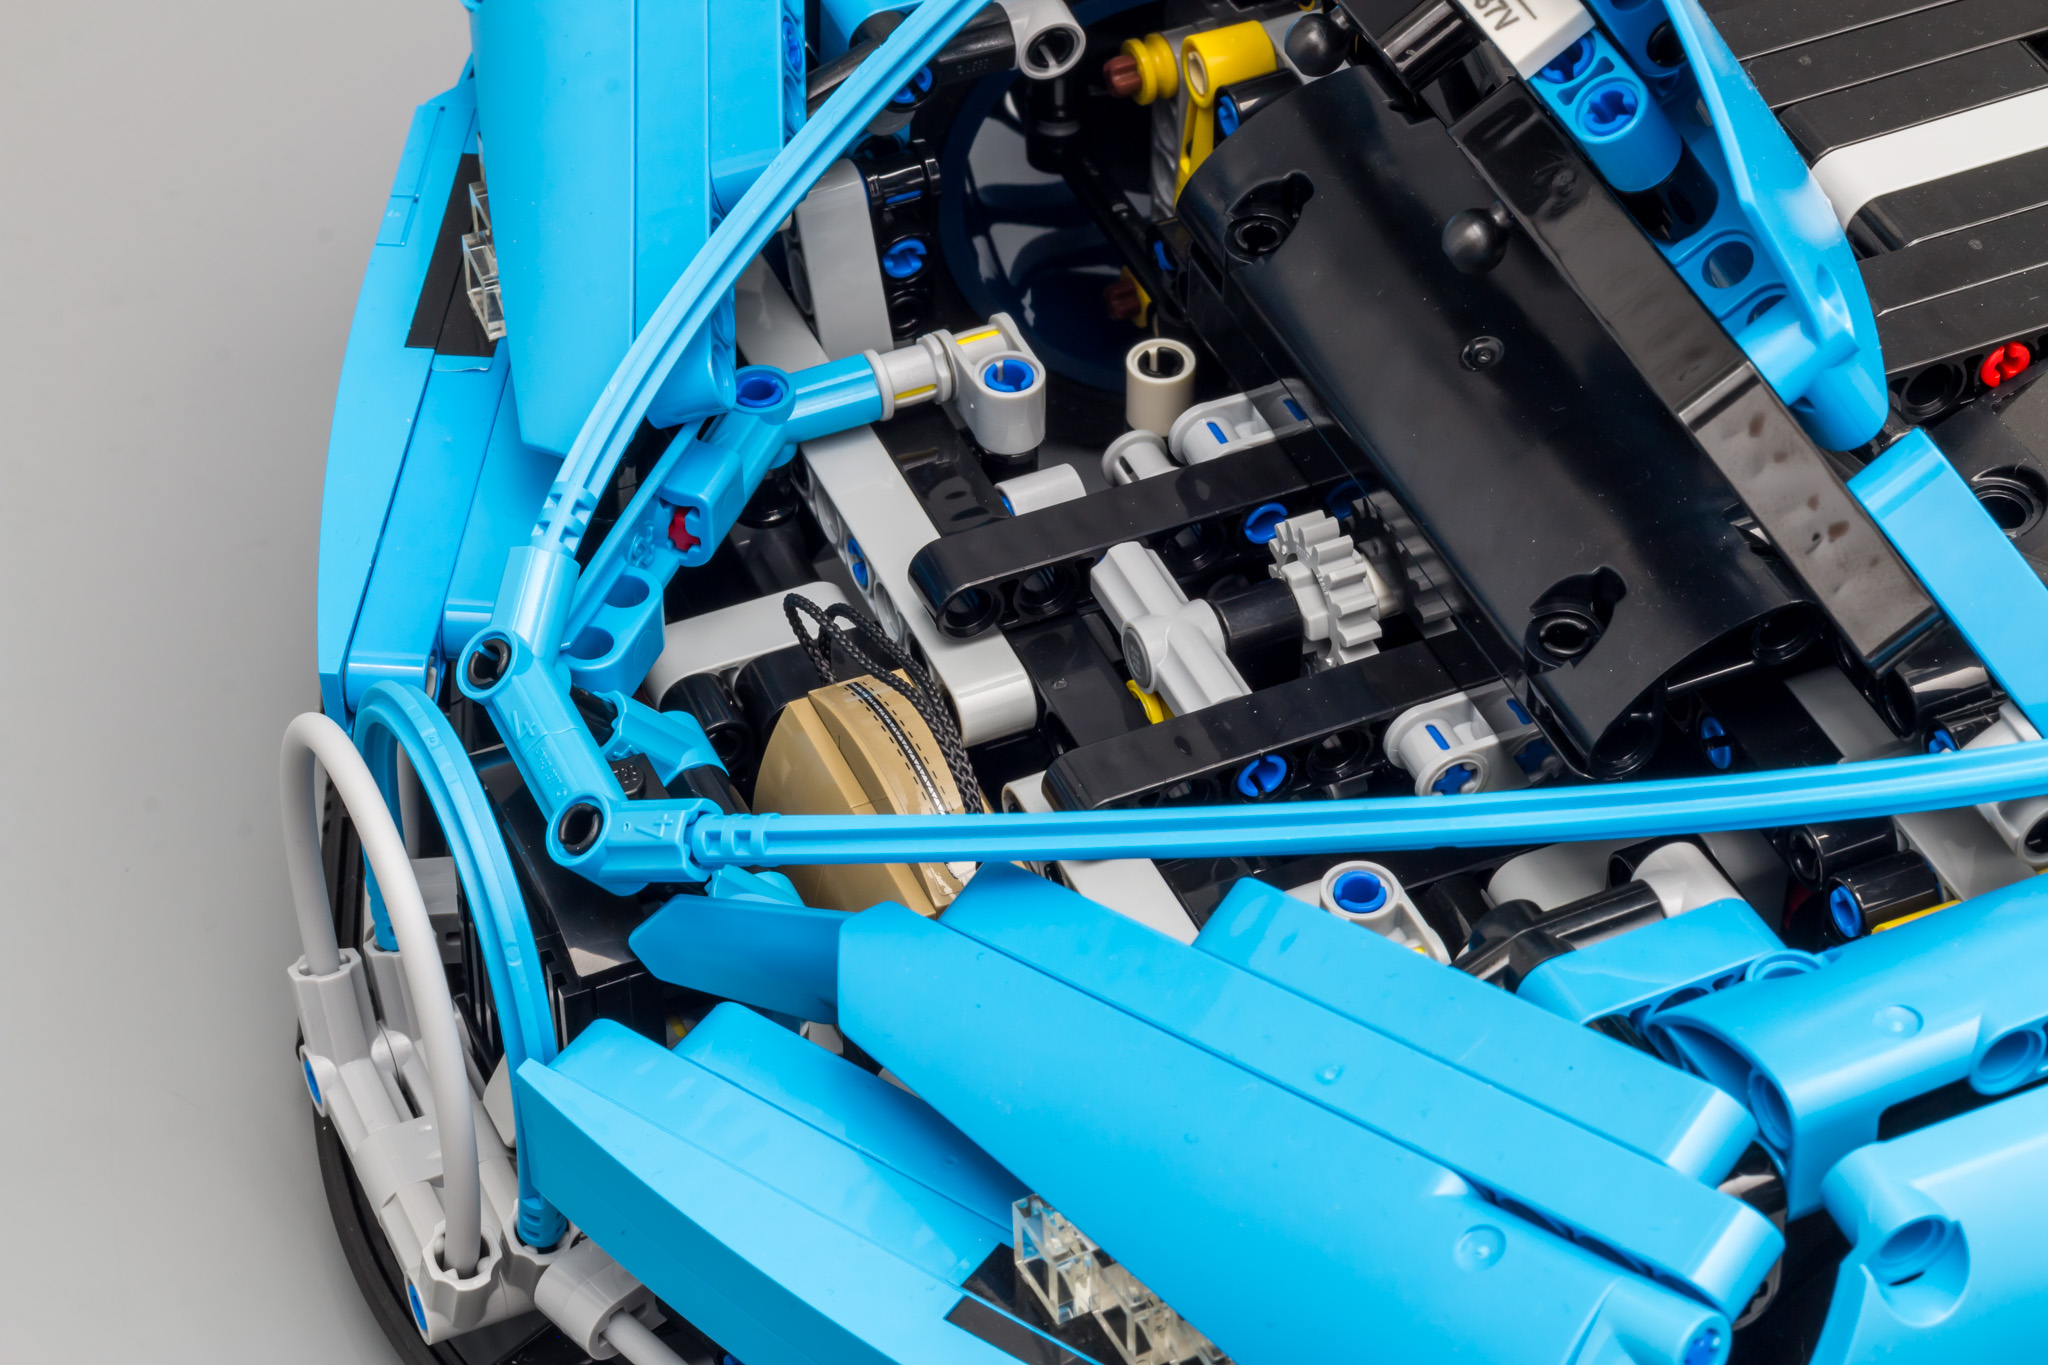
I like how the W16 worked out. The engine has been partially covered with system bricks to give it the "big engine look", but you can still see most of the cylinders, in contrast to the Porsche.
In this image you can see that the door isn't entire closed. This could have easily been avoided by adding door locks. Other than that, the car looks magnificent.
Another great view of the back. Looking at this image, I start to wonder how this car will look like when the bodywork is entirely made in dark blue, and possibly losing the grey rigid hoses.
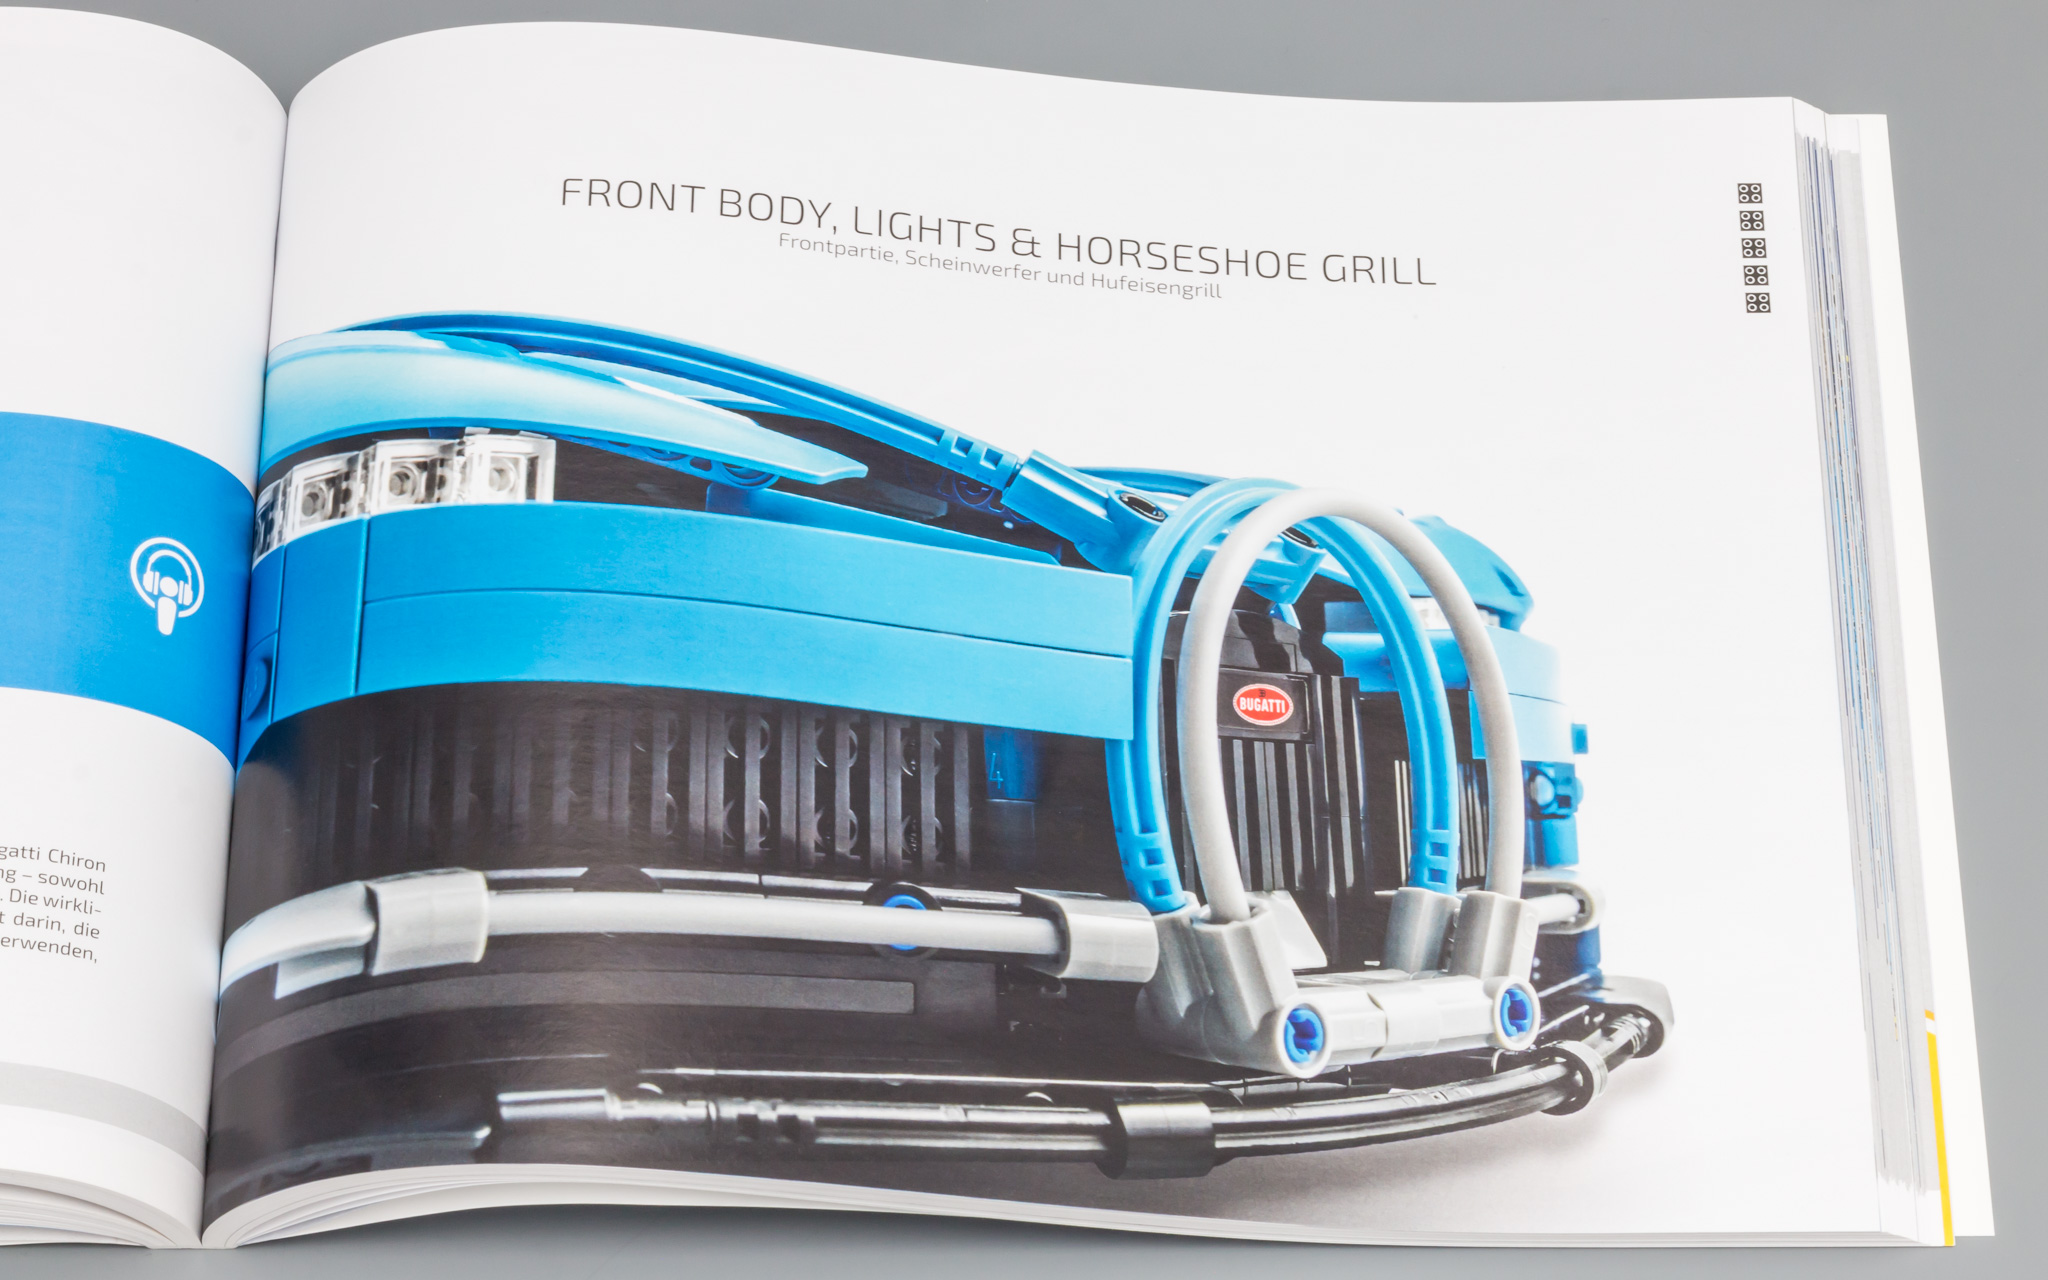
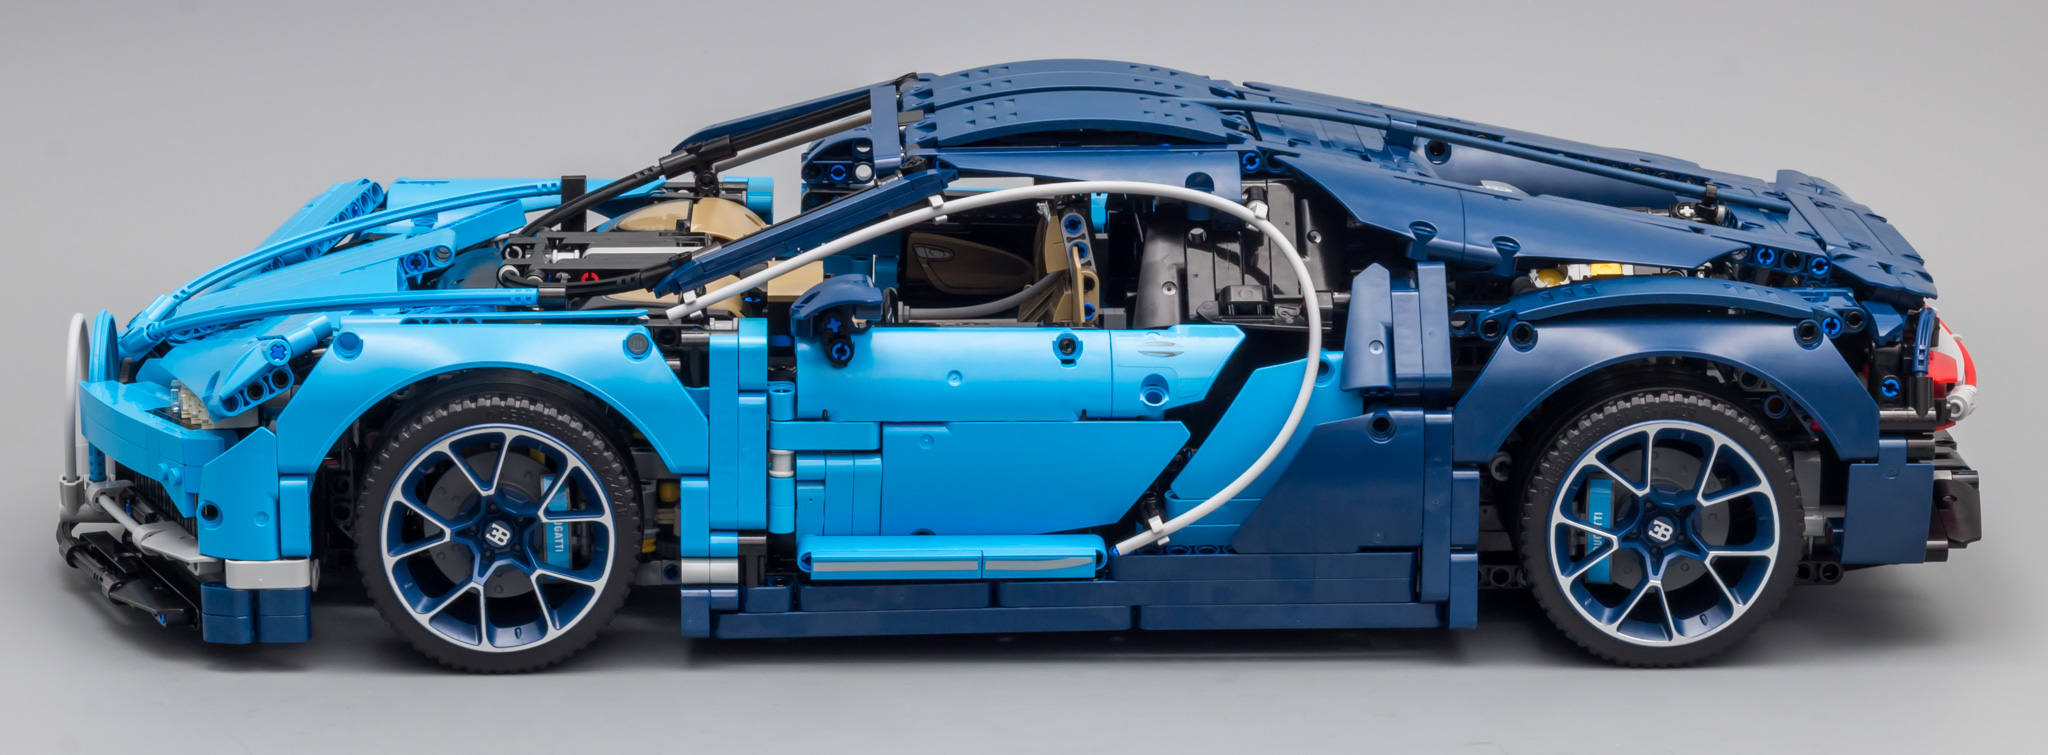
The profile view is also very beautiful, but two odd thing stand out. First is the flex axle and rigid hose combo comprising the front grill. I somehow feel this could have looked better using a single axle or hose. The other thing is that the flex axles continue as stickers. This just doesn't feel entirely right. Especially since we have seen some simple, but very good looking, MODs, using rigid hoses.
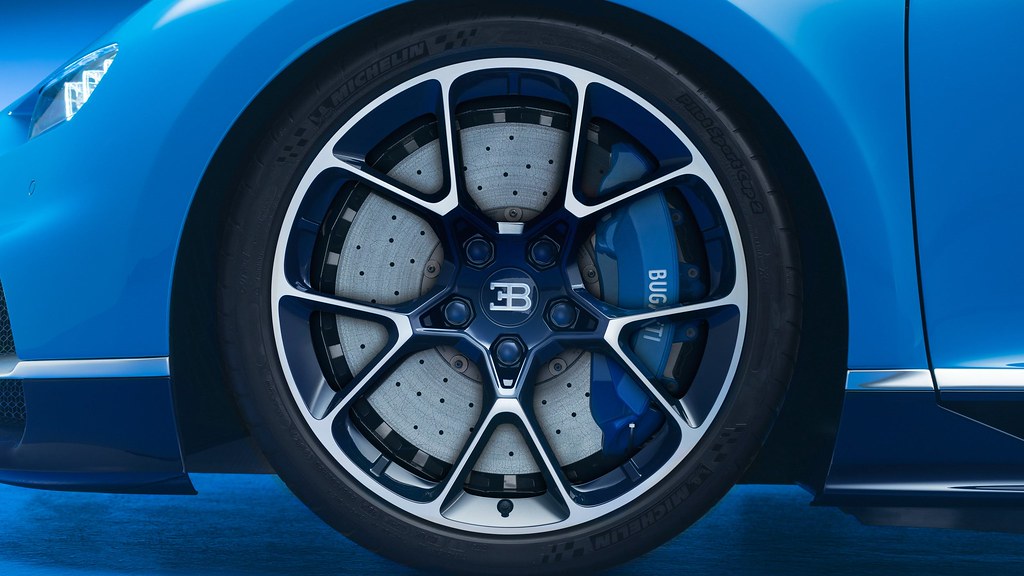
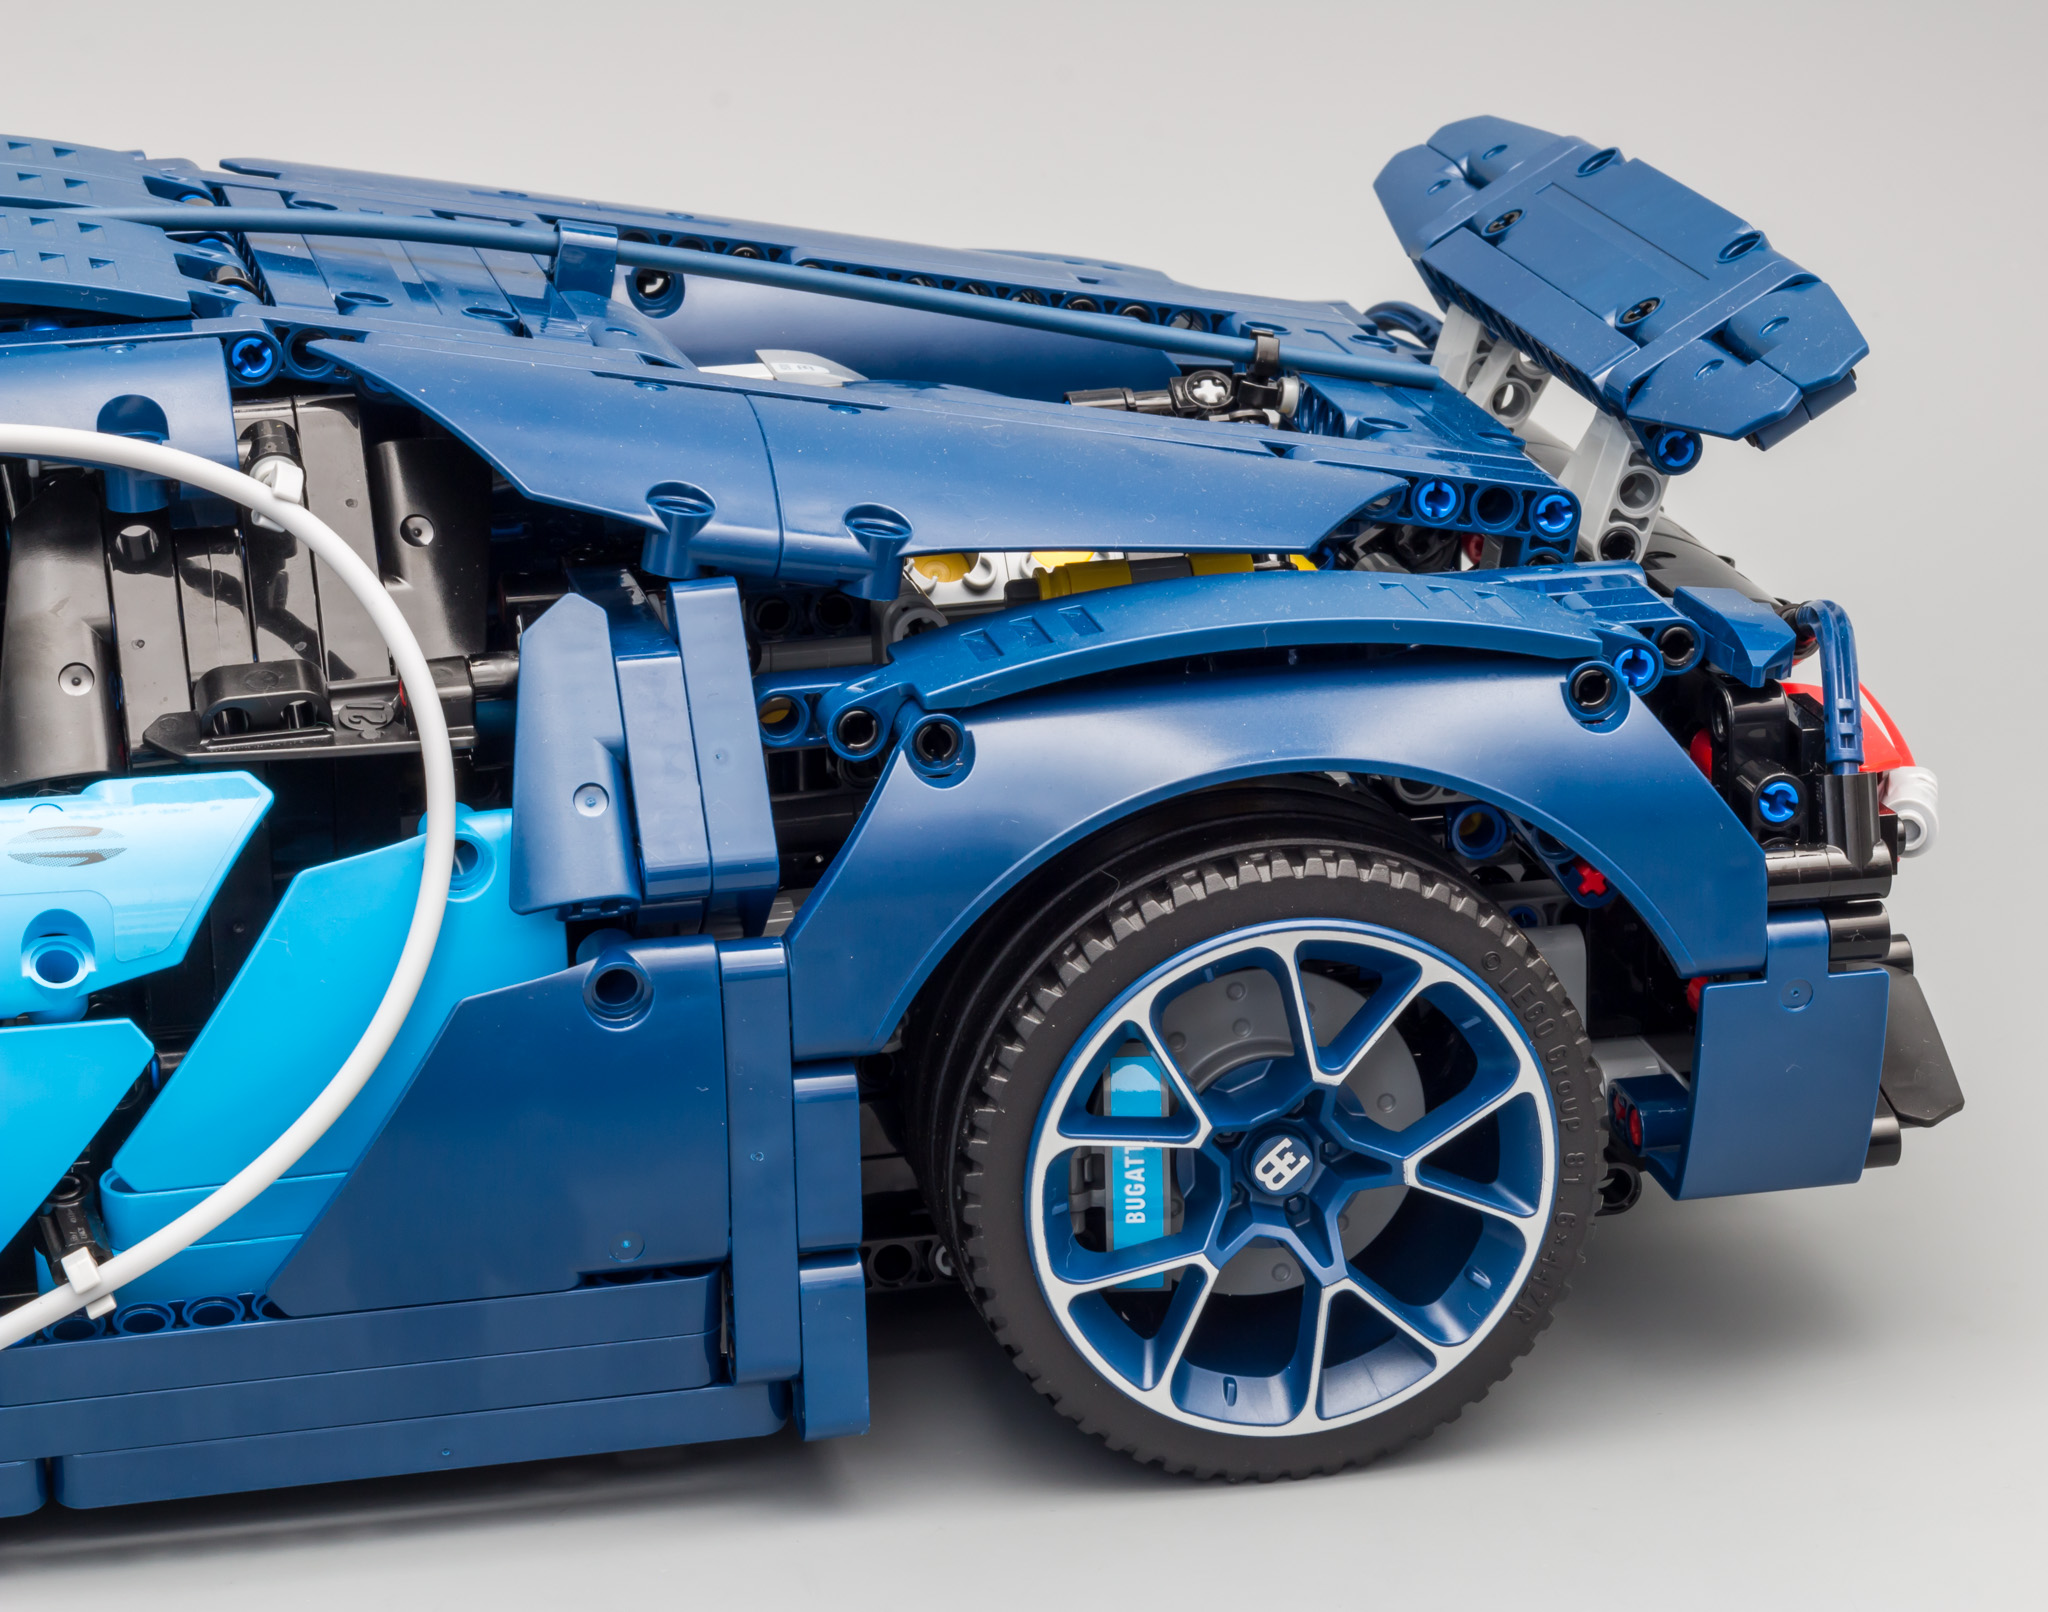
Some of the negative or odd things aside, I absolutely love the looks of this car. The duo-tone blue is stunning and the rims are out of this world. If you look closely at the rims, you will notice that the tires are not mounted "correctly". The rims slightly protrude the tires. Apparently Bugatti designers found the rims to be too small when mounted correctly. This was a very simple solution to make them look a bit bigger. At first I wasn't convinced by this solution, but upon seeing the solution in real life, I was convinced that it indeed looked better.
And look at those disc brakes ... fantastic!
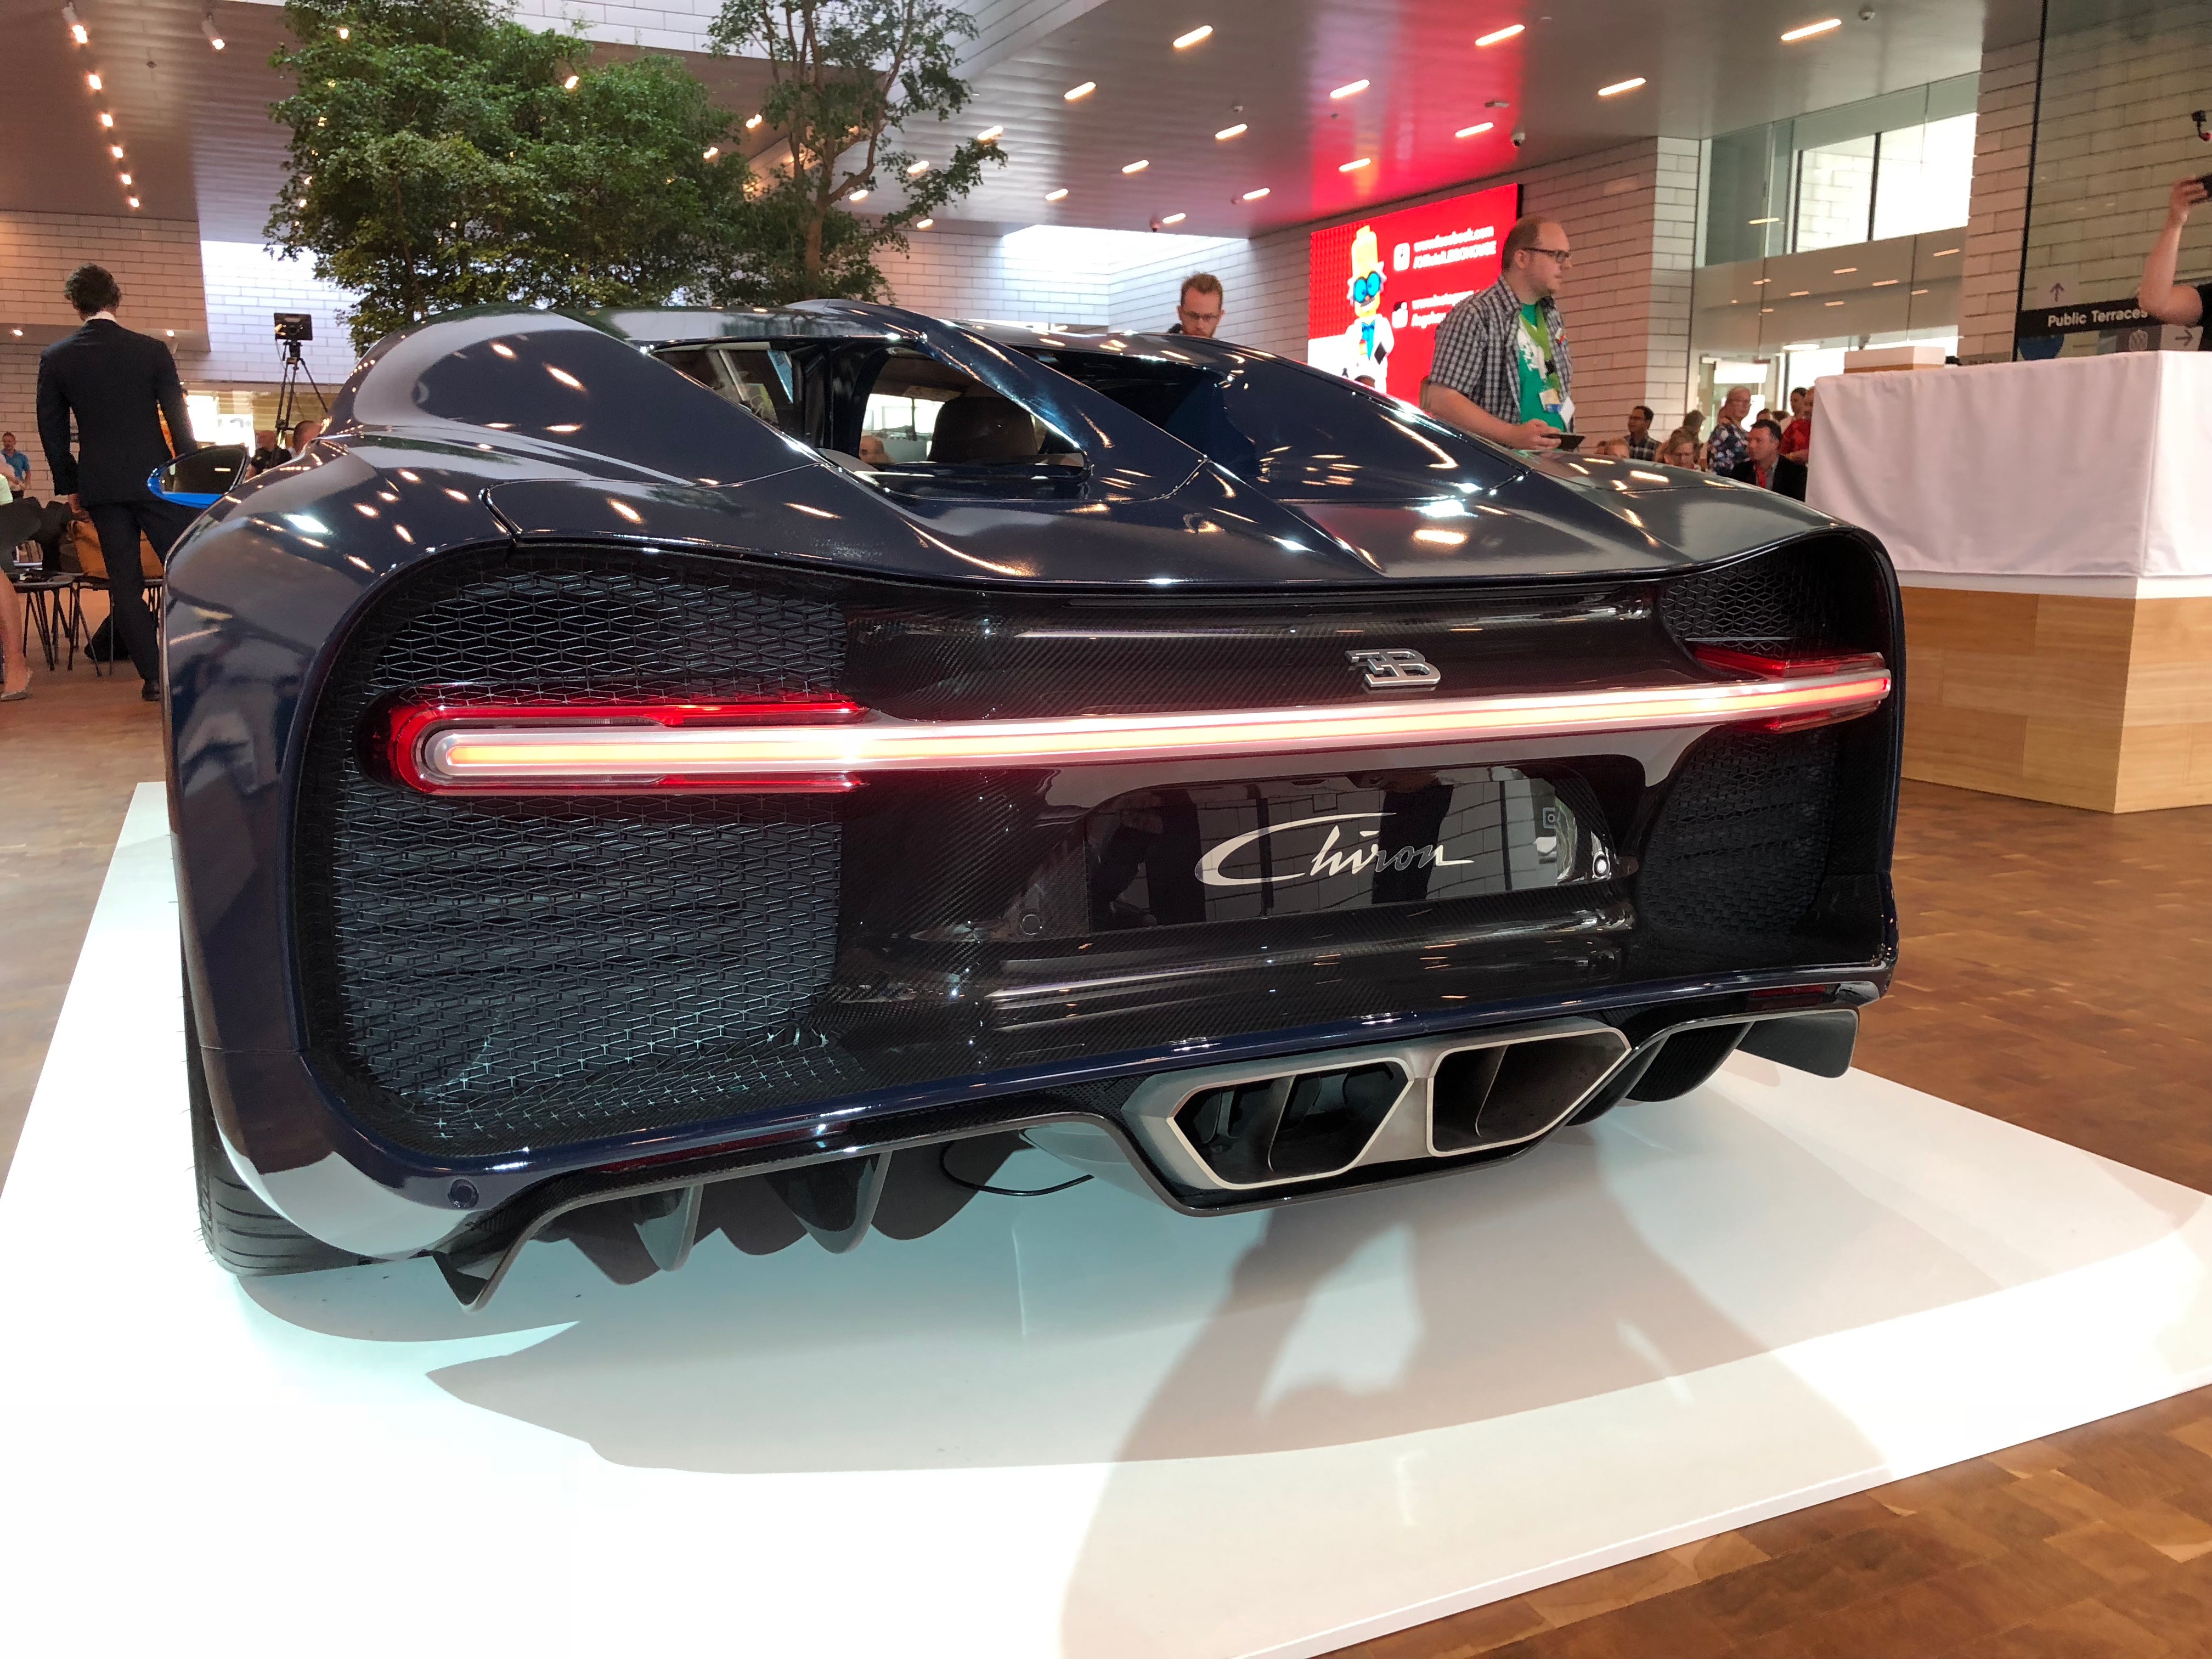
The real ones don't look too shabby either :wink:
There are a lot of odd angles, which are implemented very well. It's obviously a matter of personal taste, but I do like the looks of this car better than the Porsche's. Maybe it's the sophisticated color scheme. Combine dark azure with the classy dark blue and you have an instant winner. But of course, it's not only about colors, it's about shapes as well.
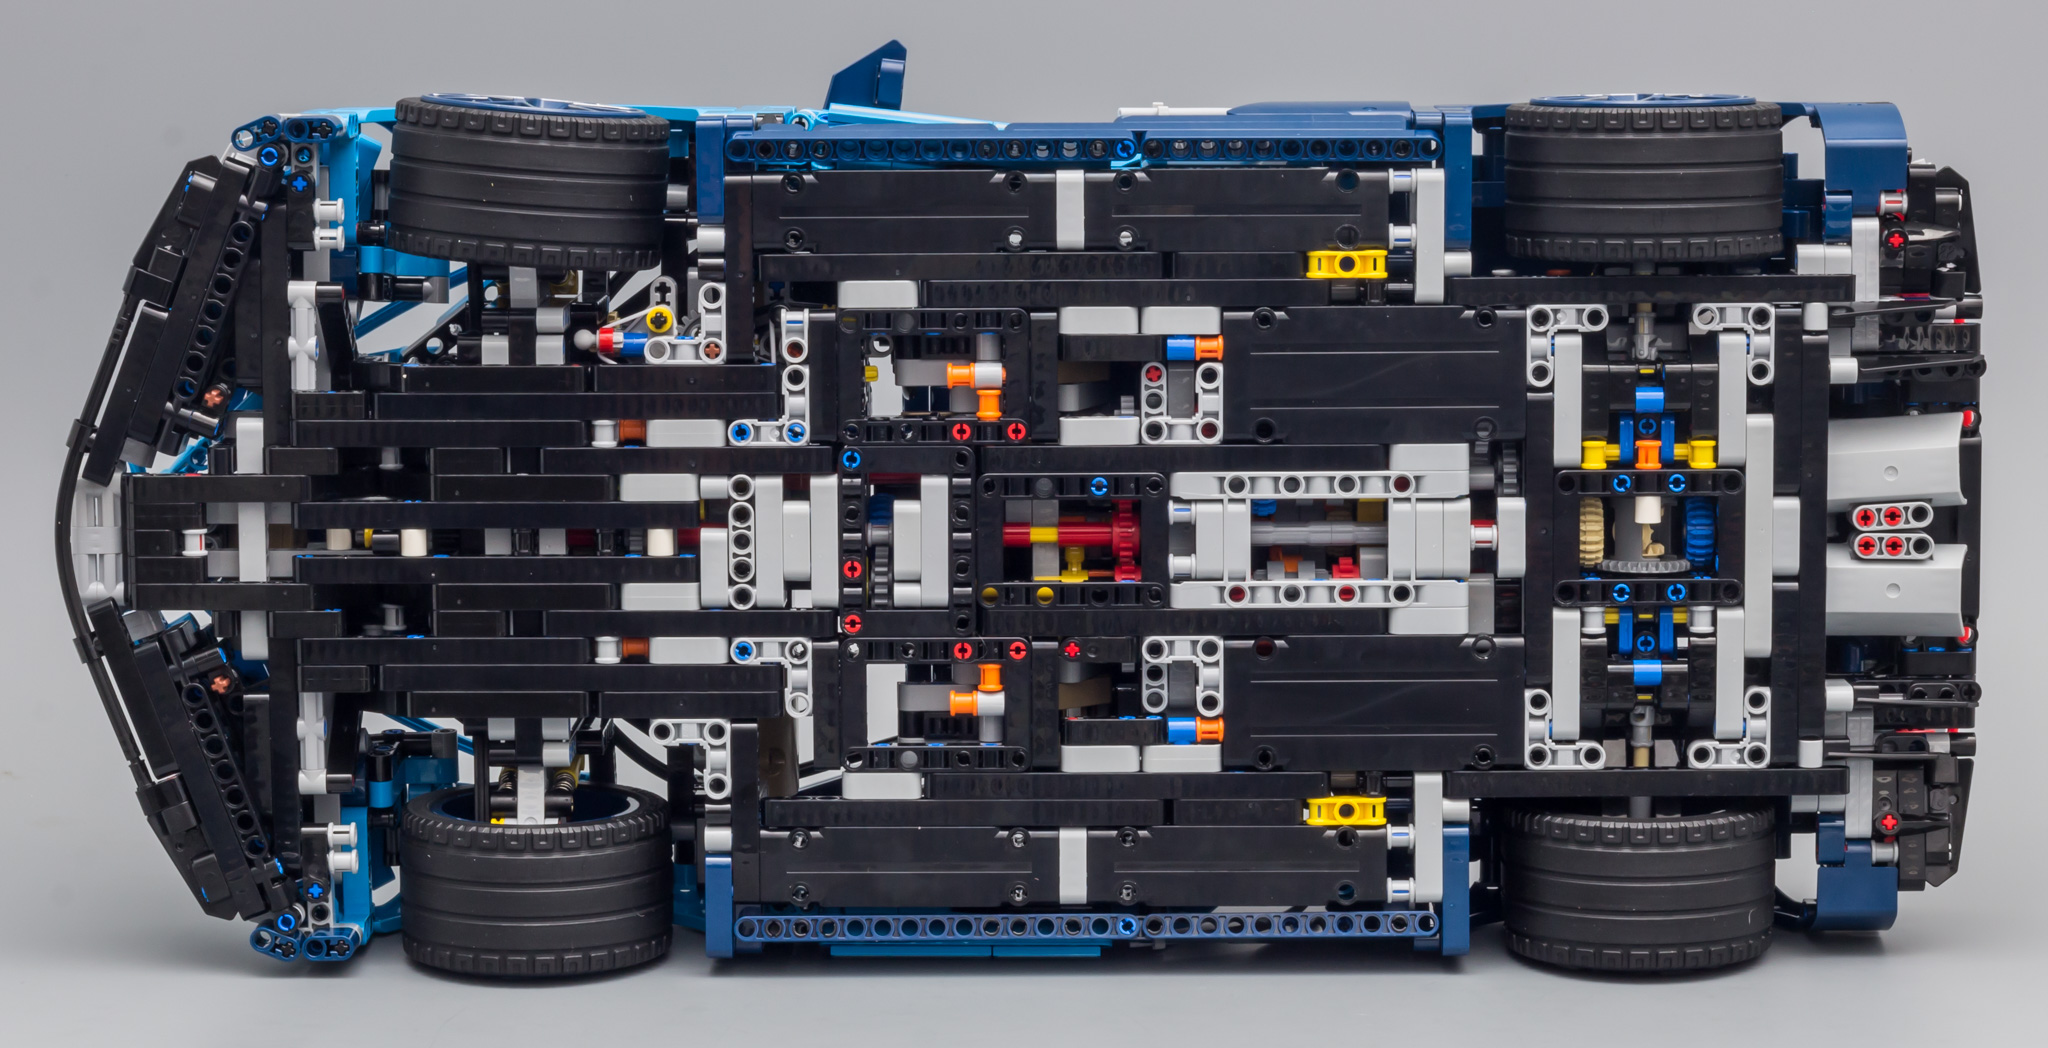
The bottom of the chassis looks really clean.
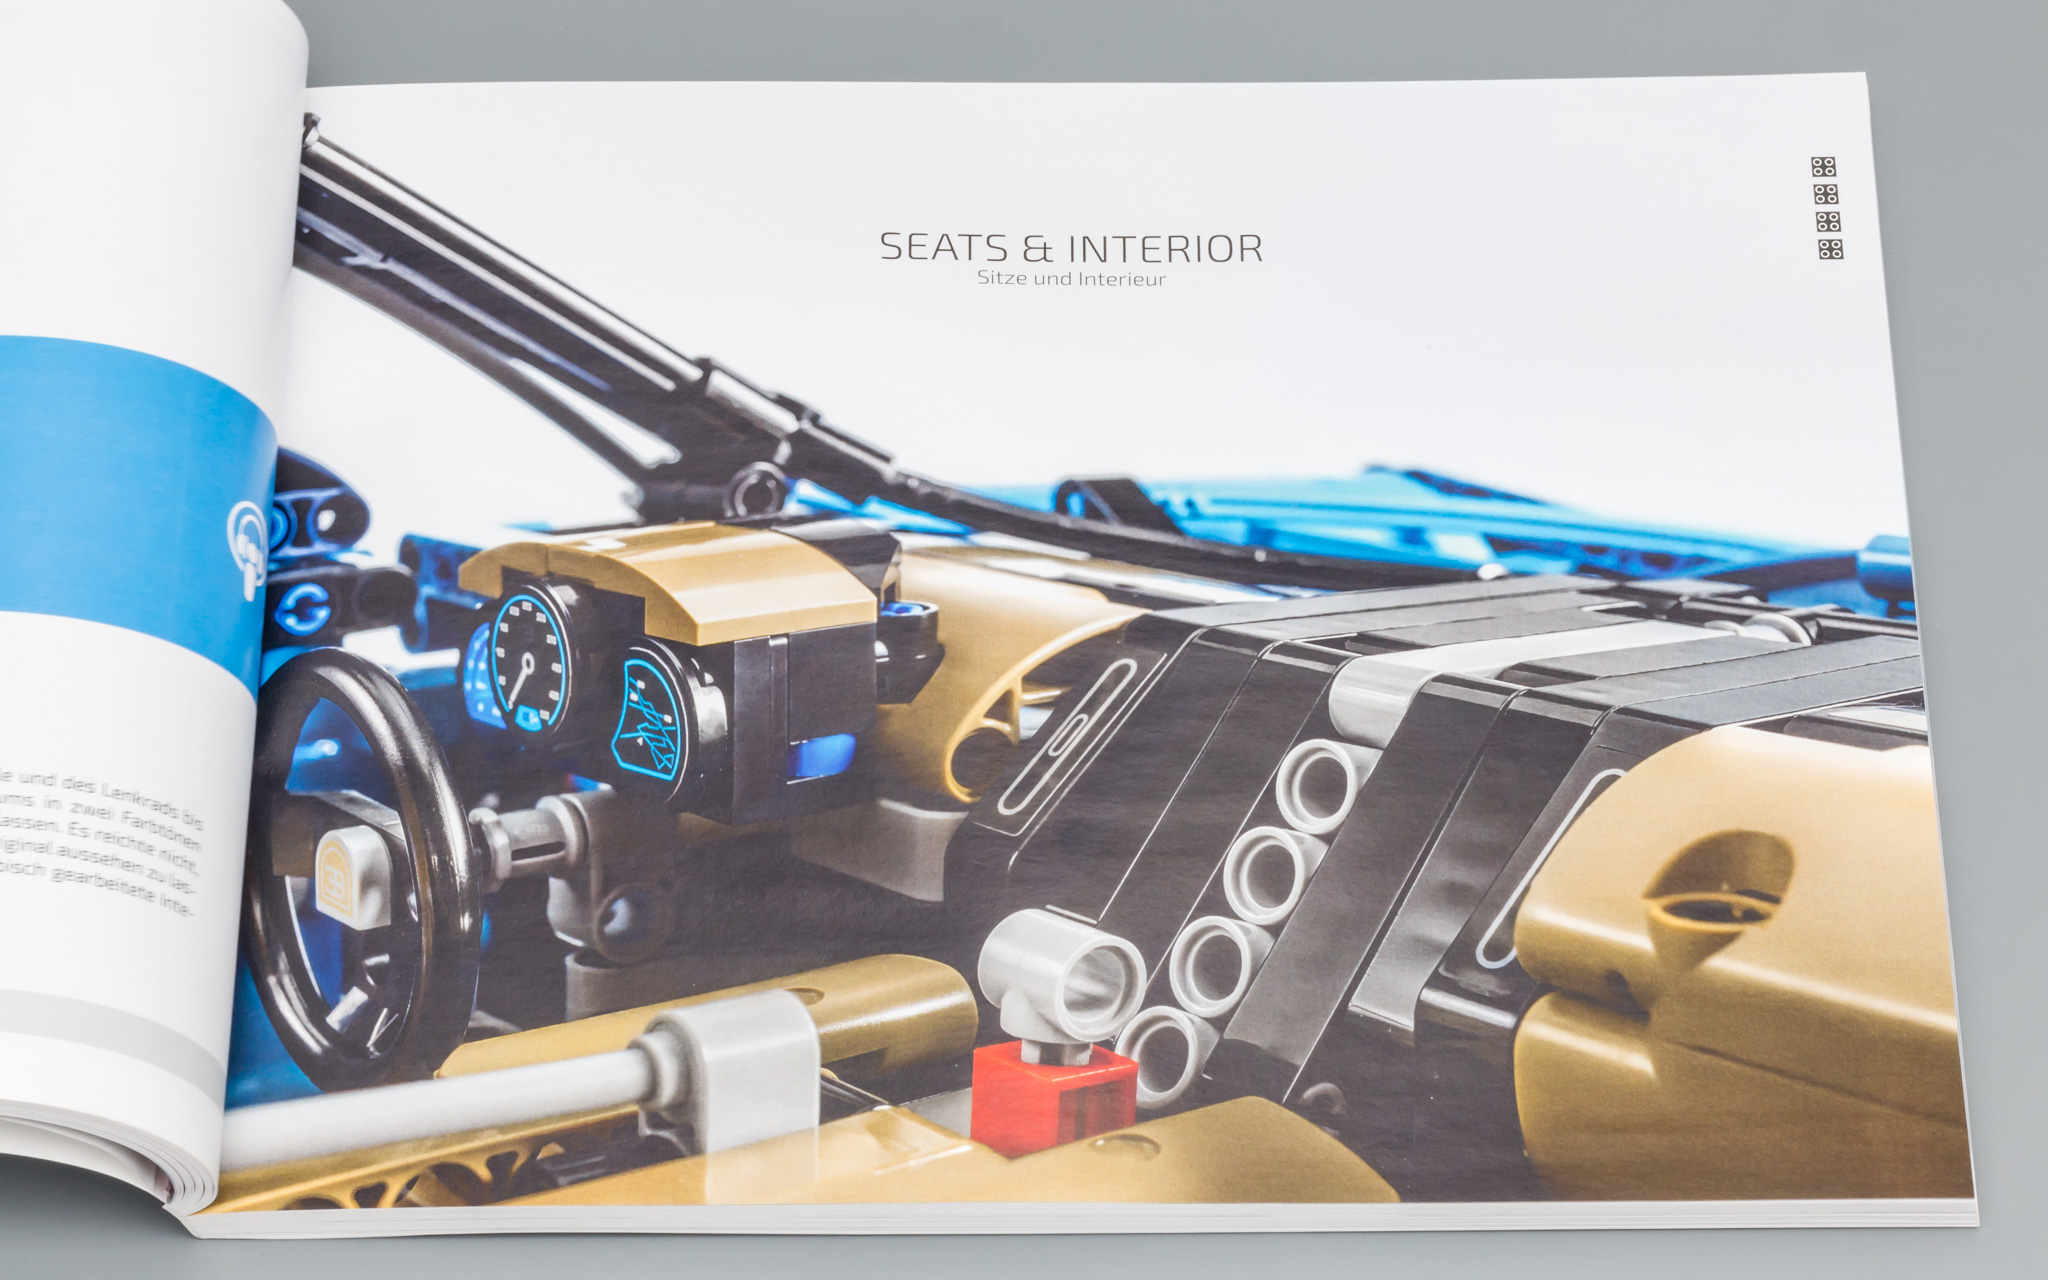
The tan interior looks great, especially with the stickers on the dashboard and on the inside of the doors.
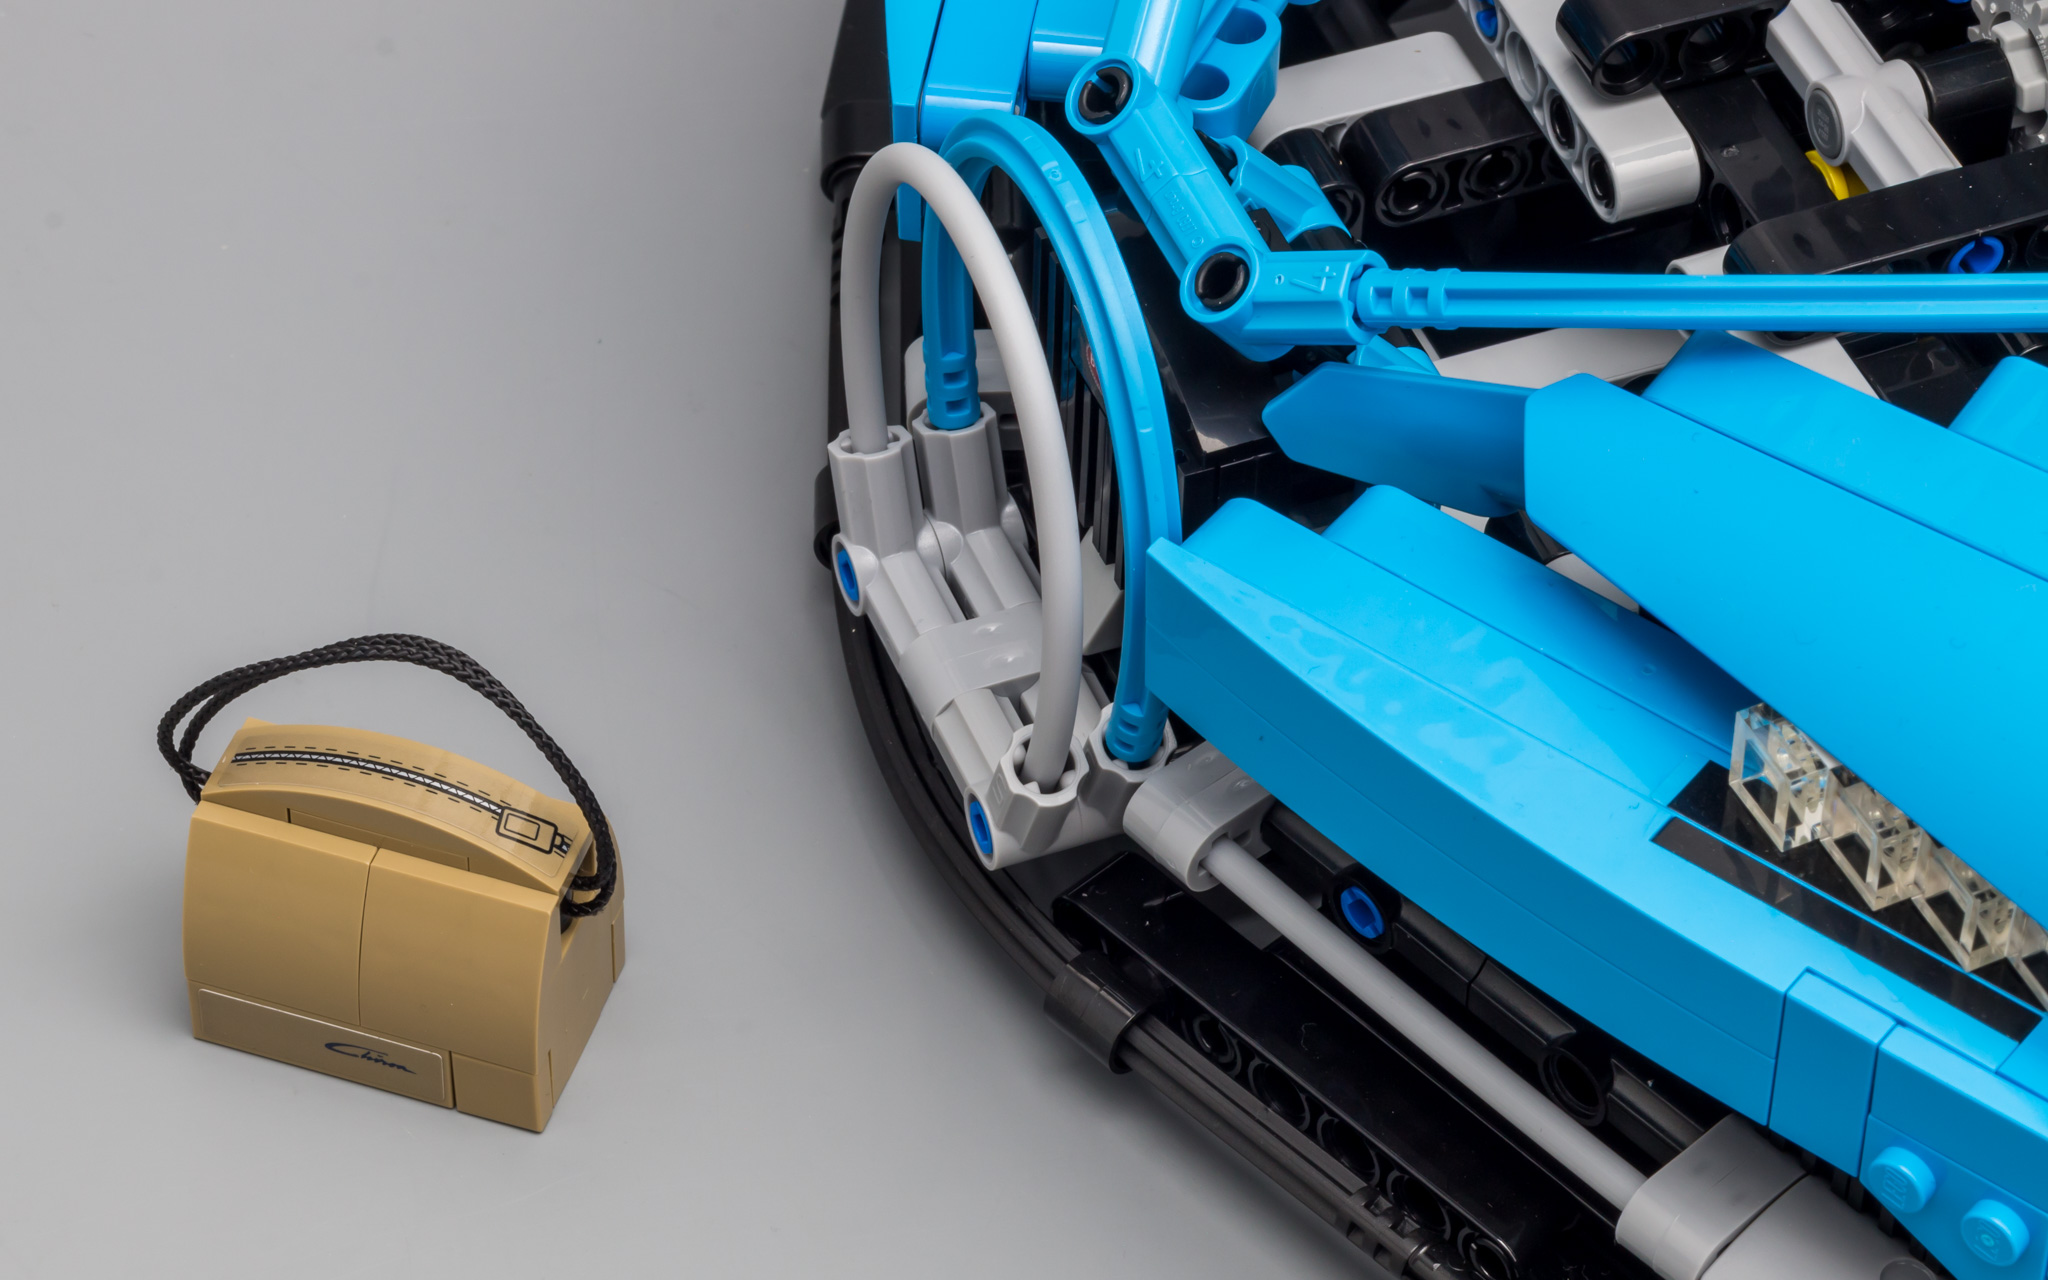
The Frunk (front trunk) opens to reveil the Bugatti bag.
Like the Frunk, the space in the bag will be limited too. Where we are going, we don't need trunk or bag space :wink:
These are the left-over parts after the build and the brick-built key you can use to raise the spoiler.

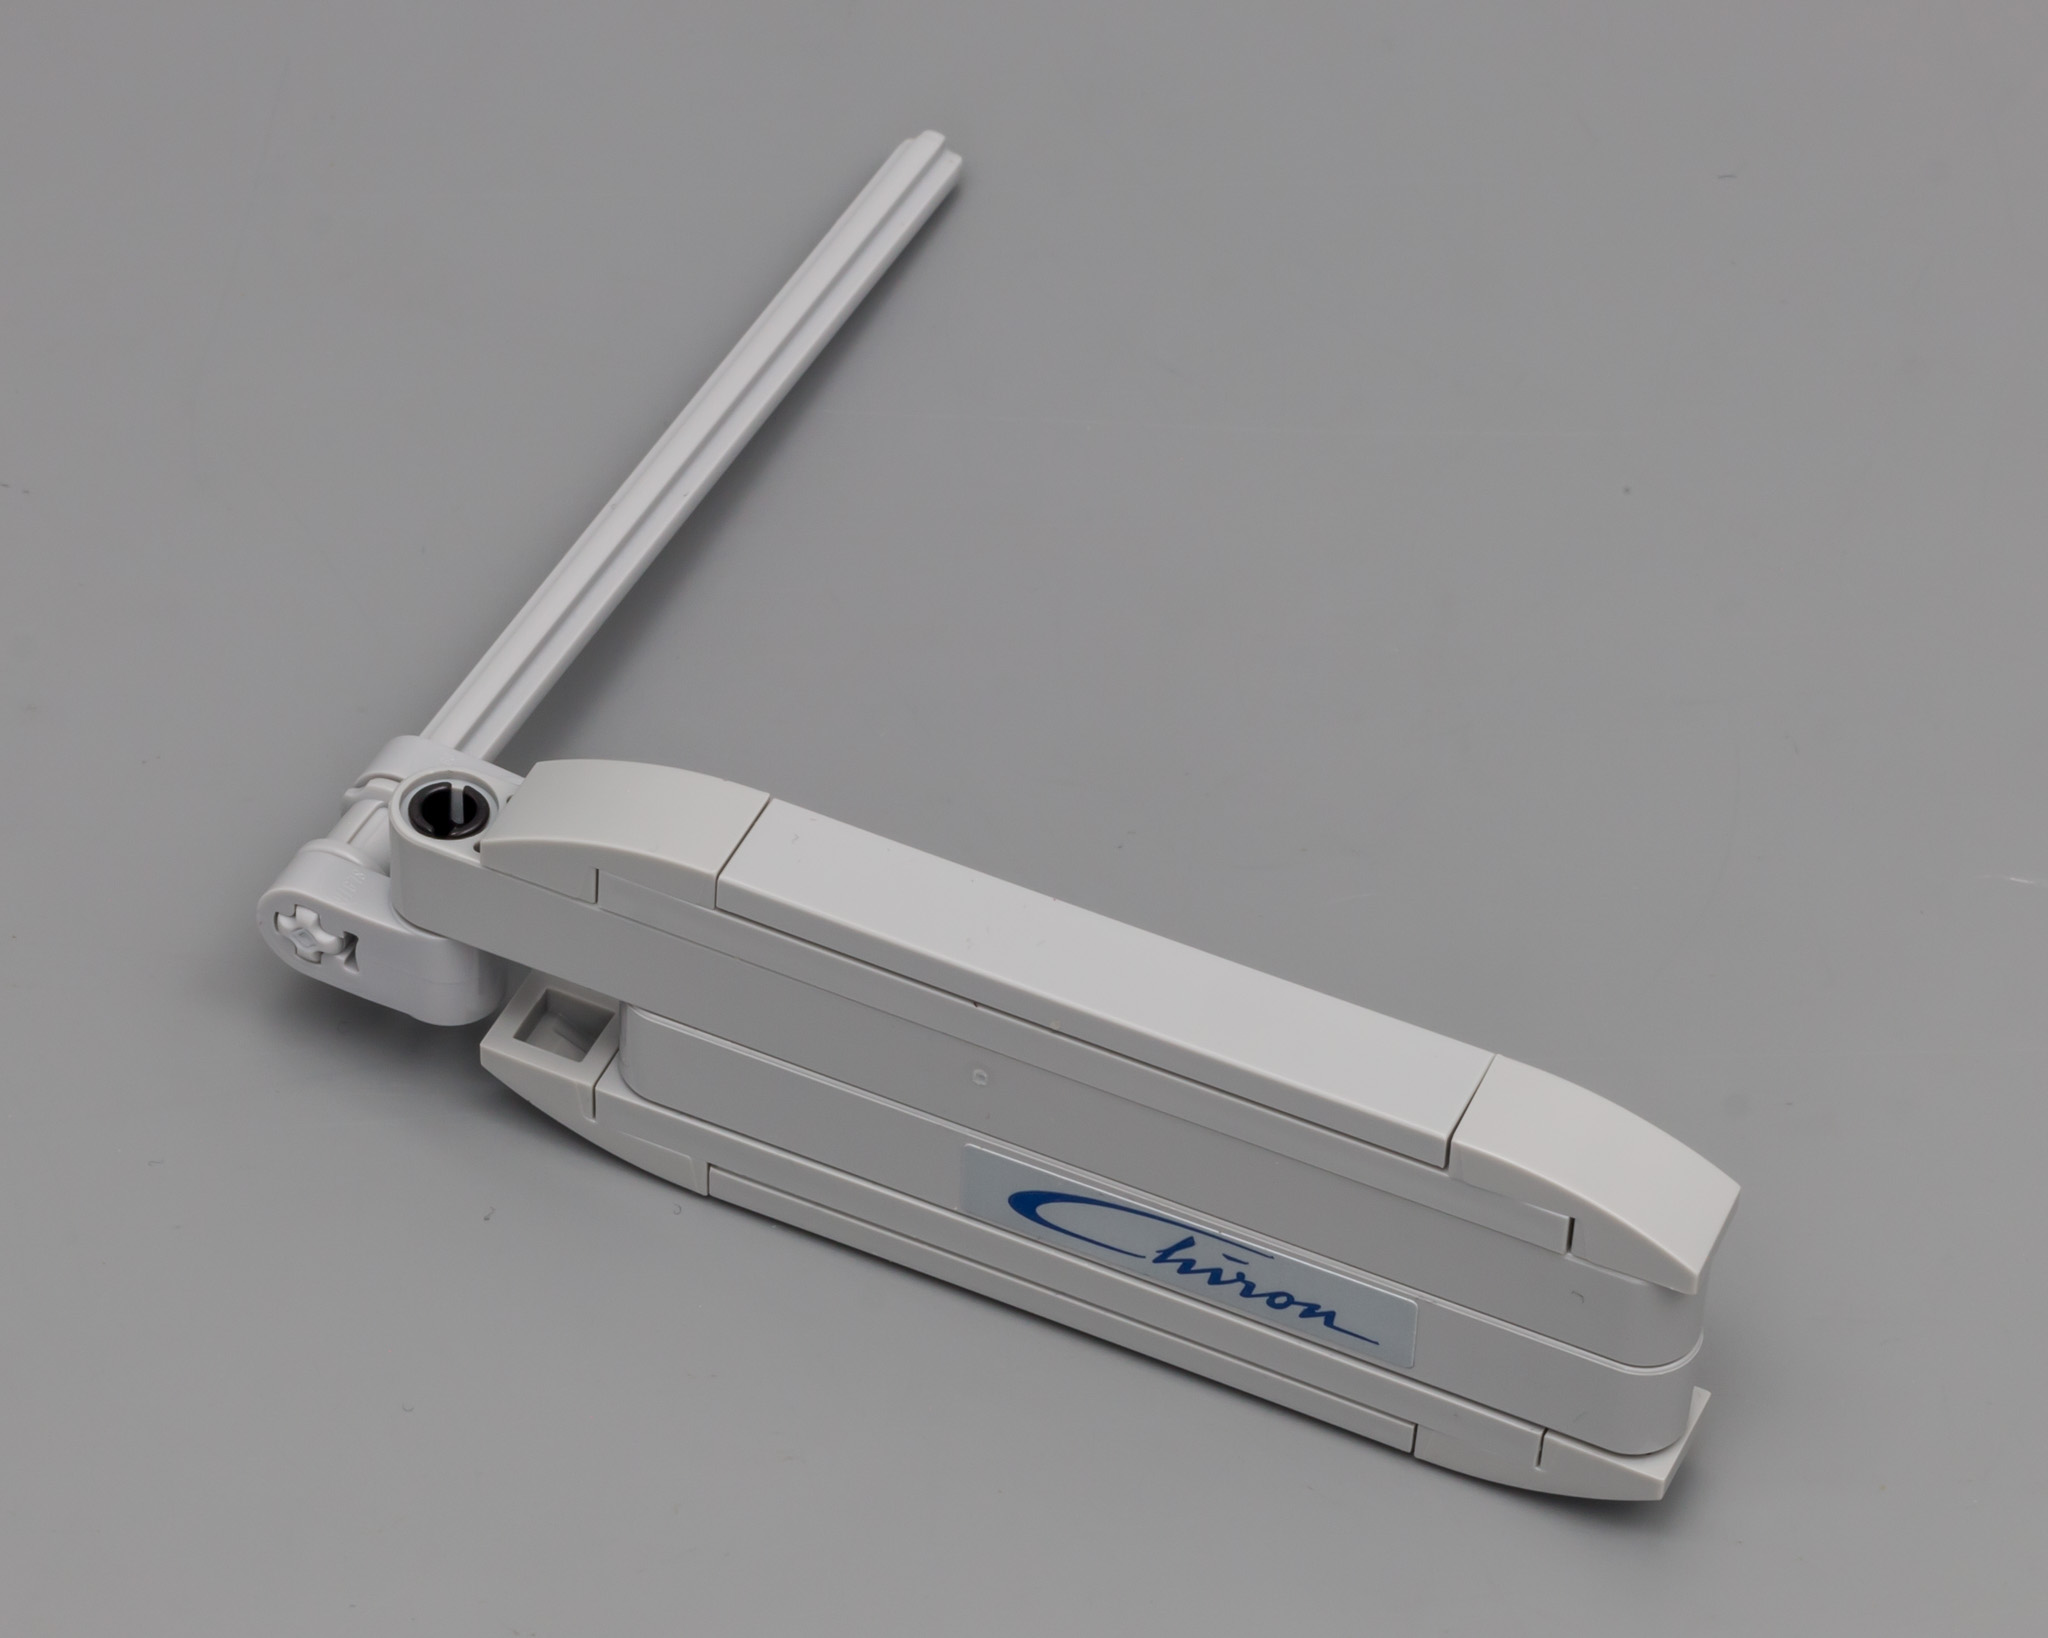
The real car has key which can activate ludicrous speed (Spaceballs anyone?!). Although I like the gimmick of the LEGO key, I would have rather seen a spoiler which was raised with a lever next to the seat, or a similar solution.
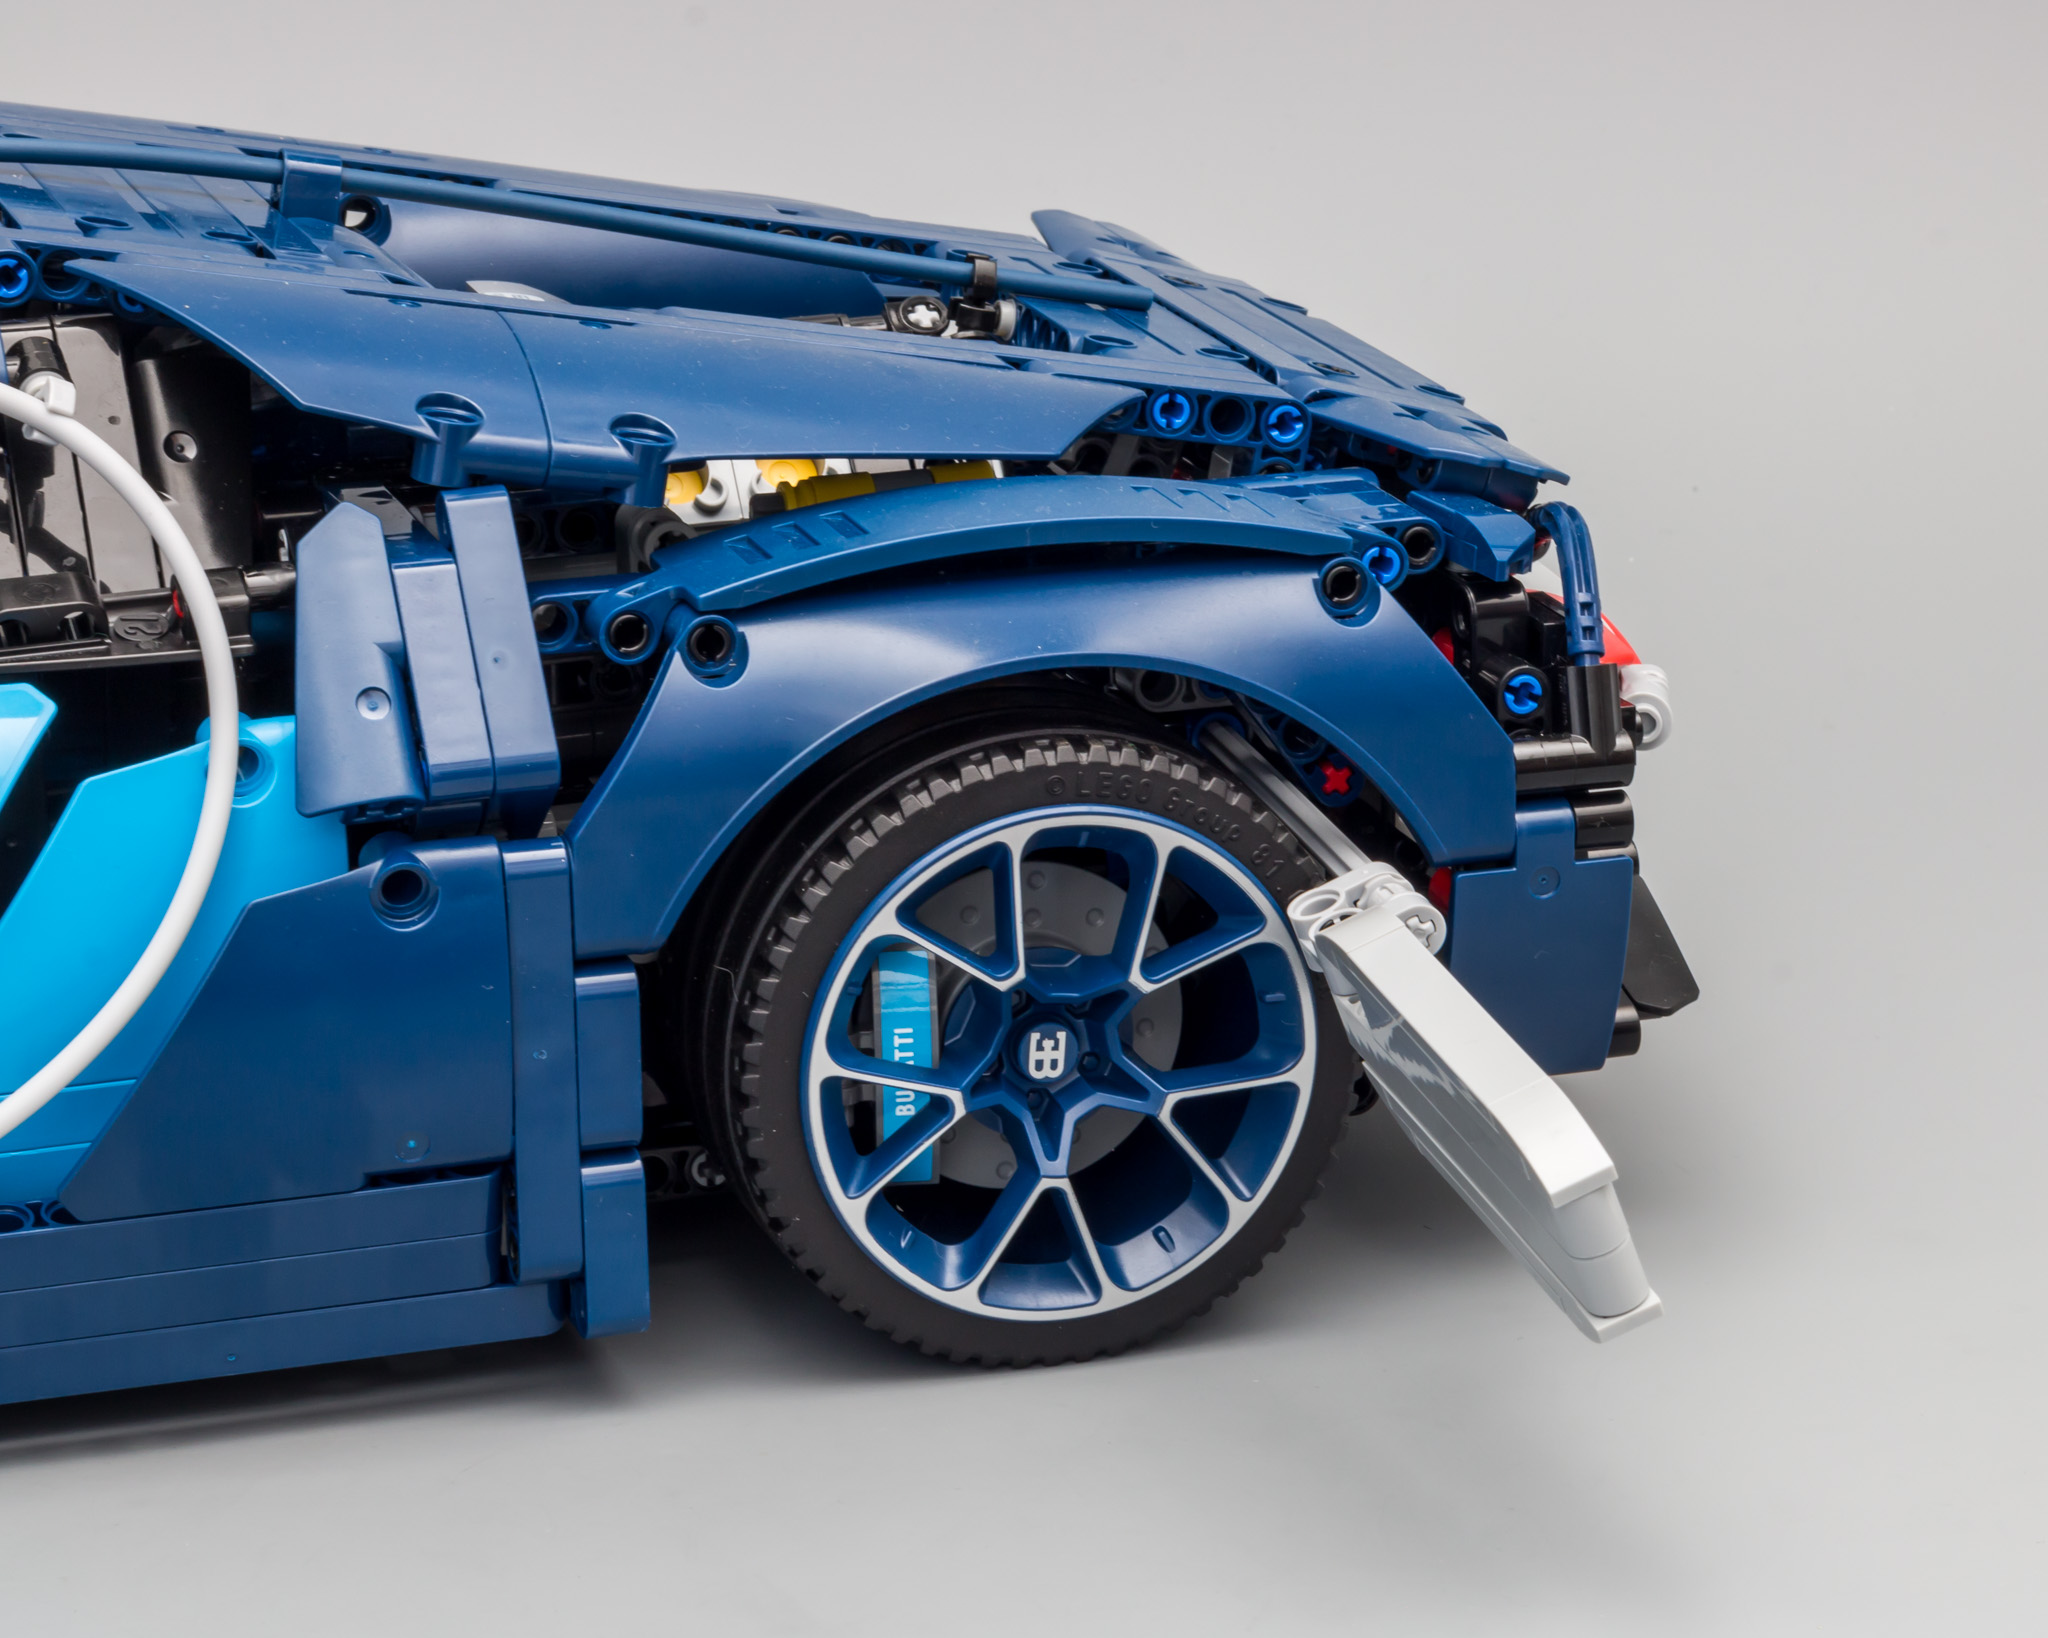
Without the key inserted.

SUMMARY
Being a model of a supecar, there's only so much functionality one can expect. However, with a hefty price tag, one can expect the functions to work properly.
STEERING
Basic functionality is steering, which doesn't work that well. The weight of the car, combined with the lack of HoG (Hand of God) steering, makes this car virtually unsteerable. When you manage to steer at a maximum angle, the turning radius is even bigger than Yo Mama.
SUSPENSION
After the gearbox issues in the Porsche two years ago, the suspension developed to be the flaw of this set. When you push the bodywork down, it doesn't come up again. This goes for the front AND the back. Maybe TLG don't see this as a flaw, but I do think this should work better. I have seen a solution where some of the friction pins were replace with frictionless pins and the suspension worked better. Maybe TLG (and Bugatti) considered the suspension to be too wobbly with frictionless pins, but this being a LEGO model, I feel the model should return to normal state after pushing the suspension down. For me, it's not a deal breaker, but I wonder how much thought went into this.
DOORS
The doors are very wobbly when opening. Besides that, there's no door locking mechanism. We have seen some pretty simple MODs, which would have solved this problem instantly. I don't get why simple details like these are so often omited in Technic models.
GEARBOX
For me, the gearbox lives up to the expectation. TLG went all out and designed some cool new elements to make sure this supercar has a properly working gearbox. Of course, there are always people who can make a better version, but after gearbox-gate two years ago, I'm very pleased with this one.
W16 ENGINE
Also, subject to many debates...the W16 engine. For the connaisseurs, this isn't really a W16 engine. It's more like a stacked V8 or a V8 with two extra 4-cilinder blocks. I would have loved for TLG to design some new engine elements as well, but I reckon they will leave that for future supercars. I can also imagine that the Bugatti is unique with a 16 cilinder engine, so designing special elements might be unneccesarily expensive. And to be honest; I do think the current setup is a proper solution for the W16. The engine works like a charm.
DRIVETRAIN
Something which does slightly bother me is the slack in the entire drivetrain. I have tested the gearbox sequence, which is flawless. But when you look at the pistons in the completed model, they sometimes only start turning after 50cm of driving. So many gears need to be engaged, that slack is building up. So, after the closed engine compartment of the Porsche, we now get a semi-open engine compartment, but the pistons aren't very responsive.
SPOILER
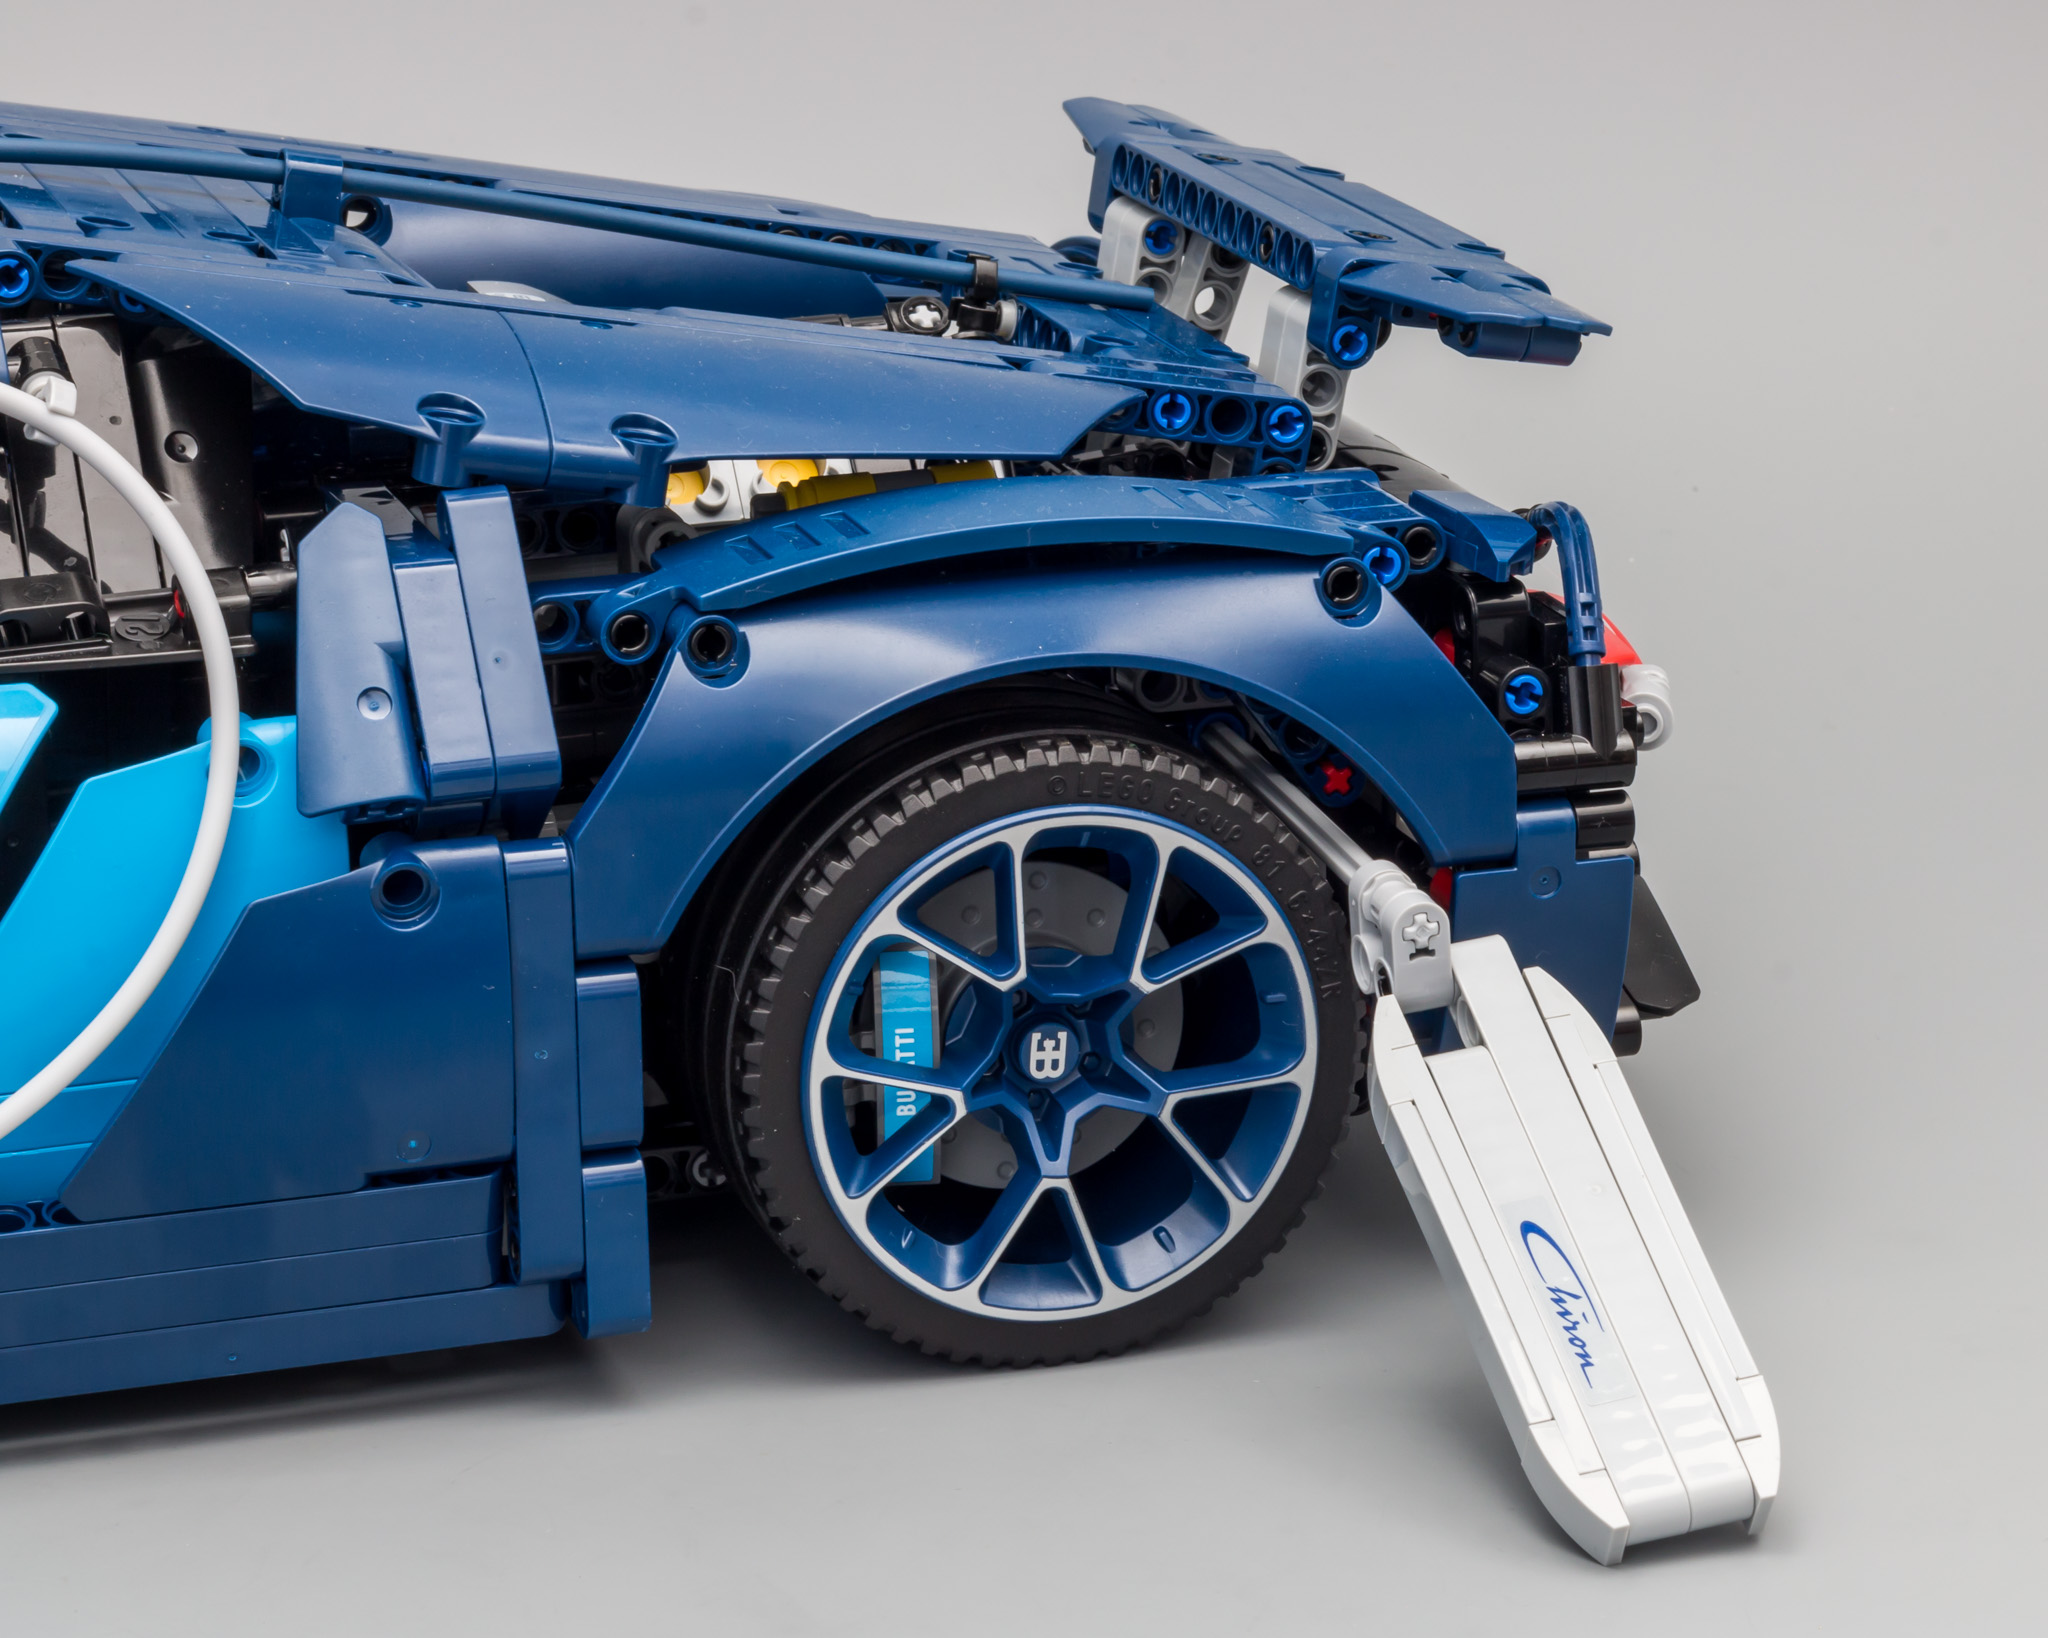
Raising the spoiler with the key is a nice gimmick, but I'd rather have a lever in the interior. Or maybe, have it linked to a fake brake pedal. Or, as a middle ground, be able to insert the key somewhere else in the chassis/bodywork, instead of fiddling in the wheel arch.
CONCLUSION
Some people claim (or rather, shout on every social media they can find) that this model is overpriced. At a price of € 369,99 for 3.599 parts, I don't think it's overpriced. Is it cheap? Definitely not. But in terms of part count you get what you can expect of a Technic set. It's not that this set is filled with System parts, as was expected before the unveiling.
Do I think this set is worth this kind of money?! I find this question difficult to answer. It all depends on your needs, financial situation etc. If you like to buy Technic for the functions and to build other stuff with, then this set is probably not for you. But if you are into cool looking supercars, then this set is definitely worth the money. Like the Porsche, I will probably pick up an extra copy, just to have a collection of MISB supercars.
As with most things in life, it's all about expectations. When the Porsche was released, we didn't really know what to expect. Therefore, some of the AFOLs were disappointed. Admittedly, I was a bit let down too, in some aspects. Now that we know the concept behind the "UCS" Technic models, we know better what to expect. So, does this model live up to my expectations? Yes, it does! The new gearbox surpasses my expectations, while I am somewhat disappointed with some of the other features.
I do like this model better than the Porsche by the way. The build is slightly more fun, the gearbox works better and I do love the duo-tone color scheme. Oh, and did I mention the gorgeous looking rear of the car?!
All things considered I do love this set. If you are into the Porsche, you will definitely love this set. If you think the Porsche is just an expensive display model, you can easily skip this set as well. On the other hand; this line of supercars is probably the best chance, for most of us, of getting a collection of supercars :wink:
SCORE
From now on I will omit the scoring section. Not all sets have the same criteria and not all people are looking for the same things in a set. What can be a good parts pack for one builder, can be a lousy one for the other etc. A set like this, is not built for playability, so it's useless to rate the playability. Therefore, I think it's better to have a written summary with my feelings and let you decide the score yourself.
I will end with a "which one do I like best" list, which I will use for future reference, when reviewing supercars. This list reflects my current preference:
- Bugatti Chiron
- Porsche GT3 RS
FINAL WORDS
Thanks you for reading this review. All pictures can be found here. Discussion about this set can be found here.